I've Moved!

Thursday, January 31, 2013

lemon-walnut bread.


This post marks the last post of January 2013, bringing the total for this month to 12. That seems to be pretty much the average number of times I update this blog per month, regardless of how busy or free I am. Maybe I have a sweets quota programmed internally in me that I must fulfill or not exceed every month? 12 times I bake a month. That translates to 3 times a week and slightly more than once every two days. Yet, I hardly feel that it's enough. This... is mildly disturbing. But then again, perhaps not so. If anything, it tells me that I can probably go on a non-stop baking spree- a stamina I will need if I ever decide to join the bakery biz. Oh ho!


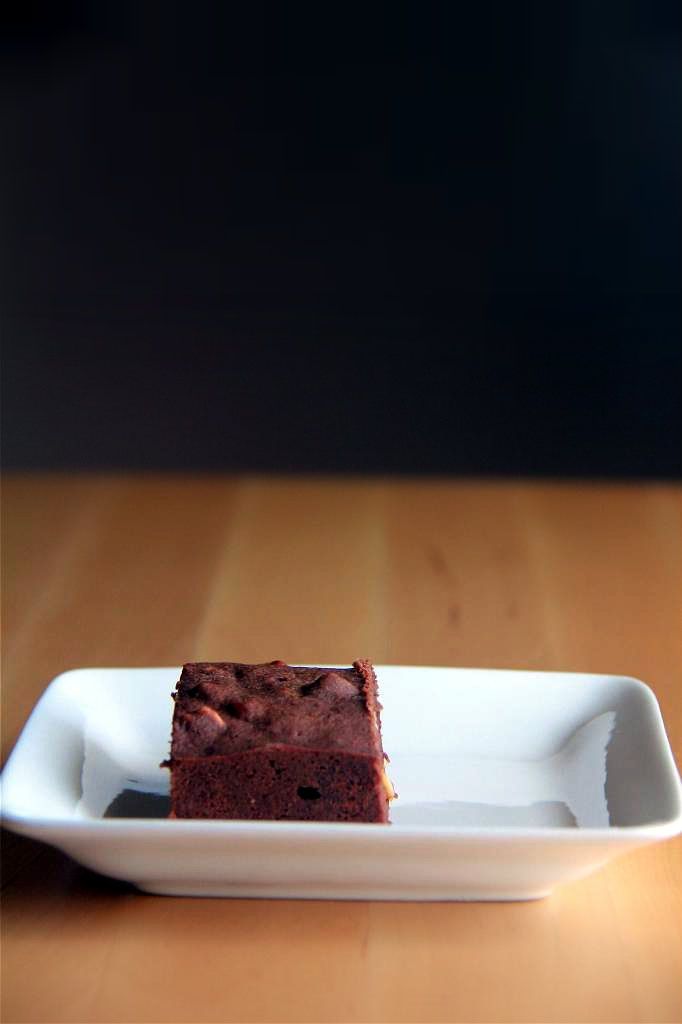
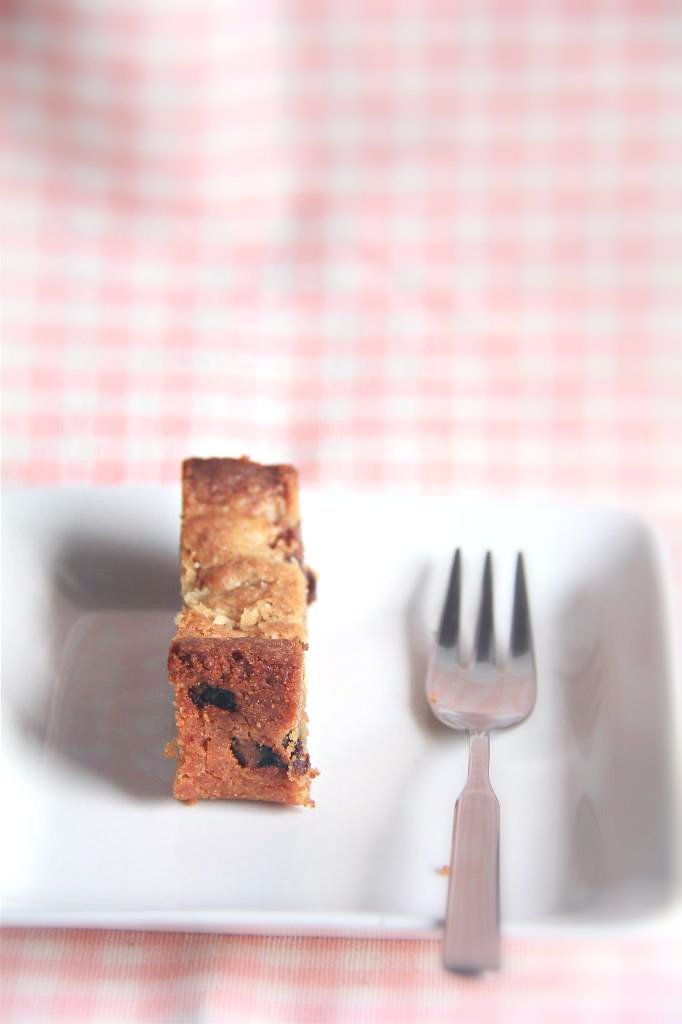
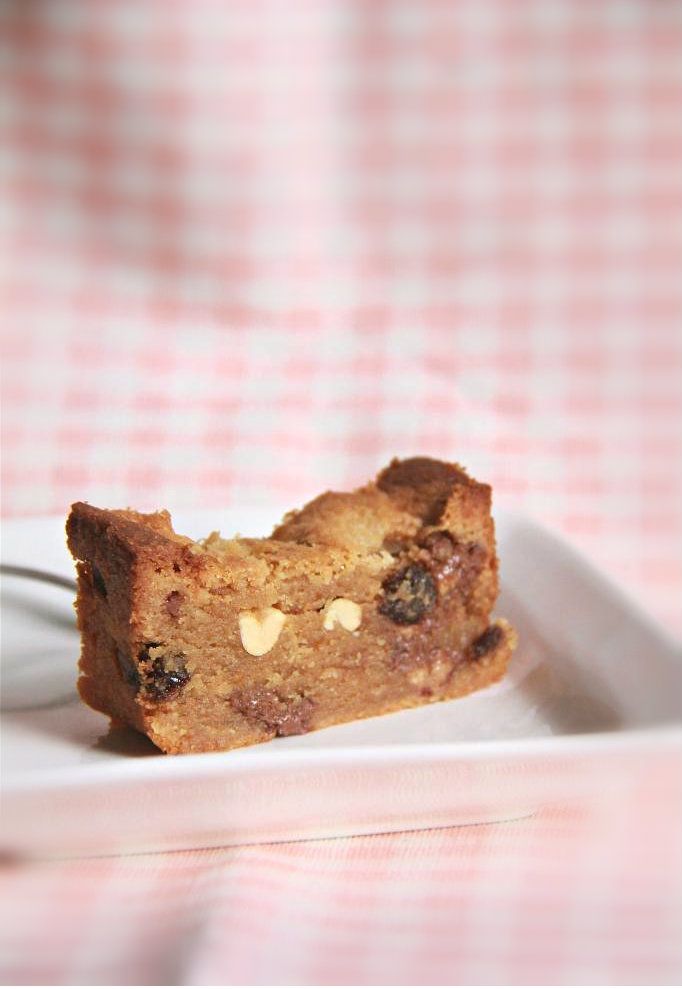
Anyway, this cake, or bread or whatever you would like to call it, is what I should divert my attention to right now. The cake itself is not very lemony (maybe because I didn't use lemon sugar), but the glaze you would apply after baking more than makes up for it. Personally, I think the glaze was a bit of an overkill as it was extremely tart and there was too much of it, but if you like lemon, rejoice. Needless to say, I'm not that big a citrus fan so I like the cake sans glaze or maybe with just a touch. Not just because of the flavour, but also because the glaze softens the crust that was so crunchy and heavenly.

Did I mention that this cake smells so ridiculously-amazing-that-it's-criminal when in the oven?


Lemon-Walnut Bread
makes a 9 x 5 inch loaf
adapted from Baking by Flavour

For the cake:
1 3/4 cup all-purpose flour
1 1/4 tsp baking powder
1/4 tsp salt
1 stick butter
1 cup lemon sugar (lacking this, I upped the quantity of lemon zest instead)
2 eggs
1 tbsp lemon zest
1 1/2 tsp lemon extract
2 tbsp ground walnuts
1/2 cup + 2 tbsp heavy cream
1/2 cup chopped walnuts, toasted and cooled

For the glaze:
1/2 cup lemon juice
1/3 cup + 2 tsp sugar
1/4 tsp lemon extract

Preheat oven to 350F. Prepare a 9 x 5 inch loaf pan.

Sift the flour, baking powder and salt together into a bowl.

Cream the butter until smooth. Add the sugar in 3 additions, beating well after each addition. Beat until the mixture is pale and fluffy. Add the eggs one at a time, incorporating the first well before adding the next. Stir in the lemon zest, lemon extract and ground walnuts.

Stir in half of the flour mixture, all of the heavy cream then the rest of the flour mixture, mixing to just incorporate each addition before adding the next. Stir in the toasted walnuts.

Scrape the batter into the prepared pan and bake for 50 minutes or until a skewer comes out with just a few moist crumbs attached. Cool the cake in the pan for 5 minutes before unmolding onto a rack.

While the cake is baking, make the glaze. Combine the lemon juice and sugar in small saucepan and place on low heat until the sugar has dissolved, about 5 minutes. After the sugar has dissolved, continue heating for another minute. Pour the glaze into a bowl and stir in the lemon extract. Set aside to cool slightly.

When the cake has been unmolded, immediately brush the cake with the cooled glaze. Cool the cake completely before slicing.

Tuesday, January 29, 2013

lavender-lemon sponge cake with chocolate cream.


I've always wanted to make a cake like this- with the sides and top unadorned with frosting, and only a layer of filling in the middle as thick as one of the layers. Very minimalist, very afternoon-tea-cake.

This sponge cake is so much moister than your average genoise and springier too. Try to hold yourself back from jabbing it too many times with a finger. Even the parts of the sponge not soaked with syrup were not too dry to eat without complaint. The whole lavender buds embedded in the sponge may prove too strong at times but I would prefer pockets of lavender flavour than a lavender-infused sponge. If you find biting into a lavender bud too jarring for your tastebuds (it's not that bad, trust me), you could grind them down to a powder and proceed according to the recipe's instructions as per normal.


I had some issues with the chocolate cream because it never seemed to reach soft peaks and I stopped just before the whole thing degenerated to curdled cottage cheese consistency. That, was too close for comfort. If you find yourself in the same situation as me, I suggest just taking the mousse-y thing and slather it over the bottom layer of the cake and be happy or, refrigerate the mixture for a while until it's a little colder before you continue whipping.


Lavender-Vanilla Sponge Cake with Chocolate Cream
makes a 7 inch cake

For the sponge cake:
115g cake flour, sifted twice
2 tsp dried lavender buds
3 eggs
130g sugar
15g glucose
30g unsalted butter
45ml milk
1 tsp vanilla extract

Preheat the oven to 170C. Butter and flour only the base of a 7 inch round cake pan.

Stir the flour and lavender together.

Whisk the eggs, sugar and glucose together in a bowl over a pot of simmering water until the sugar has dissolved. Off the heat, continue whisking until the mixture is pale and thick (the ribbon stage).

While the egg mixture is being whisked, heat the butter, milk and vanilla together in another bowl placed over the same pot of simmering water until the butter has melted. Set aside to cool slightly.

When the egg mixture has reached the ribbon stage, fold in the flour mixture until no traces of flour remain. Take 1/6 of this mixture and whisk it into the butter mixture until homogenous. Fold this butter mixture into the rest of the egg mixture until combined.

Scrape the batter into the prepared pan and bake for 30 to 40 minutes or until an inserted skewer comes out mostly clean. Cool the cake in the pan on a rack completely before unmolding. Slice the cake into half horizontally.

For the cake syrup:
20g sugar
40ml water
1/2 tsp grated lemon zest
1 tsp lemon juice

Put all the ingredients in a saucepan and bring to a boil, stirring occasionally, until the sugar has dissolved. Set aside to cool. Brush the syrup evenly onto the cake layers.

For the chocolate cream:
75g semi-sweet chocolate, chopped
1 cup heavy cream, divided

Melt the chocolate chips and 1/3 cup heavy cream in a bowl over a pot of simmering water. Set aside to cool completely. Whip the remaining cream until the whisk just begins to leave distinct tracks. Add the cooled chocolate mixture and continue whipping until soft peaks form.

To assemble the cake: Place the bottom layer of cake on a cake board, spread all of the chocolate cream on top then place the top layer of cake on top of the cream. Chill the cake for at least 2 hours or until the cream has set.

Friday, January 25, 2013

banana mousse parfaits.


Oh parfaits... what's not to like? It's everything that you love in a glass and you don't even have to worry about presentation, because it looks perfect already- layer after layer of contrasting and complementing textures, shapes and colors. Plus, eating a dessert in a cup with a spoon as your shovel, or weapon, is somewhat comforting.


Today, the genetic makeup of these parfaits is primarily chocolate and banana, the chocolate coming from the brownies (or cake in my case) and chocolate sauce (that I didn't use but no biggie), and the banana element represented by banana mousse and fresh sliced bananas.

The banana mousse won't turn out as the same shade of yellow as you would predict it to be, at least in my case. I'm not talking about a bright and cheery yellow, not even a dull and dirtied one. The yellow practically got kicked out and replaced by this grayish tone that I'm sure the black seeds of the vanilla bean paste contributed too. Of course, you have to bear in mind that the bananas will oxidize too. I'm just saying it now so you don't suffer from a heart attack when you end up with soup the colour of a cloudy sky. But it is a delicious banana-y cloudy sky, yes it is.


The only ingredient that I felt was out of place was the granola. Okay, maybe it's not a misfit but I certainly don't agree with the order it is placed in the parfait. The moisture of the mousse will certainly get to it and make it a soggy mess by the time you get to eat it 2 hours later. Either top the parfait off with the granola or omit it altogether. That's my advice.


Banana Mousse Parfaits
adapted from Baked Elements

For the mousse:
1 cup heavy cream, chilled
1/4 cup milk
2 bananas, chopped into large chunks
1/4 cup sugar
2 tsp vanilla bean paste

Whip the cream until it holds soft peaks.

Blend the milk, bananas, sugar and vanilla together until smooth. Pour into a large bowl. Fold in the whipped cream. Cover and chill for 2 hours.

For assembly:
2 large brownies (I used this chocolate cake with peanut butter cups in it as a bonus!), coarsely chopped
2 medium bananas, sliced
1/2 cup granola
1/4 cup chocolate sauce (I didn't use. If you ask me though, I would greatly prefer caramel sauce.)
1/2 cup whiskey whipped cream, recipe follows
assorted sprinkles (optional)

The layering of the parfaits works this way: brownies, banana mousse, sliced bananas, granola, banana mousse, brownies. Chill for 2 more hours. Before serving, make the whiskey whipped cream and top the parfaits off with it. Drizzle with chocolate sauce. Sprinkle over the sprinkles, if using.

For the whiskey whipped cream:
1/4 cup heavy cream
1 1/5 tsp sugar
1 1/5 tsp to 2 2/5 tsp whiskey, to taste

Whip the cream until soft peaks form. Add the sugar and whiskey and continue whipping until stiff peaks form.

Thursday, January 24, 2013

chocolate, peanut and peanut butter candy fudge cake.


This chocolate cake is fine-crumbed with frequent punctuation by nutty roasted peanuts and Reese's peanut butter cup pieces. The peanut butter in the batter is really subtle so this cake tastes predominantly chocolate. It does, however, softens the intensity of the chocolate so that the peanutty add-ins blend in nicely with the cake.

This cake will also make an appearance in an upcoming dessert. Look out for it!


Chocolate, Peanut and Peanut Butter Candy Fudge Cake
makes a 9 inch cake

1 1/2 cups all-purpose flour
1 tbsp unsweetened cocoa powder
1/4 tsp baking powder
1/4 tsp salt
5 packages (1.6 ounces each) milk chocolate peanut butter cups, each cup cut into 6 chunks
3/4 cup whole roasted unsalted peanuts
1 cup butter, melted
4 ounces unsweetened chocolate, melted and cooled
2 tbsp creamy peanut butter
4 large eggs
1 1/2 cups sugar
2 tsp vanilla extract

Preheat oven to 325F. Prepare a 9 inch springform pan.

Sift the flour, cocoa powder, baking powder and salt into a bowl. Toss the peanut butter candy chunks and peanut butter with 2 tsp of the flour mixture.

Whisk the melted butter, unsweetened chocolate and peanut butter in a bowl until smooth. Whisk in the eggs until combined. Whisk in the sugar until combined. Blend in the vanilla extract. Sift in the flour mixture and whisk until no traces of flour remain. Stir in the peanut butter candy chunks and peanuts until evenly distributed.

Scrape the batter into the prepared pan and bake for 45 minutes or until an inserted skewer comes out mostly clean. Cool the cake in the pan on a rack before unmolding.

Saturday, January 19, 2013

pierre hermé's carrément chocolat.


I knew it. I knew that I couldn't hold it in any longer. I made a cake with 6 components. And I loved every single moment of the laborious time-consuming process. Why do I have such weird interests I do not for the life of me know.

But this cake, this cake!, or should I say cakes, are worth every single minute of the 2 days I spent making them. What really struck me was how every single component uses the same type of chocolate in differing applications and amounts. What you get is a cake with a singular cohesive taste but varying textures. Interesting huh.


The bottommost layer, the chocolate cake, is dense and fudgy and rich, like a brownie. The following layer, a chocolate cream, is smooth and creamy. Next up is a chocolate mousse that is lighter and airier. Then the glaze, which has a somewhat sticky quality to it (the glaze is a two-part process). Lastly, the tempered chocolate decoration on top to provide a crisp crunchy contrast. I even added caramelized rice krispies in between the chocolate cream and chocolate mousse layers for crunch but they softened. I guess its to be expected. They did leave behind a nice caramel taste that complemented all that chocolate though.

The glaze gave me a bit of trouble because it seized up and then separated when I added the chocolate sauce. Maybe it's because of the differing temperatures of the two components. In the end, the glaze was too thick even though it was at the right temperature and couldn't coat the cakes evenly and smoothly.


Although there are many components to make, you will realize that they are not that hard. Majority of your time spent will go towards the chilling so don't be daunted by the length of this recipe! The sense of accomplishment is worth it. Oh and of course the eating.


Carrément Chocolat
adapted from Desserts by Pierre Herme
makes an 8 inch square cake

For the chocolate cake:
4 ounces 72% chocolate, chopped
1 stick butter, diced
1/2 cup sugar
2 eggs
1/3 cup all-purpose flour, sifted

Preheat the oven to 170C. Butter and flour an 8 inch pan that is 1 1/2 inches to 2 inches deep.

Melt the chocolate in a heatproof bowl over a pot of simmering water. Remove from heat and add the pieces of butter. Stir in the sugar, eggs and sifted flour, mixing to incorporate each ingredient after adding before adding the next.

Pour the batter into the prepared mold and bake for 20 minutes. The cake should look underdone. Unmold the cake on a rack and let cool. Clean, rinse and dry the mold then wrap it in plastic wrap. Place the cooled cake at the bottom of the mold.

For the smooth chocolate cream:
2 1/2 ounces 72% chocolate, chopped
7 tbsp whole milk
7 tbsp heavy cream
2 1/2 egg yolks
1/4 cup sugar

Bring the milk and cream to a boil in a saucepan. In a bowl, beat the egg yolks with the sugar. Whisk the milk and cream mixture into the egg yolks gradually then pour the mixture back into the saucepan and set over gentle heat until it reaches 185F or 85C. Pour 1/3 of the mixture over the chopped chocolate, stirring well. Repeat twice more, stirring after each addition, then process the mixture with a handheld immersion blender. Pour cream over cake. Refrigerate for 1 hour, then place in freezer for 1 hour.

For the chocolate mousse:
6 ounces 72% chocolate, chopped
1/3 cup whole milk
1 egg yolk
4 egg whites
4 tsp sugar

Melt the chocolate in a heatproof bowl over a pot of simmering water. Remove from heat. Bring the milk to a boil in a saucepan and pour milk over chocolate in the bowl, beating until the chocolate is smooth. Add the egg yolk and incorporate well. Beat the egg whites until stiff with a dash of the sugar, then, as the mixture begins to stiffen, add the remaining sugar. Incorporate 1/3 of the beaten egg whites into the chocolate mixture then carefully fold in the remaining beaten egg whites. Pour the chocolate mousse over the smooth chocolate cream in the mold. Smooth the surface with a spatula. Freeze for 2 hours.

For the thin chocolate sheet:
3 1/2 ounces 72% chocolate, chopped

Melt the chocolate in a heatproof bowl over a pot of simmering water. Remove from heat and cool at room temperature until the chocolate thickens, then reheat it slightly for a few seconds over the pot until it reaches a temperature between 88F and 90F. Pour chocolate over a sheet of acetate and spread it out. Before it can set, cut out a square the same size as the cake. Place another acetate sheet on top and add a weight to prevent the chocolate from warping as it dries. Refrigerate for 2 hours.

For the chocolate sauce:
1 1/2 ounces 72% chocolate, chopped
6 1/2 tbsp water
2 1/2 tbsp sugar
3 tbsp heavy cream

Place the chopped chocolate in a small saucepan and bring the a boil with the water, sugar and cream. Stir continuously until the sauce is thick enough to coat a spatula.

For the chocolate glaze:
3 1/2 ounces 72% chocolate, chopped
1/3 cup heavy cream
4 tsp unsalted butter
1/2 cup chocolate sauce, recipe above

In a saucepan, bring the cream to a boil then remove from heat. Gradually beat in the chopped chocolate, beating it from the centre outward. Set aside to cool to 140F before adding the butter, then add the 1/2 cup of chocolate sauce.

For assembly:

Remove the cake from the mold and discard the plastic wrap. Using a small ladle, pour the chocolate glaze (it should be warm, between 95F and 105F) around the sides of the cake, then over the centre. Using a cake spatula, even coat the sides and edges. Leave to set for a few minutes then transfer it to a cake plate. Remove the acetate from the thin chocolate sheet, and place it on the cake. Set the cake in the refrigerator to defrost for 2 hours before eating. Cut with a knife dipped in hot water for 30 seconds for a clean cut.

Wednesday, January 16, 2013

rich and chewy peanut butter bars.


I really thought that I was shaking off the curse of always messing up recipes whenever I bake in the mornings. I really did. I mean, everything was going so well... until I realized only when the bars were baking in the oven that I added 4 times the stipulated amount of peanut butter! I was dividing the recipe by 4 and forgot to quarter the peanut butter measurements.


Obviously, the bars turned out richer than they were supposed to be, not exactly in a bad way. They were incredibly dense and peanutty (if there's such a word). They had this gritty texture and I'm not sure if it was due to the extra dose of peanut butter. It was strangely appealing though. The downside is that these bars became extremely crumbly and fell apart easily. Also, they left a slick of grease on the plate because of the added fat. Still, these were not bad overall. They would do the job well if you ever needed to satisfy your peanut cravings.


Rich and Chewy Peanut Butter Bars
makes an 8 inch pan's worth

1 cup all-purpose flour
1/4 cup cake flour
3/4 tsp baking powder
1/8 tsp salt
1/2 tsp ground nutmeg
1 stick unsalted butter, melted
1/3 cup smooth peanut butter
2 cups brown sugar (I reduced to 320g or slightly less than 1 1/2 cups)
1 large egg + 1 large egg yolk
3/4 tsp vanilla extract
1/3 cup roasted peanuts
1/2 cup peanut butter chips (I used the equivalent of sultanas)
3 packages (1.6 ounces each) peanut butter cups, chopped into rough chunks

Preheat the oven to 350F. Prepare an 8 inch square pan.

Sift the flours, baking powder, salt and ground nutmeg into a bowl.

Stir the melted butter and peanut butter in a bowl until combined. Add the brown sugar and beat to incorporate. Add the eggs and vanilla extract and stir until incorporated. Stir in the flour mixture until no traces of flour remain. Stir in the roasted peanuts, peanut butter chips and peanut butter cups until evenly distributed.

Bake for 25 to 30 minutes or until set. Cool completely before cutting.

Monday, January 14, 2013

coconut washboards.


Sometimes, life beats you down. You know you have to stand back up but you feel like staying on the ground to sob a while longer.

We aren't always blessed with what we desire, even if it can be the only thing we ever want and fervently pray for to keep for ourselves. It's the kind of thing that has to be given to you, like an inborn talent.

I've never really understood how it felt like to want something that you're not born with so badly. I've always been able to bake pretty decently, even from the start with absolutely no form of teaching, so I could only laugh and shrug when others tell me how they wish they could bake like that too. But, finally, I'm on the receiving end.

I try so hard but it's not good enough. It's just short of best. Sub-par. Second place. I'm going to fight on, because crying about it does not solve the problem.


These cookies, I think, are meant to be soft in the middle and full of coconut flavour. If you want them crunchy on the outside and heavily emanating alluring scents of coconut and butter, you have to have them warm, a few minutes out of the oven.


Coconut Washboards
makes 54 cookies
adapted from Baking by Flavour

3 sifted cups all-purpose flour
1 tsp baking powder
1/2 tsp baking soda
1/4 tsp salt
3/4 tsp freshly grated nutmeg
1/2 tsp ground cinnamon
3/4 cup unsalted butter
1 cup brown sugar
1/2 cup sugar
1 large egg + 1 large egg yolk
2 tsp vanilla extract
3 tbsp heavy cream
1 2/3 cups lightly packed sweetened flaked coconut (I used desiccated)

Preheat oven to 400F. Prepare baking sheets.

Sift the flour, baking powder, baking soda, salt, nutmeg and cinnamon together into a bowl.

Beat the butter until smooth. Add the brown sugar in 2 additions, beating to incorporate after each addition. Add in the sugar and beat until the mixture is pale and fluffy. Beat in the eggs, vanilla extract and heavy cream. Mix in the coconut. Stir in the flour mixture in two additions, until no traces of flour remain.

Spoon out the dough by rounded tablespoons and form into oval-shaped logs. place the logs of dough 3 inches apart in the lined baking sheets, arranging them 9 to a sheet (although I managed to squeeze in more). Flatten the balls slightly. Then using the tines of a fork, make rows of striated impressions to flatten each ball of dough into a rounded oval.

Bake for 8 to 10 minutes or until set. The bottom of the cookies and the edges will be golden.

Thursday, January 10, 2013

mocha bars.


Oh this is going to be so hilarious because I am such the genius, as usual. I was following the recipe for these mocha bars but scaled down to a quarter for a smaller batch. I did it by mental calculation to give my brain a good morning workout. Everything was going fine, almost too uneventfully, when Murphy's Law turned around and bit me in the behind. At the last step, of all tragedies! I had my batter scraped and ready to go in my loaf pan and as I was about to send it into the fiery temperatures of the metal box, I had this nagging feeling to check the recipe again. And hey presto! I forgot to stir in the heavy cream.

I considered leaving it out but remembered that the book said that the cream would smooth out the bitterness of the unsweetened chocolate and coffee so I didn't. Pouring all the batter out of the pan into the mixing bowl would result in loss of batter, plus create more trouble by having to get another clean loaf pan and then spraying it with non-stick baking spray. So what did I do? I mixed the cream directly into the batter while it was in the pan, praying fervently that I could somehow get it all evenly mixed.


After I finished with a satisfied there!, Murphy's Law came to say hi again. I added double the amount of cream I needed. You see? That's what would happen if you try to handle finicky mental sums while you are mentally distressed. At that point of realization, I was so exasperated that I added colourful M&Ms on top to cheer me up (which, by the way, didn't turn out to be such a good idea because the shells cracked like fissures). I poured out too much initially and tried to put back the excess into the bag, accidentally sacrificing one orange M&M in the process. May you rest in peace.

You know, when I first saw the title of the recipe, I thought that these bars would be a cookie kind of bar. While I was mixing up the batter, it seemed like a brownie sort of recipe to me. But when I read the instructions in detail, it called these cake. I felt that these were more brownie-like because they are fudgy. Although I have to admit, they are lighter than the average brownie so the most accurate description would be a half-fudgy half-cakey brownie. Then again, brownies are under the cake family- the author wasn't wrong to call them cake.


While the batter smelled strongly of coffee, after they were baked, the coffee taste wasn't that prominent anymore. I would be hard-pressed to call these mocha bars if I hadn't known what had gone into them. The coffee helps to boost the chocolate flavor rather than vie with it on an equal level, which makes it mocha, does it not? Still, that doesn't change the fact that these bars are delicious. Now if you would excuse me, I'm going to chill the rest of the bars to turn them into chocolate fudge.


Mocha Bars
lightly adapted from Baking by Flavour

49g unsalted butter
1 ounce unsweetened chocolate, chopped finely
1/2 tsp instant coffee
1/2 tsp vanilla extract
1/4 cup all-purpose flour
2 1/4 tsp cake flour
1 1/2 tsp unsweetened cocoa powder
1/16 tsp baking powder
1/8 tsp salt
1/4 cup semi-sweet chocolate chips
1 small egg
80g sugar
3/4 tsp heavy cream
3 tbsp chopped walnuts, toasted and cooled

Preheat oven to 350F. Prepare a mini loaf pan.

Place the chopped unsweetened chocolate and instant coffee in a small ramekin.

Place the butter in a small saucepan and heat on medium until the butter has melted and is sputtering slightly. Immediately pour the butter into the small ramekin. Let the mixture stand.

Sift the flours, cocoa powder, baking powder and salt into a bowl. Toss a bit of the flour mixture with the chocolate chips until they are well-coated. Shake off the excess and set the chocolate chips aside.

Stir the vanilla extract into the butter mixture until the mixture is homogenous.

Whisk the egg until foamy. Whisk in the sugar gradually and continue whisking until the mixture is thick and slightly pale. Stir in the butter mixture until combined. Sift over the flour mixture until no traces of flour can be seen. Stir in the heavy cream, chocolate chips and walnuts until evenly mixed.

Scrape the batter into the prepared pan and bake for about 25 minutes or until an inserted skewer comes out with a few moist crumbs attached. Cool in the pan for 15 minutes before unmolding onto a rack to cool completely.

Tuesday, January 8, 2013

brown sugar apricot bars.


The moment my caboose hits the chair, my sore muscles instantly relax like a knot that has been unravelled. A tension still dwells in my legs as blood courses rapidly through them, not unlike how the string of the recently unravelled knot remains somewhat curly. For a fleeting moment, I reach heaven closer than any point in life. My eyelids start to flutter shut unconsciously in bliss, but halfway, I stop. What could be more cliche than showing signs of blissfulness by allowing your peepers to close and your head tilted slightly back? I defiantly will my eyelids to spring back up, not wanting to adhere to such cheesy imagery. But yet, I thought in my head, this is paradise. 10 minutes...15 minutes...20 minutes later, the lower half of my body didn't, couldn't, even shift an inch. Somewhere within that time, my eyelids felt like weights were hanging on them and started to droop, this time from sheer exhaustion. No! I can't afford to close my eyes here or I'll never wake up to sleep in my bed. So, to stave off the sleepy bug, I log on to blogger and started typing. It's working- but I doubt it will work for long.


To cut a long story short, I was on my feet nearly the whole of a good 12 hours, and finally being able to let my behind adhere to a chair for more than 5 minutes was such a treat. When I finally lay down in a horizontal position, I was out for 11 hours straight. Amazing. I woke up hungry but with nothing to eat and ended up ravaging my snack cupboard for a quick fix. I was still unsatisfied though, so I proceeded to the kitchen to whip up something. Not to cook, if that's what you're thinking, because I can't cook for nuts. I went to bake some of these brown sugar apricot bars, which I chose simply because they were quick. Fast forward 1 hour later and they were ready to eat. Of course, it was only made possible by cheating with the cooling process. Thank you technology for freezers!

These bars, and I swear I'm not biased because I was hungry, are a.w.e.s.o.m.e. It's brown sugar-coconut-walnut-apricot nutty nirvana. They are moist and chewy with a sturdy layer of crunch on top.

Make them. It's not an option.


Brown Sugar Apricot Bars
adapted from Baking by Flavour

1 cup coarsely chopped dried apricots
1 1/2 tbsp apricot jam
1/2 cup all-purpose flour
1/4 cup + 2 tbsp cake flour
1/4 tsp salt
1/4 tsp baking powder
1/2 tsp ground nutmeg
1/4 tsp ground cinnamon
1/8 tsp ground cardamom (I omitted)
1 stick butter, melted and cooled
2/3 cup brown sugar
5 tbsp sugar
2 eggs
2 tsp vanilla extract
1/2 cup lightly packed sweetened flaked coconut (I used desiccated)
2/3 cup chopped walnuts, toasted and cooled

Preheat oven to 350F. Prepare a 9 inch square baking pan.

Combine the dried apricots and apricot jam together in a bowl and stir to coat the apricot pieces evenly.

Sift the flours, salt, baking powder, nutmeg, cinnamon and cardamom in another bowl.

Stir the melted butter and sugars until combined. Blend in the eggs and vanilla extract. Stir in the flour mixture until just incorporated. Stir in the apricot mixture, coconut and walnuts until evenly distributed.

Scrape the batter into the prepared pan and bake for 25 minutes or until golden on top and just set. Cool completely before cutting.

Sunday, January 6, 2013

vanilla bean cream sprinkle cake.


Sometimes, I just feel like writing. Not about baking, not about food; nothing in particular, really.

I like writing, even though I don't think I'm that good. I like crafting sentences. I think the English language is so pretty. A sentence is like a plain white T-shirt and adjectives are the ribbons and lace. The nouns can be the fabric, since they are quintessential in a proper sentence. The verbs are the buttons and zippers as you have to move your fingers to button up those buttons and zip up those zips. The colors and designs of those buttons and zips are the adverbs, as they make them more interesting.
I also think that English is also one of the most melodic languages to be spoken.


Do you know that English is the second most-spoken language in the world? Right after Mandarin.

I like finding new words, and I've learnt many browsing through blogs. Here's one of my new favourites: panache. You pronounce it just like ganache. I feel so cool just by saying it. And here's another: quel que soit, meaning whatever. Like, I know that this counts more as a phrase than a word, but quel que soit. This the kind of word that I want to show off while sticking my nose in the air. But first, I have to learn how to pronounce it with a bit of french flair.

My paragraphs don't link together, I know. That happens to me all the time when I want to write about too many things in a bout of excitement. Since there is already no structure whatsoever, I'm going to talk about cake now. This post pretty much feels like a Christmas tree with no color coordination to me.
Or even worse- hot pink pants with a neon green top. Oh please shield my eyes.


I was really anticipating for this to be an outstanding cake based on its ingredients- vanilla bean, cream and rum. Sadly, it didn't quite live up to my expectations. Part of it was my fault. I ran out of almond extract so I didn't include any. I also messed up the glaze. I dumped all of the ingredients into the pan at once at the beginning of the recipe by mistake instead of following instructions. Although the taste of the cake was pretty much mundane, I loved its dense yet moist crumb. The funfetti, which was my spur-of-the-moment addition, surprisingly managed to retain a bit of crunch. (I can only vouch for the first day though.)


Vanilla Bean Cream Sprinkle Cake
lightly adapted from Baking by Flavour

I made a few, okay, a lot, of changes to the original recipe. I didn't have shortening so I substituted it with butter, used more vanilla bean since I didn't have any vanilla sugar, added sprinkles and most obviously, downsized the cake. The measurements are a bit finicky but try your best!

For the cake:
70g all-purpose flour
23g cake flour
1/10 tsp baking powder
1/5 tsp salt
3/20 tsp ground nutmeg
3/5 stick butter
1/2 cup sugar
seed scrapings from one-fourth of a vanilla bean (save the pod for the glaze)
1 egg
1/2 tsp vanilla extract
1/10 tsp almond extract
50ml light cream
3 tbsp sprinkles

For the glaze:
15g sugar
1 tbsp water
vanilla bean that was used for the cake
1/2 tsp dark rum
1/4 tsp vanilla extract
a drop of almond extract

For the cake: Preheat oven to 325F. Grease and flour a 3-cup tube or bundt pan.

Sift the flours, baking powder, ground nutmeg and salt together into a bowl.

Beat the butter until smooth. Beat in the seeds of the vanilla bean. Add the sugar in 3 additions, beating until combined after each addition. After all the sugar has been added, beat until the mixture is pale and fluffy. Add the extracts and beat to combine. Add the egg in 5 parts, beating to fully incorporate each part before adding the next.

Alternately stir in the flour mixture in 3 additions and cream in 2 additions. Stir in the sprinkles.

Scrape the batter into the prepared pan and bake for 20 to 25 minutes or until an inserted skewer comes out with a few moist crumbs attached. Cool in the pan for 5 to 10 minutes before unmolding onto a rack with a tray below to catch any dripping syrup when applied later.

For the glaze: (You should make this while the cake is baking.) Combine the sugar, water and vanilla pod in a small saucepan. Place the pan on low heat, stirring occasionally until the sugar has melted. Bring the syrup to a boil and boil until it has reduced and thickened slightly. Add the rum and heat for another 10 seconds. Take the pan off the heat and stir in the extracts. Remove the vanilla pod and set the pan aside to cool.

Using a pastry brush, brush the top of the cake (previously the bottom) with the syrup while the cake is still warm. Cool the cake before slicing.

Saturday, January 5, 2013

brooksters.


Brownies + cookies + hipster (attitude)= Brooksters.

No, sorry, I'm just kidding. But these tiny confections are so adorable that they make you want to strut around a party with one positioned just so between your pointer and thumb, because they make you look cool.

Hey! It's a cookie AND a brownie conveniently and ingeniously packaged together in one cohesive calorie bomb!


I made something similar before, except that the cookie dough portion was unbaked. And like before, my opinions remained unchanged. Two good things combined together doesn't make the final product even more mind-blowing. I think it's probably due to the coinciding flavour profiles, i.e. rich and chocolaty. Usually, the best desserts are those with complementary flavours and textures, regardless of what form they are in. So if I were to take the same brownie with, say, vanilla pudding, I would greatly prefer that. It helps to break the monotony.

That's not to say that these weren't good though. I actually used my own chocolate chip cookie dough recipe instead of the one provided in the book so of course it's good! (Har har.) The brownie is definitely one of my favourites so far. It's dense, but not too much, with a slight cakey-ness to it. So when you store it in the fridge overnight, it transforms into this creamy chocolate bar. Which, by the way, I highly recommend you to try!

On a side note: Curse you chocolate cookies. Why are you so dang good?


Brooksters
partially adapted from Baked Elements
makes 6 4 inch ones, 12 regular-sized ones or 48 mini ones

For the cookie dough, refer to here. Make 1/2 of the recipe or make the full and bake the rest of into regular cookies. Whichever quantity you make, you have to prepare it at least 3 hours ahead, store in fridge.

For the brownie:
3/4 cup flour
1 tbsp unsweetened cocoa powder
1/2 tsp salt
5 ounces bittersweet chocolate, chopped
1 stick butter
3/4 cup brown sugar
1/4 cup sugar
1 tsp vanilla extract
3 eggs, cold

Grease 6 4-inch pie pans, a 12-hole regular-sized muffin pan or enough mini muffin pans.

Whisk the flour, cocoa powder and salt together in a bowl.

Melt the chocolate and butter in a heatproof bowl over a pan of simmering water. Remove from heat and stir in the sugars and vanilla extract. Stir in the eggs, one by one, until fully incorporated but don't overmix. Fold in the flour mixture until just combined.

Fill each cavity just under halfway full. Refrigerate for at least 3 hours.

Preheat oven to 375F, 350F or 325F for 4-inch, regular-sized or mini brooksters respectively. Take about 1/4 cup of cookie dough for 4-inch brooksters (downsize accordingly for the smaller versions), roll it into a ball and flatten it slightly before placing it on top of the brownie batter.

Bake for 20 to 25 minutes (adjust accordingly for the smaller versions again. 10 to 12 minutes for the mini ones should suffice.) or until the cookie dough turns a light golden brown at the edges. Cool in the pan for 10 minutes or until firm enough to hold before unmolding.

Friday, January 4, 2013

chewy brown butter chocolate chunk cookies.


It's strangely frustrating to be posting about chocolate chip cookies while dying, raging, to make french entremets. I've been browsing through pictures of the aforementioned cakes and now I'm hopelessly obsessed. I want to get started right this instant on one but the mere thought of my never ending to-bake list stops me dead in my tracks. There are probably at least 50 items to be checked off and none of them are entremets, because they are a very recent obsession. I can't bear to add yet another project to my endless list either so I'm just going to maniacally cut down those that currently exist on my list by at least half before I embark on my entremet. Oh boy.


So let's get started, beginning with these cookies.

I've tried so many variations of chocolate chip cookies I find it hard to give them a unique name to properly represent them. "Chewy chocolate chip cookies"- too vague. "Browned butter chocolate chip cookies"- been there, done that. Alas, the best solution is to bombard the name with long detailed descriptions that are specific to that certain batch of chocolate chip cookies. So I apologize, sincerely, truly, if you find it hard to catch your breath while uttering the title of this post because I'm definite that this won't be the last.

the hallmark of a good chewy cookie is its flexibility!

What sets this batch of cookies apart from others is the use of corn syrup for a moister and chewier cookie. If. You don't overbake them, of course. No secret tricks can help if you overbake cookies. Similarly, one of the best secrets to chewy cookie heaven is also simply not to overbake them.

I think these pictures sufficiently illustrate how gooey these cookies are. I'm not particularly proud of them but they do do the trick in bringing across my point well. (They were taken at night- please pardon them! I didn't put in more effort because I knew that almost certainly, despite later editing, the lighting would still make the pictures look horrible. But I managed to rescue them a fair bit.) Ah... brings me back to approximately 734 days ago when I was even more of a rookie photographer than I am now. You can take a trip back to my first few posts and you'll see what I mean. Poor lighting, embarrassing close-ups, things that can lead me to make like an ostrich and bury my head in the ground. At that point of time, I was framing my pictures with a message in mind as a guide. Like, I want to show how fudgy this brownie is, so I position my camera 5 cm away from the brownie to capture the texture in detail. Furthermore, I didn't have a DSLR last time so picture quality was obviously poorer too. Oh and I didn't edit my photos as well because I had not discovered photobucket.com and its wondrous editing tools. (I love you, photobucket!)

super moist. I assure you that its not my drool.

I'm well aware that this is my first post of the new year. Will this set the tone for my upcoming bakes? Maybe. Probably. Conceivably. Argh, who am I kidding?

Yes.


Chewy Brown Butter Chocolate Chunk Cookies

2 cups all purpose flour
1/2 tsp baking soda
1/2 tsp salt
3/4 cup butter, browned and cooled
3/4 cup brown sugar
1/4 cup + 2 tbsp sugar
1/4 cup corn syrup
2 tsp vanilla extract
1 egg + 1 egg yolk
1 cup chocolate chunks

Whisk the flour, baking soda and salt in a bowl.

In a separate bowl, mix the browned butter, sugars, corn syrup, vanilla extract and salt until homogenous.

Stir the flour mixture into the butter mixture and mix just until incorporated. Stir in the chocolate chunks. Let the dough rest for 10 minutes so that the flour absorbs some moisture. It will become moderately tacky and easier to scoop.

Take about 1/3 cup of dough and roll it into a ball. Set it on a lined baking sheet. Repeat until all the dough has been used up. Refrigerate overnight.

Bake at 325F for 10 to 12 minutes or until the edges of the cookies start to turn a light golden brown. Remove from the oven and cool cookies on the baking sheet.