I've Moved!

Friday, July 29, 2011

chocolate peanut butter pretzel bars.


I know the chocolate-peanut-butter-pretzel combination has been done over and over again and some of you may even yawn at the sight of the name of this post but what can I say? Classics never die.


I usually don't hanker after chocolate but sometimes I just have to have a little bit of it. Really. Just a little. So I quartered the recipe and chilled the bars in a mini loaf pan. Because too many of these chilling around is way too dangerous.


At first, these seem really sweet but after a few moments, the saltiness of the pretzels start to kick in. I made a mistake and only halved the amount of cream needed for the chocolate topping so mine isn't really firm, even after freezing. Dang.


Chocolate Peanut Butter Pretzel Bars
recipe taken from The Craving Chronicles

Makes 9 medium or 16 small bars
Peanut Butter Base 
6 tablespoons unsalted butter, melted
3/4 cup peanut butter
1 1/2 cups pretzels crushed in a food processor but not too fine, you want some chunks
1/2 cup confectioners’ sugar
Chocolate Ganache
1 heaping cup semisweet chocolate chips
1/3 cup heavy cream

Directions
Line 8×8 pan with foil. Spray with baking spray.
In a medium microwave-safe bowl, melt peanut butter and butter together in microwave (about 1 minute on HIGH). Stir in pretzel crumbs, confectioners’ sugar and salt. Spread evenly into prepared pan and refrigerate at least 10 minutes.
In a small saucepan or microwave-safe container, heat heavy cream to near boiling (1-2 minutes on HIGH, depending on your microwave). Pour over chocolate chips. Let sit for 2 minutes. Stir until chocolate is melted and smooth. (If needed, microwave on DEFROST 10 seconds at a time to finish melting.) Pour chocolate over chilled peanut butter base. Chill.
Refrigerate for at least 1 hour before cutting. Store in refrigerator.

Thursday, July 28, 2011

waffle my world: pandan waffles.


Many years back, I was obsessed with pandan waffles. I would buy them from a local bakery chain, freshly made, slathered with peanut butter then folded into half. Yep, that's right. I love the pairing of salty peanut butter with fragrant sweetened pandan waffles till this very day. Although, kaya is a very close second. But personally, nothing beats the ooze of peanut butter.

I've always wanted to try making my own. Not because I felt that by doing so I could save dollars spent on buying those waffles. Actually, it's more because of greed. Somehow, the waffles seem to "shrink" over the years and while they used to be fat and fluffy, now they are just simply thin and limp. Not to mention the measly amount of filling they spread on the waffle- what happened to the giant dollops? I wanted waffles that were thick and chock full of peanut butter, and what better way to customize my waffle by making it myself?


I did a little searching, and ultimately ended up with two potential winners. One of them, which is this recipe, requires less work because instead of using pandan juice, which I had to extract from the leaves themselves, it uses an artificial pandan extract. Don't scoff now, you'll be amazed how much work that tiny bottle can save you. The second recipe is the more laborious one which I think would do better than this recipe as the real pandan juice gives a stronger flavour.

I think this recipe could have done with a bit more pandan extract. The waffles didn't taste artificially flavoured, which was a good thing, but they were not as fragrant as the ones I would buy from the bakery. Apart from the pandan extract, I also added some pandan paste. Pandan paste is different from pandan extract because instead of adding flavour, its primary purpose is to add colour. Pandan extract is colourless you see, so I had to add in a bit of pandan paste to get my desired shade.

The pandan extract isn't the only extract I used. Because I didn't have any coconut milk, I substituted it with evaporated milk and coconut extract. It's a great lower-fat substitute for the real stuff! For every 1/3 cup of coconut milk, just use 1/3 cup of evaporated milk or just milk and 1/2 teaspoon of coconut extract. If you want a thicker version, add 1 teaspoon of cornstarch. You can click here for more instructions.

These waffles are meant to be soft, apart from the first few minutes fresh from the waffle maker. And don't be afraid of the large amount of sugar. I didn't find the waffles terribly sweet, in fact. And do give these a try with some peanut butter! Kaya too, if you can get some!


Pandan Waffles
recipe adapted from House of Annie
makes 3 to 4 waffles

1 cup plain flour
1/2 cup sugar
1 1/2 tsp cornstarch
1/2 tsp salt
1/2 tsp baking soda + 1/2 tsp cream of tartar OR 1 tsp baking powder + 1/4 tsp baking soda
1 egg, separated
1 cup coconut milk
2 tbsp unsalted butter, melted
3/4 tsp pandan extract
1/2 tsp pandan paste

Preheat your waffle iron.

Mix all the dry ingredients together. In a separate bowl, combine the rest of the ingredients except for the egg white. Add the wet to the dry ingredients and stir until just combined.

Whisk the egg white until medium-stiff peaks and gently fold the egg white into the batter. Cook the waffles according your waffle maker's instructions.

Like all waffles, these freeze beautifully too.

Linked to These Chicks Cooked, Sweet Treats Thursday, Full Plate Thursday, Sweet Tooth Friday, Sweets for a Saturday, Strut Your Stuff Saturday and Sweet Indulgences Sunday.

Wednesday, July 27, 2011

maple syrup dumplings with cinnamon candied pecans.

sorry for the horrible lighting- it was another breakfast-for-dinner day
This recipe caught my eye because I have yet another use for maple syrup and the word dumplings intrigued me. Just what kind of dumplings? The chewy kind made with glutinous rice flour or the... oh I don't know. What it actually is is a biscuit sort of dough boiled in a "soup" of maple syrup and water on the stovetop. Yep, that's right. No baking!

What I found really amazing is that even though the dumplings were semi-submerged in the maple syrup mixture, they didn't soak it all up. The outsides did drink in a little but the interior remained light, moist and fluffy.

Don't try to scoop huge balls of dough in because they do puff up a lot! I made mine mini to avoid that and so that they could cook faster. I wish there was more sauce in the end because the maple syrup managed to reduce down quite a bit, resulting in a sticky coating rather than a fluid topping. I added extra water to the pan after scooping out the dumplings to scrape out the sticky bits and also to add more sauce. A good thing too, since even after the extra water the sauce was quite sweet. I would suggest upping the amount of water added in the beginning, from 1 1/4 cup to 1 3/4 cup, the same amount as maple syrup.

I didn't stop there. I added some cinnamon candied pecans.


These pecans are not the usual sugar and water candied pecans but rather, they were coated in a mixture of egg white, brown sugar and cinnamon, among other things before being baked in an oven to dry out. I let my pecans go unattended too far and they look burnt. They weren't that bad, despite their blackened facade. I think this method makes super crunchy nuts because of the egg white coating- the craggy bumps form a really crackly outside.

To be honest, the maple dumplings didn't wow me, but the novelty factor won me over. Not to mention that they were extremely easy to make!

Maple Syrup Dumplings
adapted from Saveur.com

1 3/4 cups maple syrup
1 1/2 cups flour
4 1/2 tsp baking powder
1/2 tsp kosher salt
4 tbsp unsalted butter, frozen
3/4 cup milk

Bring syrup and 1 3/4 cups water (originally 1 1/4 cups water) to a boil in a 6-qt Dutch oven over medium high heat. Meanwhile, whisk flour, baking powder, and salt in a bowl; set aside. Grate butter on large holes of a box grater into flour and toss to coat; add milk and stir with a fork until dough forms. When syrup mixture reaches a boil, use a spoon to drop large clumps (but not too large) of dough into syrup. Cover pot, simmer until dumplings are cooked through, 10-15 minutes. Smaller clumps cook faster. Spoon dumplings and sauce into bowls and serve.

Makes 6 servings.


Cinnamon Candied Pecans
adapted from The Yummy Life
makes 4 cups

1 large egg white
1/2 cup sugar
1/2 cup brown sugar
2 tsp cinnamon
1 1/2 tsp kosher salt
1 tbsp water
4 cups raw pecan halves

Preheat oven to 300F. Line a baking sheet with parchment paper. In a large bowl, whisk to beat the egg white until foamy, add the rest of the ingredients except the pecans and mix until well combined. Stir in the pecans until well coated.

Pour onto the baking sheet and spread nuts out in a single layer. Bake for a total of 40 minutes, stirring halfway through. Remove from the oven and cool. After cooling completely, break apart and transfer to an airtight container. Store at room temperature.

If the nuts loose their crispness, especially if they're left out uncovered for an extended period, restore their crispness by warming them in the oven again for 5-10 minutes.

Tuesday, July 26, 2011

ice cream cones.


*Update: I realized that when I halved the recipe, I forgot to halve the flour as well, hence the whole harder to roll and hard to spread bit. 


Making waffle cones is painful.

My fingers are now red and throbbing, and every key punched is like a prick with a needle but these cones are so worth it. They are thicker than usual with a humongous crunch, and they don't get soggy so easily, even though I spent a good 30 minutes savoring my scoop of butter pecan ice cream.

I'm not sure though, if I will attempt cone-rolling again. It's hard to get the right shape when your fingers are burning. I should have worn gloves. Gee... why did I only think of that now...

I halved the recipe and made enough batter for 3 cones, and only 1 came out somewhat decent. But even that one had a gaping hole at the bottom through which most of my ice cream melted out of. I tried to block that hole with some ladyfinger biscuits, obviously that didn't work. Perhaps melted chocolate would. In the end, I had to eat my ice cream in a cone in a cup with a spoon.


Spreading the batter also took some skill- too thick and they were hard to roll, and I clearly had that problem. The batter was just so sticky! I would advise you to use up all of it at once, because if you let it sit, the flour would be absorbed even more and you will end up with a pasty glop.

If you don't have a cone roller like me, you don't have to go out and buy one especially for this. What I did was to cut out a big round out of a cereal box, make a slit up till the center and roll it into a cone. Tape down the slit with a lot of scotch-tape and then wrap the whole thing in aluminum foil. You don't even have to wash this! After using, just rip of the foil and replace with a new sheet. Convenient, no?


Ice Cream Cones 
makes 6
recipe from The Perfect Scoop


I accidentally added too much flour which resulted in a different texture- more crunchy-cookie-like than a delicate tuile sort of cone. I bet with less flour, the cones would be more malleable and more crisp rather than crunchy.


2 large egg whites
7 tablespoons sugar
1/2 teaspoon vanilla extract
1/8 teaspoon salt
2/3 cup flour
2 tablespoons melted butter

Preheat your oven to 350F. In a small bowl, stir together the egg whites, sugar and vanilla. Add the salt and half the flour, stir, then stir in the melted butter. Beat in the remaining flour until batter is smooth.

Line a baking sheet with parchment paper and use a small offset spatula to spread 2 level tablespoons of the batter into a circle 6 inches across. Try to get the circles as even and smooth as possible, their shape doesn't change much. You're likely to get 2 rounds on one standard baking sheet.

Bake for about 10 to 15 minutes, checking after about 10 minutes. The circles should be a deep golden brown, some lighter and darker patches are inevitable. Remove the baking sheet from the oven and use a thin metal spatula to loosen the edge of one disk, flip it over and immediately roll it into a cone. Press the seam firmly to close the cone and make sure you pinch the point at the bottom. Let the cone cool slightly on the mold until it feels firm then stand it upright in a tall glass to cool. Repeat with the remaining batter. If the other circle has cooled while you are dealing with one, warm it in the oven until softened.

Store in an airtight container until ready to serve. They are best eaten on the day they are baked.

Monday, July 25, 2011

butterscotch pecan ice cream.


Oh butterscotch pecan ice cream~ You're so delicious I could eat a whole bowlful of you~

I can't stop doing those funny little "~" signs when it comes to ice cream. Help me. Correction- when it comes to really really good ice creams. Like for my vanilla bean gelato. Oh yeah, that's outta-this-world awesome!

Homemade ice creams easily are easy to tell because of their freshness. I don't mean picking up a pint of ice cream at your grocery store, go back home, dig in and say, "Hmm... This is like 2 weeks old already." I don't know anyone who could deduce that anyway. I mean by judging from the crunchiness of the mix-ins.  If your scoop of ice cream has soggy pretzels, you know that it was made 2 or 3 days ago. Likewise, if your mix-ins, like nuts and oreos, are still crunchy, you got yourself some freshly made ice cream!


Basically, I'm saying that I've had some pretty great butter pecan ice cream, but most of them had soggy pecans nuts. I took that as an unchangeable fact, until today. This homemade batch had pecans that were still crunchy and buttery with a hint of salt. And the base, although not super smooth and creamy because I altered the recipe and used whole milk, plus the fact that I don't have an ice cream machine, had a caramel-ly depth of flavour.

I tinkered with the recipe a little- changing the use of heavy cream and whole milk to just whole milk and omitting the scotch because I didn't have any. Consequently, the texture is much icier than it should be, but that didn't get in my way of finishing oh I don't know... 3/4 of the whole container? Luckily, I made only a third of the recipe or I'd be 100% willing to live in ice cream for days!


This is the first time I used egg yolks to make ice cream. I used cornstarch for my previous cookies and milk popsicles and vanilla bean gelato with stellar results- creamy and a clean flavour. I think I prefer the cornstarch method. Not only is it less fussy, you don't have to worry about overheating your custard.

As much as I love homemade ice cream, I don't like the way they freeze completely hard. I had to transfer the containers to the defrost section of the fridge and the edges soften much faster than the centre if I leave it there for a short while but wait too long and the ice cream is too soft. I know that alcohol is one way for the ice cream to remain soft but I want to know about gelatin instead. Does it really work? Is the texture of the ice cream much more scoop-able?


Butterscotch Pecan Ice Cream
adapted from The Perfect Scoop

For the buttered pecans:
1 1/2 tbsp butter
1 1/2 cups pecan nuts
1/4 tsp coarse salt


For the ice cream:
5 tbsp butter 
3/4 cup dark brown sugar 
1/2 tsp coarse salt
2 cups heavy cream, divided
3/4 cup whole milk
6 large egg yolks
1/2 tsp vanilla extract


To make the buttered pecans, preheat the oven to 350˚ F. Melt the butter in a skillet. Remove from the heat and toss the pecans with butter until evenly coated. Sprinkle with the salt. Spread on a baking sheet and toast in the oven for 8-12 minutes, stirring once or twice during baking. Remove from the oven and let cool completely. If desired, coarsely chop the pecans before adding them to the ice cream.
Melt the butter in a medium saucepan set over medium heat. Once melted, whisk in the brown sugar and salt. Stir in 1 cup of the heavy cream, and the whole milk. Pour the remaining 1 cup of cream in a mixing bowl with a fine mesh sieve set over the top.
Place the egg yolks in a separate medium mixing bowl, lightly beat the egg yolks. Whisking constantly, slowly add the warm sugar-cream mixture to the egg yolks to temper. Continue until all of the liquid has been incorporated. Return the mixture to the saucepan over medium heat. Continue to heat, stirring constantly, until the mixture thickens slightly and reaches 170-175˚ F on an instant-read thermometer. Immediately remove from the heat and pour through the sieve and into the bowl with the cream. Stir in the vanilla. Cover the bowl and transfer to the refrigerator until thoroughly chilled. (To speed chilling, stir over an ice bath.)
Once the mixture is completely chilled, freeze in an ice cream maker according to the manufacturer’s instructions.  Transfer to a freezer-safe container and gently fold in the buttered pecans until evenly incorporated.  Freeze until firm.
Linked to These Chicks Cooked, Sweet Treats Thursday, Full Plate Thursday, Sweet Tooth Friday, Sweets for a Saturday, Sweet Indulgences Sunday.

Saturday, July 23, 2011

thai sweet chili sauce.


Ohohoho... Sweet-toothed gal is making chilli sauce. A sweet one, of course. I can't express in words how much I dig this, but if actions are any indication, I dipped my way through 3/4 of the jar. Dipped with what? Well, I'm keeping that a delicious secret... until tomorrow.

Thai Sweet Chili Sauce
makes a little over a cup
adapted from She Simmers

The original recipe uses 1 tablespoon of cornstarch which I felt made the sauce way too thick. It practically jellified when I refrigerated it. You could use what the original recipe indicated, or try my suggestion which is to use 2 teaspoons for a less vicious sauce. 

2 garlic cloves, peeled
1 medium red chili, deseeded (I can't take the heat but you can leave the seeds in if you can!)
1/2 cup sugar
3/4 cup water
1/4 cup white vinegar
1/2 teaspoon salt
2 teaspoons cornstarch
2 tablespoons water

Puree all the ingredients in the blender, except for the last two.

Transfer the mixture to a saucepan and bring to a boil over medium-high heat. Lower the heat to medium and simmer until the mixture thickens up a bit and the garlic-pepper bits begin to soften, about 3 minutes.

Combine the cornstarch and water to make a slurry. Whisk in the cornstarch mixture and continue to simmer for a minute more. The cornstarch will help the sauce to thicken slightly thereby causing a nice suspension of the garlic-chili bits, otherwise, you get a thin sauce with all the little pieces floating on the surface.

Let cool completely before storing in a glass jar and refrigerate.

Tuesday, July 19, 2011

strawberry coconut cake.


This cake is really more for me to play with piping frosting than to eat, but of course I ate it in the end. I tried my hand at ruffle frosting again and I just couldn't get it! I mean, you can't call this a ruffle can't you? I piped away in frustration for about 3/4 of the cake until I finally realized that my tip was supposed to be vertical to the cake. (Is this correct?) So I rotated it horizontally and I got this.


Much better? I think so. At least it looks 3D now.

I used the same strawberry cake as my neapolitan cake's. I had an extra layer left over after slicing it into half- ah, the wonders of a freezer. For the coconut cake, I used Rose Levy Beranbaum's recipe found from The Cake Bible. I thought that it wasn't sweet enough although certainly very coconutty (this word looks cute!). I sandwiched both the layers together with coconut pastry cream and used some to top the cake as well. I should have strained the coconut out- way too much texture in a cake.

That strawberry cake is really growing on me. Nom nom nom.

Monday, July 18, 2011

best ever vanilla bean gelato.


Ice cream is happy food~

Vanilla is my favourite flavour~

Anything that can be eaten in a bowl (or cup) with just a spoon spells comfort~

I'm so blissful right now that I doubt I can establish a proper sentence without "~" but I shall try.

Like I said, I'm a vanilla girl through and through. Nothing beats the pureness of vanilla, not even chocolate.


Gasp. 


I know.


Vanilla is the most basic flavour. Most recipes, cake or ice cream, often start off with a vanilla base and then adapted to suit our crazed imaginations. Vanilla is the simplest, but ironically, the hardest to get right. I can't tell you how long I've searched for that perfect version of vanilla. I tried many shops but I often leave disappointed. Too eggy, too rich, too watery, not vanilla-y enough... I've not encountered that vanilla ice cream... until now.

This is why homemade is best- you get to tweak the recipes to your taste, among other things. I took a vanilla gelato recipe from Scoop by Ellen Brown and did a minor adjustment which is to replace some of the vanilla extract with vanilla bean. This recipe also called for non-fat milk powder. You can read more about its uses here. 


I like this recipe because its not too rich, and because there are no eggs, the vanilla comes through prominent and untainted. In fact, when my mother took a bite, she wrinkled her nose and said, "There's too much vanilla." Oh please, is that even possible? I'll just take that as a compliment.

I don't have an ice cream maker so I did it the long way- stirring the custard regularly at half hour intervals. I did three times of manual mixing and blitz the custard in the food processor for the last mixing. Although the results weren't as great as an ice cream maker's, the gelato didn't take long to disappear.


I made some pine nut brittle on a whim but I let the caramel cook to far. It wasn't bitter but I think a lighter caramel would suit the gelato better. Like Haagen Dazs' Macadamia Nut Brittle! Yum, one of my favourites.

I'm thinking of making another batch of ice cream already. What flavour should I make?

Sunday, July 17, 2011

maple bacon cupcakes.


Remember the time I said that I wanted to do more with maple syrup than just have it with waffles and pancakes? Well, last time I made sea salt chocolate maple peanut butter cups (gosh, that's a mouthful), so this time I decided to go the cupcake route and make maple bacon cupcakes.

To be honest, I'm not the biggest bacon fan. The smell of frying bacon sends me running rather than shuffling towards it eyes dreamily closed, nosed pointed up and nostrils dilated. It smells of grease and fat. And you will too especially if you are the one doing the frying. But, I put aside my less-than-friendly reaction to it because I've been hearing people gush about how heavenly maple and bacon are together.

I'm glad I did.


The bacon is salty and crispy while the frosting is creamy and sweet... That salty-sweet combo works everytime. Everytime. 

I used a maple cupcake recipe complete with maple frosting from Baked Explorations. As much as I loved the use of bacon in this cupcake, the maple cupcake itself left me underwhelmed. There wasn't enough maple taste for me, despite maple syrup being the only source of sweetener in this recipe. The resulting cupcakes are mildly sweet and equally mildly flavoured. I can't fault the recipe for that because I think my syrup is too light tasting. I wasn't quite comfortable with the texture though- the cupcakes were not fluffy enough and were a little crumbly, even possibly a tad dry. I'm okay with the crumbly texture, I just wish that they were less dense.


Even though the frosting was named Maple Cream Cheese Frosting, I couldn't taste the maple at all. I'm sure it's not just because of my maple syrup. The recipe called for a mere 2 tablespoons for a huge batch of frosting. I think it's hard to get a good maple punch without maple extract- cream cheese frosting is so liquid-sensitive a little too much liquid can ruin the thing.

I want to be able to decorate the cupcakes using that stylish yet simple technique of ice-cream-scooping a mound of frosting on top and smooshing that mound down and out to the sides, creating an elegant ridge of sorts. Sadly, I don't think decorating is my strong point and my frosting was probably too soft anyway. To think that I even contemplated a basket weave. Pffft.


Maple Bacon Cupcakes with Maple Cream Cheese Frosting
recipe adapted from Baked Explorations, taken via thekitchn

Baked Note: Do not, I repeat, do not use imitation maple syrup in this recipe. Actually, avoid imitation maple syrup at all times. It is usually composed of corn syrup and food coloring and, sadly, contains very little, if any, real maple syrup. In short, it’s hard to think of a more disingenuous grocery store product.

Ingredients
For the maple cupcakes
3 cups all-purpose flour
3 teaspoons baking powder
1 teaspoon salt
1/2 cup (1 stick) butter, slightly softened, cut into chunks
2 tablespoons vegetable shortening, at room temperature
2 cups pure maple syrup (I use grade B to bake with but any grade will suffice)
3 egg yolks
1 large egg
1 1/2 cups whole milk
1 cup walnuts, toasted and coarsely chopped 


For the maple cream cheese frosting
3/4 cup (1 1/2 sticks) unsalted butter, softened
12 ounces cream cheese, softened
4 cups confectioners’ sugar, sifted
2 tablespoons maple syrup


Assembly
Cooked bacon, crumbled into tiny salty shards


Make the maple cupcakes
Preheat the oven to 325 degrees F. Line two 12-cup cupcake pans with paper liners.


In a medium bowl, sift together the flour, baking powder, and salt. In the bowl of a standing mixer fitted with the paddle attachment, beat the butter and shortening until ribbonlike. Turn the mixer to low and stream in the maple syrup. Increase the speed to medium-high and beat until the mixture is nearly uniform in color, about 3 minutes. Add the egg yolks and egg, one at a time, and beat until just incorporated. Scrape down the sides and bottom of the bowl. Add half of the flour mixture and mix on low speed until incorporated. Stream in the milk. Stop the mixer, add the rest of the flour, then turn the mixer on until just combined. Scrape down the sides and bottom of the bowl and fold in the walnuts. 


Fill the prepared cupcake pan about three-quarters full. Bake the cupcakes for 20 to 25 minutes, rotating the pans halfway through the baking time, until a toothpick inserted in the center of a cupcake comes out clean. Note: These cupcakes take longer to bake than traditional cupcakes due to the maple syrup.


Allow the cupcakes to cool for 15 minutes in the cupcake pan, then turn them out onto wire racks to cool completely.


Make the cream cheese maple frosting 
In the bowl of a standing mixer fitted with the paddle attachment, beat the softened butter until it is completely smooth. Add the cream cheese and beat until combined. Add the sugar and the maple syrup and beat until smooth. Be careful not to overbeat the frosting or it will lose structure. (At this point, if you want to, you can tightly cover the frosting and refrigerate it for a day. Let it soften at room temperature before using.) 


Assemble the cupcakes
There are many ways to frost a cupcake. If you have a pastry bag, simply fit with the largest tip, fill the bag with frosting, and pipe enough to cover the cupcake in a big mound. If you do not have a pastry bag, use an ice cream scoop with a release mechanism to scoop the frosting and dispense it onto the top of the cupcake. You can also use an offset spatula to frost the cupcakes. Top with bacon crumbs.


Refrigerate any leftover cupcakes in an airtight container for up to 3 days. Bring cupcakes to room temperature before serving.


Linked to Muffin MondayCast Party Wednesday, These Chicks Cooked, Full Plate Thursday, Sweet Treats Thursday, Sweet Tooth Friday, Sweets for a Saturday and Sweet Indulgences Sunday.

Saturday, July 16, 2011

waffle my world: chocolate waffles.


What is wrong with me? This is my third chocolate post in a row! The next one won't be anything chocolate, I swear.

I've been making it a point to use my waffle machine at least once a week, so I decided to try out this waffle recipe I found on Annie's Eats. To cut a long story short, I decided to forgo the chocolate chips partly because I didn't want to end up with a gooey chocolaty mess (good to eat but not to clean), and also because I forgot about them as I scrambled to the shrieking waffle machine. Although I would like to tell you that that's okay, the waffles are great without the chocolate chips anyway, I can't. Because then I would be lying.

The waffles aren't sweet enough for my liking- the harsh bitterness of cocoa powder needs to be countered with more sugar methinks. I would suggest doubling the amount of sugar. But perhaps that was why chocolate chips were called for- to add pockets of sweetness to the bittersweet batter. Bottom line: please don't forget the chocolate chips. In fact, why not use white chocolate? I bet their sweetness would work wonderfully. Or maybe stir in some dried cranberries in the batter?


I immediately thought of pairing these waffles with a chocolate sauce but you know what? Sometimes chocolate doesn't have to go with chocolate. I think a raspberry sauce would shine here.

I'm quite disappointed because these waffles didn't stay crisp for long. But at least I had some crispy edges because I overfilled my waffle iron again! It's a terrible uncontrollable tendency. Anyone else has that too? Oh and I decided to have a taste the waffle batter on a whim. One word- bleh. 

After several waffle making sessions, I found that the best way to crisp up waffles that stay hopelessly limp is to place them in a low oven directly on a rack for a few minutes. It's much better than allowing the waffle to cook longer in the waffle iron. In fact, you could make some ahead and freeze them, reheating in a 400F oven for 3 to 4 minutes, no defrosting necessary. Who says waffles have to be made and eaten on the spot?


Chocolate Waffles 
adapted from Annie's Eats

Ingredients
1 1/2 cups all purpose flour
6 tablespoons sugar
1/2 cup cocoa powder
1 teaspoon baking powder
1 teaspoon salt
1/2 teaspoon baking soda
3 large eggs, beaten
4 tablespoons butter, melted and slightly cooled
1 teaspoon vanilla extract
2 cups buttermilk, at room temperature
3/4 cup mini chocolate chips or white chocolate chips or dried cranberries

Directions
Preheat waffle maker.

In a medium mixing bowl, combine the flour, sugar, cocoa powder, baking powder, salt and baking soda and whisk to blend. In another bowl, combine the eggs, butter, vanilla and buttermilk. Whisk to blend as well.

Mix the wet ingredients into the dry just until incorporated. Stir in your add-ins and let the batter rest for 5 minutes.

Cook the waffles and serve with accompaniments if desired. Raspberry sauce is highly recommended!

Tuesday, July 12, 2011

sea salt chocolate maple peanut butter cups.


So I had this bottle of maple syrup, and I wanted to do more with it than consume it by the ramekin-fuls with waffles. I always imagined that maple syrup would be good with peanut butter, chocolate, bacon, coffee... and thats how I ended up with chocolate maple peanut butter cups. The sea salt was an after thought, but a very well thought of one.

I did some serious recipe unearthing as usual, for the best rendition of Reese's famous peanut butter cups. A few clicks here and there, and I discovered a recommendation for crushed graham crackers in the peanut butter filling. I thought that was brilliant! Crushed crackers could give the filling the familiar slightly dry and crumbly texture without excessive use of powdered sugar. I still find Reese's peanut butter filling a mystery- it's dry-ish yet with a tinge of salt, so there couldn't be a whole lot of powdered sugar. What do they use to achieve that texture then?

Anyway, back to my peanut butter cups. To make a maple version, I simply subbed the sugar for maple syrup. Because though there wasn't any powdered sugar to hold it together, I relied on the crushed grahams to do that job. The filling was still a little wet though, next time I would add more crackers to the mix.


Before I could even fill the cups, I had to make the chocolate shell. I decided to have a little fun and give tempering a go, but the chocolate took so long to cool to the proper temperature that I gave up halfway and I got a half tempered chocolate shell. Ha! At least the outside was shiny and the chocolate had a little bit of a snap to it. I used a mini muffin pan with no paper/ foil liners by the way.

Fast forward to a few hours later and I finally sank my teeth into one of these cuties. I wished that the maple flavour was more pronounced but I could barely keep myself from shoving down another.


Sea Salt Chocolate Maple Peanut Butter Cups
makes 12 mini muffin sized ones

This is a revised version- changes to the cracker quantity has been reflected.

200g bittersweet chocolate
1/3 cup creamy peanut butter
1/4 cup maple syrup
1/3 cup crushed graham crackers
sea salt, for sprinkling

Mix together the peanut butter, maple syrup and crushed grahams. Refrigerate.

In a double boiler, melt the chocolate and brush it on the bottom and insides of the mini muffin tin. It's okay to be generous, just make sure that there is enough left for the top. Place the pan in a freezer to set, about 10 minutes.

Remove the muffin tin from the freezer and divide your peanut butter mixture evenly amongst each cup. Spoon more melted chocolate on top, sprinkle some sea salt and place the tin back into the freezer until the chocolate on top has set. After the chocolate has set, you can, of course, transfer it back into the fridge or if you are not in a hurry, you could let the chocolate set in the fridge instead of the freezer.

Linked to Cast Part WednesdayThese Chicks Cooked, Full Plate Thursday, Sweet Treats Thursday, Sweet Tooth Friday, Sweets for a Saturday and Sweet Indulgences Sunday.

Sunday, July 10, 2011

chocolate root beer cupcakes in a jar.


Root beer haters beware and root beer lovers sit up straight, because these cupcakes' root beer flavour hits ya right in da face! Usually chocolate is such a strong character that it can easily overpower any competition, but the 2 cups of root beer used makes sure that that doesn't happen. Plus, I let the baked cupcakes sit overnight for an even more developed root beer punch, just like Baked suggested. Unfortunately, the frosting doesn't have as much root beer taste as the cupcakes themselves, but its just as well because I don't want to eat root beer.


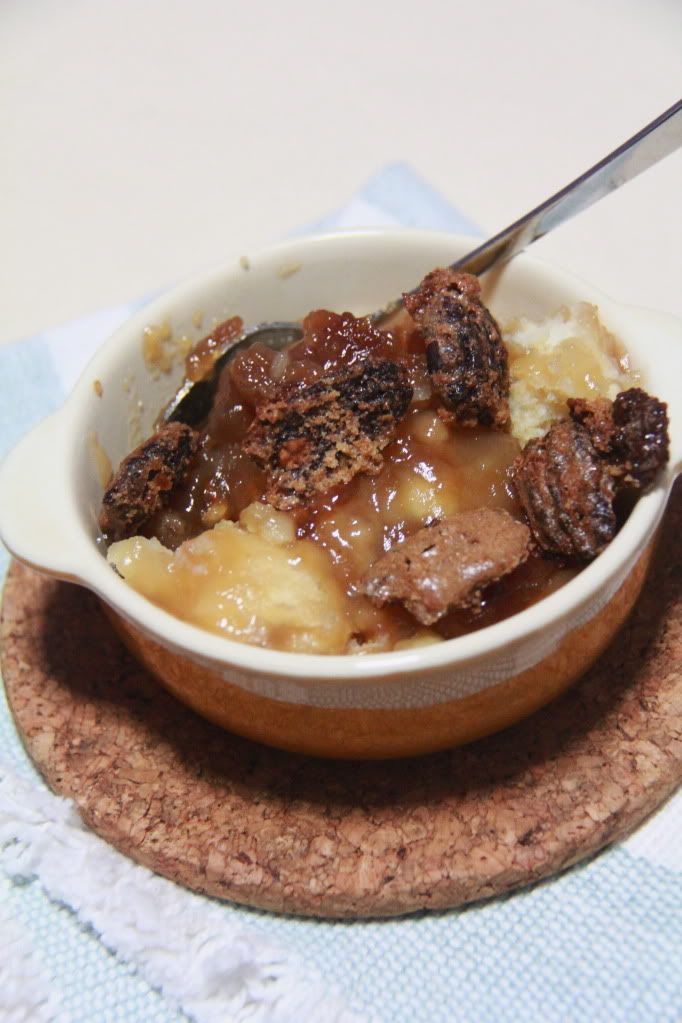
As if chocolate and root beer put together weren't interesting enough, I decided to assemble the cupcakes in a jar with an additional layer of graham crackers at the bottom, inspiration from How Sweet it Is's S'mores Cake in a Jar! I decided to enhance the graham cracker layer's flavour by baking it in the oven for about 10 minutes or so until lightly golden brown and toasty. I let that cool before screwing on the lid for it to refrigerate overnight. When I opened the jar the next day, this wonderful aroma of caramel corn, albeit with less sugary heaviness, wafted out and into my nostrils. Best perfume ever! 


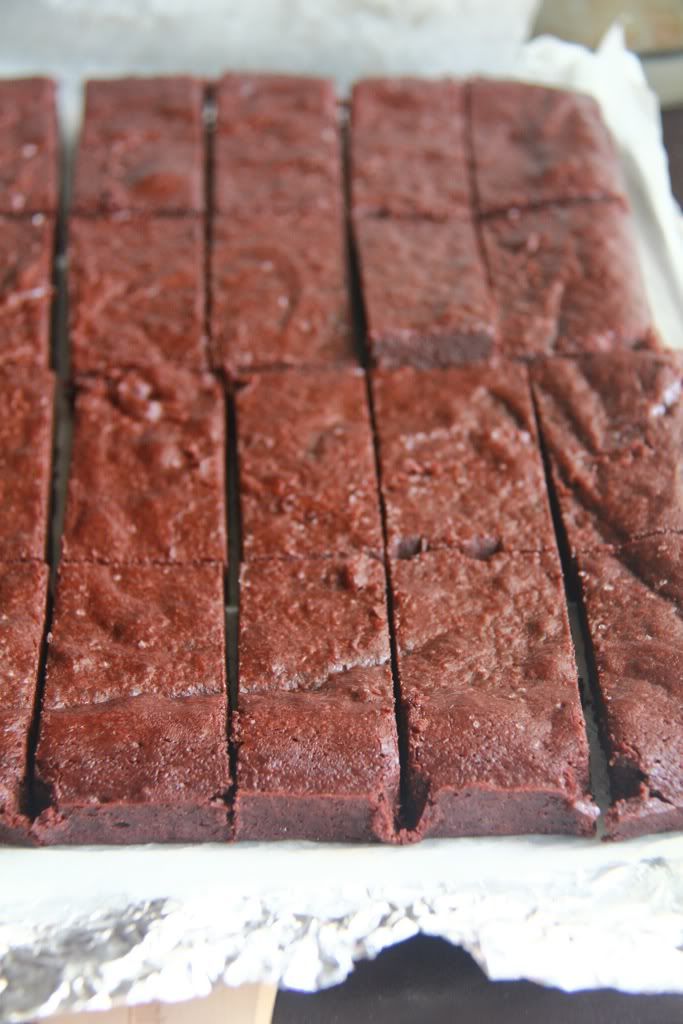
This recipe was supposed to be a bundt cake, but I quartered it and got about 6 cupcakes so the original yield should be 24. Anyway, despite being a bundt, it isn't dense and filling like regular ones. It has a much lighter texture, making it more akin to a cupcake than a pound cake. The good folks at Baked meant it to be that way so that this recipe can be baked anytime of the year.


Another plus point to this recipe is that it is super simple to put together! It uses the muffin method which means no creaming and no mixer. Just a bit of light stirring of dry into wet ingredients. I particularly like recipes which call for oil or melted butter because I can cut a bit of fat out by replacing some with applesauce. In this case, I substituted half of the melted butter and the cupcakes remained moist even after chilling in the fridge.

The frosting barely requires any work too. In fact, the only fussy part is melting the chocolate, but after that little hurdle, all you have to do is combine everything in the food processor and blitz!

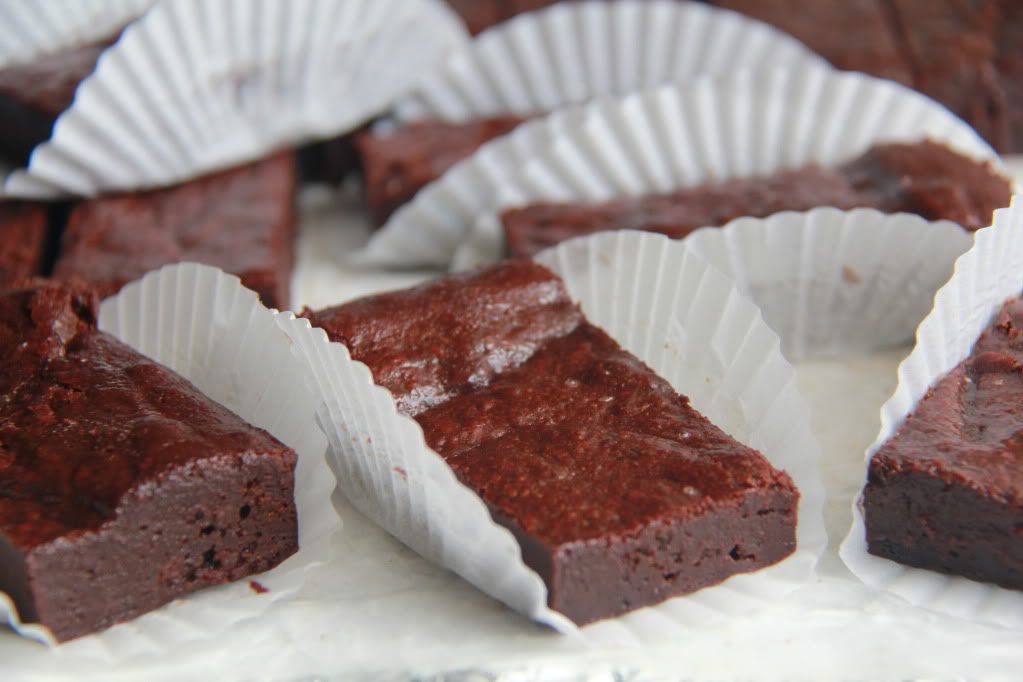
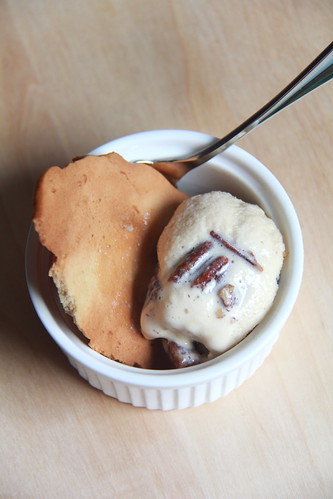
My favourite part is assembling the cupcakes in the jar! I used 1 1/2 cupcakes to fill a jar. Of course, I gotta slice the cupcakes into half first...


put a half into the jar...


and then pipe on the frosting! I should have used a smaller star tip. The large tip pumped in almost too much frosting for my liking. Almost. Because both the cupcakes and frosting are a deep intense brown, under poor lighting they almost blend into each other which had me dumbly digging my fork into a mound of frosting without cake at times. Luckily, the frosting isn't very sweet. When it was still cold right out of the fridge, it tasted like a truffle!


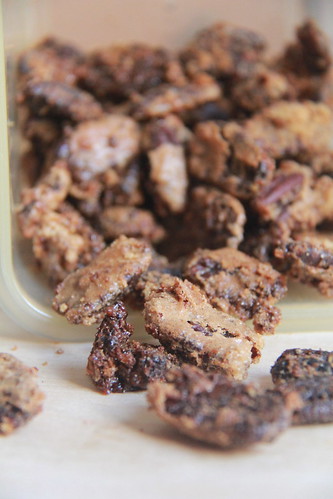
I layered some crunchy chocolate balls on my frosting...

Repeat until full, and drool.


And we're done! I have to say, that graham layer really goes well with the cupcakes and frosting. Sort of like the salty contrasting the sweet. Yum.

Chocolate Root Beer Cupcakes
makes 24
recipe adapted from Baked: New Frontiers in Baking

Cake
2 cups root beer (no diet here!)
1 cup dark unsweetened cocoa powder
1/2 cup unsalted butter
1 1/4 cups granulated sugar
1/2 cup firmly packed dark brown sugar
2 cups all-purpose flour
1 1/4 teaspoons baking soda
1 teaspoon salt
2 large eggs
Frosting
2 ounces dark chocolate melted and cooled slightly
1/2 cup unsalted butter, softened
1 teaspoons salt
1/4 cup root beer
2/3 cup dark unsweetened cocoa powder
2 1/2 cups confectioners’ sugar
For the cake:
Preheat the oven to 325 degrees F. Prepare your muffin pans.
In a small saucepan, heat the root beer, cocoa powder, and butter over medium heat until the butter is melted. Add the sugars and whisk until dissolved. Remove from the heat and let cool.
In a large bowl, whisk the flour, baking soda, and salt together.
In a small bowl, whisk the eggs until just beaten, then whisk them into the cooled cocoa mixture until combined. Gently fold the flour mixture into the cocoa mixture. The batter will be slightly lumpy–do not overbeat, as it could cause the cake to be tough.
Divide the batter into the prepared pans and bake for 15 to 20 minutes, rotating the pan halfway through the baking time, until a small sharp knife inserted into the cake comes out clean.
For the frosting:
Melt the chocolate over low heat on the stove. Set aside to cool.
Combine the rest of the ingredients in the food processor, add in the cooled melted chocolate, and blitz away!


Linked to Cast Part Wednesday, These Chicks Cooked, Full Plate Thursday, Sweet Treats Thursday, Sweet Tooth Friday, Sweets for a Saturday and Sweet Indulgences Sunday.

Saturday, July 9, 2011

cookies and milk ice cream pops.


It seems like most people are starting to jump on the frozen treats bandwagon. It's hardly impossible to scan through a page at Tastespotting or Foodgawker without a picture of a bowl of ice cream or sorbet. As usual, the pictures have succeeded, and have enticed me to abandon my oven for a while. It's just as well since I've just found out that July is the month of ice cream!


Sadly, I don't have an ice cream maker but I can't justify an excuse for one either. So, in order to create a smooth non-icy ice cream without a proper machine, I've researched on a few ways, one of which which includes taking the heavy cream portion of the ice cream recipe and whipping it to soft peaks before folding it into the rest of the mixture. This eliminates the need for whisking every hour or so in the freezer as the air has been incorporated into the mixture through the whipped cream.


I recently found a cheap popsicle mold so what better and cuter way can there be to kick start my freezer adventures?

I took David Lebovitz's fleur de lait ice cream recipe, kept the ingredients the same but used my own churn-free method. Fleur de lait basically means flower of milk if I'm not wrong, so coupled with my addition of mini oreos, I've created my own cookies and milk ice cream pops!


Instead of folding the oreos into the mixture, I layered them in the molds. Which means a cookie, a pour of milk mixture, a cookie, a pour of milk mixture... until I've reached the top. For a third of the recipe, I managed to get 3 pops.


Having never made popsicles before, and being very impatient, I tried to yank them out of their molds after only a minute or two out of the freezer. Very bad idea. Because it's a creamy mixture, I merely succeeded in creating a large hole with the stick, and that's the only thing that came out of the mold. Luckily, I was able to remedy this by allowing everything to melt down and freezing them again. I learnt my lesson and set the pops outside for at least 5 to 10 minutes until soft enough for the sides to detach from the molds.


These pops weren't a bit icy at all! I love this method of making ice cream. My only grouse is that they tend to melt faster than regular ice cream and when melted, the ice cream had a noticeable foamy texture. There was probably too much air in the custard so I would probably reduce the cream to milk ratio.


Making popsicles are so much fun!


Cookies and Milk Ice Cream Pops
adapted from The Perfect Scoop by David Lebovitz
makes about 3 cups or 9 popsicles

2 cups whole milk, divided
3/4 cup sugar
pinch of salt
3 tablespoons cornstarch
1 cup heavy cream
mini oreos or crushed pieces of regular sized oreos

Put 1 1/2 cups of milk, sugar and salt in a heavy saucepan and start to warm them over low heat until sugar dissolves. Whisk the remaining 1/2 cup of milk and cornstarch together until the cornstarch has dissolved then stir into the milk.

Increase the heat and stir frequently until the mixture begins to bubble up. Make sure that it doesn't scorch on the bottom! Keep going until it becomes thick and coats the back of your spoon. Remove from heat and transfer it into a large bowl to cool. Make sure it cools completely before continuing with the next step because we don't want the whipped cream to melt!

Whip the heavy cream to soft peaks and fold into the cooled milk mixture. Divide it among your popsicle molds, layering the oreos as you go. Freeze until hard.


Linked to These Chicks Cooked, Sweet Treats Thursday, Full Plate Thursday, Sweet Tooth Friday, Sweets for a Saturday and Sweet Indulgences Sunday.