I've Moved!

Monday, December 31, 2012

rainbow cake.


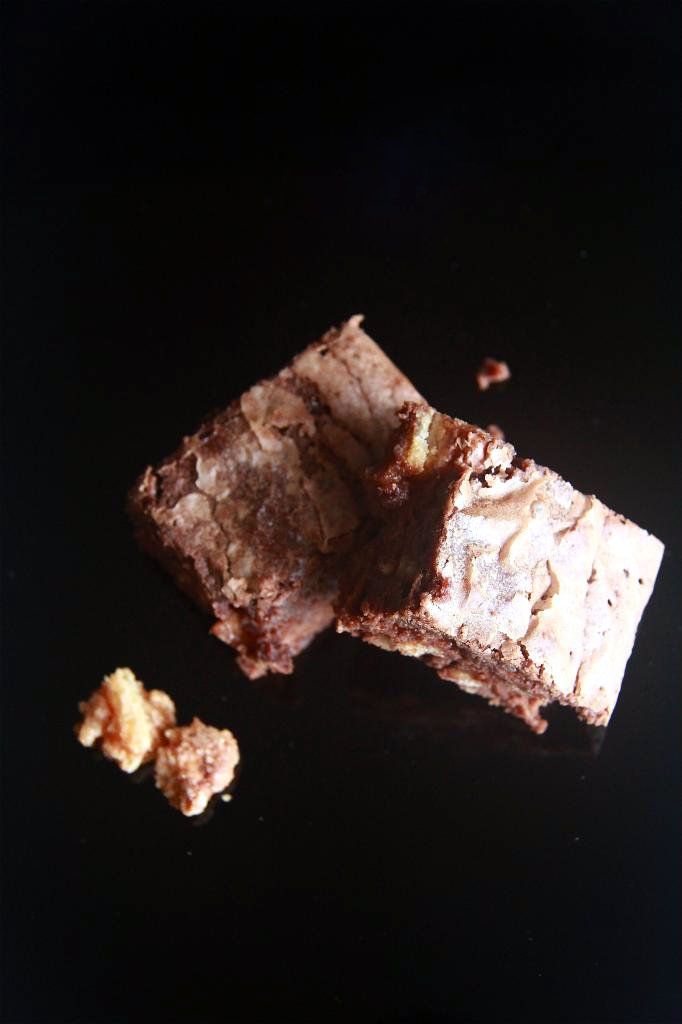
And so, I'm ending of 2012 with a big bang (cake) instead of a recipe round-up. I'm a terribly indecisive person and harsh critic. I'll pass on the headache, thanks. The rainbow cake has finally made its appearance on this blog! My cake mojo is definitely returning. I put it off for so long because of the number of layers I would have to bake. I had only two 5 inch cake pans at first- that would mean 3 rounds of baking and a hell lot more time. I had almost given up on the idea when I finally found another 5 inch cake pan, albeit a silicon one. These small sizes are really hard to come by, to me at least. Dang, I should have grabbed the 4 inch one too.


It turns out that the baking process didn't take too long at all. The layers were so thin that they needed only about 8 to 10 minutes. The slightly laborious part was the dividing of the batter into separate bowls to tint it with colouring. That's 5 bowls, 5 spoons for stirring and 5 smaller spoons to retrieve some dye out of their bottles. The last portion of batter stays in the mixer bowl. Oh and one more small spoon for the sixth dye.

I thought I put too much colouring in at first and the colours looked really intense but it all turned out well in the end. The only problematic one was the red. It turned out pink! The dye I used was Wilton's Christmas Red. I was deliberating whether to put in more dye- I wasn't sure if using more would result in a deeper pink or red. In the end, I let it go because I didn't feel like washing the spoon to scoop out more dye. (After I used a small spoon to scoop out the dye, I dunked it into the batter to get as much dye as I could off it before using a larger one to mix the batter.)


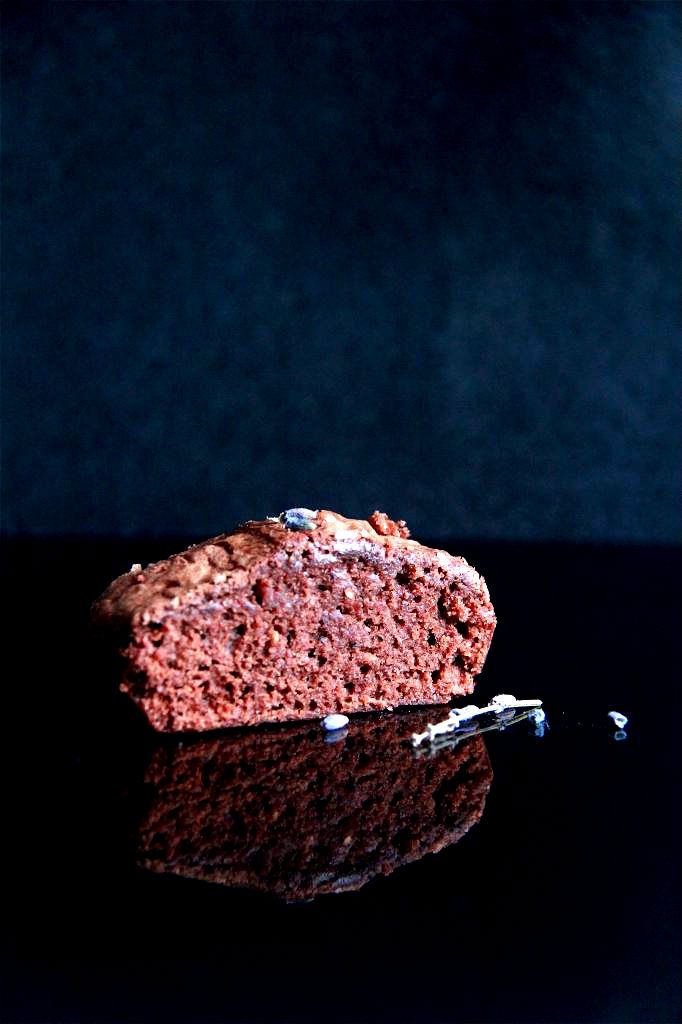
My cake layers were mostly flat but the slightest domes still made quite an impact on the overall levelness of the finished cake. One side of the cake is actually higher than the other, even though I tried to even it out as much as possible. I realized that the cakes baked in the silicon pan were completely and entirely flat. Can you guess which colours they are? I'll put the answer further down so that you won't accidentally spoil your fun!

It was definitely a wow moment when I sliced open the cake. Seeing the cake assembled and seeing the cake sliced open are a world apart. I was temporarily blinded for a moment. The colours are so lurid! At that point, all I was thinking of was that the effort was all worth it.


Maybe I should talk about the assembly of the cake. Because the rainbow cake is more about the idea of a colourful cake rather than the taste, it's a very flexible recipe. All you need is a white cake recipe, for easy tinting, and frosting of any kind. I've seen renditions using frosting to hold the layers together but I decided to use apricot jam instead. The purpose of the frosting between the layers in this cake is as what I've mentioned above just now, to serve as glue. You really want the frosting to be as minimal and discreet as possible to allow for a seamless rainbow appearance. I chose apricot jam because not only is it almost invisible as part of the cake, it also keeps the cake moister than frosting because of its higher water content. Plus, it's convenient too! Just melt down some jam and spread on cake. You'll be able to save on some butter (and calories) as well.

And now here's my answer to the question above: the orange and purple layers!

Here's to an exciting 2013!


Rainbow Cake
makes a 5 inch cake
adapted from America's Test Kitchen

Any white cake and frosting recipe goes here so if you have your favourites, please go ahead and use yours! I think a 5 inch cake is great because the amount of cake here is just right. Making larger cakes with minimal frosting in between will greatly skew the cake to frosting ratio to the undesirable end.

For the cake:
1 1/8 cups cake flour
1/2 cup whole milk
3 large egg whites
1 tsp almond extract
1/2 tsp vanilla extract
1 1/2 cups sugar
2 tsp baking powder
1/4 tsp salt
6 tbsp unsalted butter
food colouring- red, orange, yellow, green, blue and purple

Preheat oven to 350F. Prepare as many 5 inch cake pans you have.

Whisk the milk, egg whites and extracts together.

Mix the cake flour, sugar, baking powder and salt in the bowl of a mixer until homogenous. Add the butter and beat at slow speed until the mixture resembles moist crumbs.

Add all but 1/4 cup of the milk mixture to the butter mixture and beat at medium speed until the batter is smooth. Add the remaining milk mixture and beat until combined.

Divide the batter into 6 portions and tint each portion with a different colour. Pour each colour into a separate cake pan and bake for 8 to 10 minutes. If you have to reuse your pans, allow the cake to cool for 5 minutes in the pan before turning out onto a rack. Give the pan a quick rinse with water, dry it and then use again. It doesn't matter if the pan is still greasy.

Make sure all cakes are cooled before frosting. If you can, refrigerate them overnight so that they are cold and less delicate.

For the frosting:
1/3 cup sugar
2 tbsp flour
1/2 cup whole milk
2 tbsp heavy cream
1/2 tsp vanilla extract
1 stick butter, cubed and slightly cold

Whisk the sugar, flour, milk and heavy cream together in a medium saucepan. Bring to a boil, whisking constantly, until the mixture has thickened. Scrape into the bowl of a mixer, add the vanilla extract and whisk on medium-high speed until it has cooled completely. Add the cubes of butter, a few at a time, until all has been incorporated. Whisk for a while more until the frosting is fluffy and has turned paler. If it gets too soft, place the bowl in the freezer for 10 to 15 minutes and then whisk again.

For assembly:
1/4 to 1/3 cup apricot jam, melted

Start with the purple layer of cake at the bottom and spread a layer of jam on top. Place the blue cake layer and repeat until all the layers have been stacked. Also spread a thin layer of jam on top of the top layer to prevent cake crumbs from mingling with the frosting. Chill the cake until the jam has set, 10 to 15 minutes. Crumb coat the cake with frosting and chill until that layer of frosting has set, 10 to 15 minutes in the freezer. Frost with the remaining frosting and chill the cake until the frosting has hardened, about 4 hours.

Saturday, December 29, 2012

cream cheese chocolate snacking cookies.


"Dear cream cheese chocolate snacking cookies,

Why are you so hard to photograph flatteringly? Why are you so flat, so 2D, so boringly uniform in colour?

Regards,
Amanda"

- is what I would like to write if cookies were granted the power to process thoughts and speak, and if they had their very own cookie magazine with the usual monthly issues containing in them, an Ask Auntie Cookie forum.

No, seriously.

I find the average cookie so uninspiring, it's really hard to compose an interesting shot. I must have deleted at least 20 pictures before I could settle on these few, and even so, I'm not proud of them. I'm ashamed. Partly because these pictures were derived from random positioning of the camera with the shutter button pressed while harboring a devil-may-care attitude.

Maybe I should put in more effort and thought for cookies' photo shoots. I should get a nice tablecloth with matching plates and utensils, and place some of the ingredients that went into the cookies sporadically in and around.

Or not. Too much trouble.

Bah.

I really admire bloggers who go all-out to take food photos- apart from the thoughtfully-chosen backdrop, plates, forks, spoons, cups and whatever, they even spill a bit of their precious milkshake, topple over a bag of flour or crumble relevant candy bars to highlight their presence. Me? I would balk at the clean up and ingredients lost. But that's just practical side of me.

Wait... where am I going? I thought I was talking about cookies. Let's get back to that.


These cookies differentiate themselves from the average double chocolate cookie because of the cream cheese in them. The cream cheese... um... the cream cheese... I'm not sure what role it plays? Even though I pounced upon one, or two, 136 seconds after they came out of the oven? Just kidding.

Honestly speaking, I feel that the difference the cream cheese makes is very subtle. I would say that it makes the chocolate flavour a bit milder. With all the dark chocolate the batter contains, the resulting cookies should have a slightly bitter chocolate flavour. The cream cheese tones down the bitterness so that it isn't so harsh, like something you would expect from a milk chocolate cookie but less sweet. It's hard to accurately describe but it's something along those lines.

The "snacking" in their name is, according to the guys at Baked, because you would find it very hard to stop at one, and would keep going back for them at any time of the day. I'll take it as they mean that these cookies are downright delicious, but I would also allude it to another factor: their flavour is peculiar enough for you to keep sampling cookie after cookie to try to place a finger on that taste.

P.S. I find saying "cream cheese chocolate snacking cookies" weird. I rather much prefer "chocolate cream cheese snacking cookies". Don't you think so too?


Cream Cheese Chocolate Snacking Cookies
makes 24 to 36 large ones
adapted from Baked Elements

I actually added the melted chocolate just before adding the flour mixture because I was afraid that adding it after would cause the flour to be overworked but I've written the original instructions here.

4 ounces cream cheese
1 cup butter
1 cup sugar
1/2 cup dark brown sugar
2 eggs
2 tbsp heavy cream
1 tsp vanilla extract
2 1/4 cups all-purpose flour
2 tsp baking soda
1/2 tsp salt
1/4 cup dark unsweetened cocoa powder
3 ounces dark chocolate, melted and cooled
8 ounces (about 1 1/3 cups) semisweet chocolate chips

Cream the cream cheese, butter and sugars together until fluffy, about 3 minutes. Add the eggs, one at a time, beating well after each. Add the cream and vanilla and beat until just incorporated.

Whisk the flour, baking soda, salt and cocoa powder together. Add the dry ingredients to the cream cheese mixture and mix until just incorporated. Add the melted chocolate and chocolate chips and stir until just combined. Refrigerate the dough for about (at least) 15 minutes.

Preheat oven to 350F. Prepare two baking sheets.

Drop heaping tablespoons of dough 1 1/2 inches apart onto the prepared baking sheets. Bake for 10 to 12 minutes until the cookies are set.

Thursday, December 27, 2012

blueberry loaf.


It's been a while since I made cake because of all that christmas cookie and brownie baking. I think I need to slowly ease back into making cakes again. The thought of making a layer cake or anything of that splendor kind of put me off when I thought of it this morning. So I chose something simple- a loaf cake. I've had my eyes on this recipe for a while because it has cream in the batter, an addition that I had learnt very belatedly how it adds a touch of aromatic milkiness to the finished cake. In short, I knew that such a cake would rock.

I put it off for so long because I just couldn't get into the mood for making simple stuff before, but now the time has come. And it couldn't be more perfectly arranged since I just happen to have a box of blueberries and a jar of heavy cream waiting to be used.


The cake was delicious, needless to say. The cream wasn't very prominent so soon after the cake was baked but I'm guessing that it will show up stronger as it sits. My favourite parts of the cake were the crunchy crusts and the slightly gummy middle. I've always had a soft spot for gummy cake. Perhaps it's the texture, but I believe that those parts also taste better. My guess is that it is because they have more moisture and moisture conveys flavour.

My only grouse was the blueberries. Plainly folded into cake batter and baked sort of makes them taste lackluster. They weren't sweet and were reminiscent of diluted blueberry juice. They also stained the cake a ghoulish bluish-green. It's a common problem across recipes that administer such simple application of blueberries. I didn't feel that strong a discontentment with the results before but when I made these blueberry muffins by Cooks Illustrated last time, I knew how much potential those blueberries could have had. My expectations will never quite be the same again.

You know, I have this feeling that blueberries will go well with lavender. Expect something along those lines soon!


Blueberry Loaf
makes a 9 x 5 inch loaf
adapted from Baking by Flavour

2 cups flour
1 1/4 tsp baking powder
1/2 tsp ground nutmeg
1/2 tsp salt
1 cup blueberries
1 stick butter
1 cup sugar
2 eggs
2 tsp vanilla extract
3/4 cup light cream

Preheat oven to 350F. Prepare a 9 x 5 inch loaf pan.

Sift the flour, baking powder, ground nutmeg and salt together. Toss 1 12 teaspoons of the sifted mixture with the blueberries, ensuring that they coat the blueberries entirely. I find this easier to do if you place the sifter above the bowl of flour mixture, and place the blueberries in it. Then, you add the small amount of flour and just shake the sifter about. This way, the excess flour goes back into your flour mixture.

In a separate bowl, cream the butter until smooth. Add the sugar in 3 additions, beating well after each addition. After the last addition of sugar has been added, beat until the mixture is pale and fluffy. Add the eggs one by one, beating to incorporate the first one well before adding the next. Stir in the vanilla extract.

Stir in the flour mixture (in 3 additions) and cream (in 2 additions) alternatively, beginning and ending with the flour mixture. Stir in the blueberries gently.

Scrape the batter into the pan and bake for about an hour or until an inserted skewer comes out with just a few moist crumbs attached.

Tuesday, December 25, 2012

candy bar cookies.


I don't know about you but I live in terrible temperate weather. 24/7. Practically all year round. If you are grabbing an ice cream to-go, you better lick fast or it will start dripping onto your hand and down your wrists. If you have to soften butter, 30 minutes at room temperature is enough to bring it from brick-hard to soft and pliable (which is actually a good thing). If you buy chocolates, they absolutely must be stored in the fridge, lest they become an unrecognizable mound of half-melted chocolate. Because chocolates are best enjoyed at room temperature, you have to wait for it to come up to temperature before you bite into it (which is a bad thing).

That is why all my candy bars are stored at 10 degrees to ensure that they remain cold and with their original shape intact. The downside is that candy bars with caramel, and let's face it- a lot of candy bars have caramel, are less than appetizing straight from the fridge. The caramel portion is often too chewy- I bet you can actually burn calories from that jaw workout. Even worse are candy bars with nuts, like Snickers. You practically have to forcefully yank a portion of the candy bar out with your teeth! I mean, I could always leave such candy bars out at room temperature to warm up a bit but caramel is awfully resilient. By the time is loosens up into a state that requires less barbaric behavior, the chocolate coating on the outside would have become mushy. In summary, I have never had a caramel-filled candy bar at room temperature before.

And that brings me to these candy bar cookies. I could wrap the cookie dough around any candy bar so I deliberately chose Snickers and Mars. You see the significance? They both contain caramel! When they are baked, the caramel would loosen up and I could finally have my first warm-ish candy bar. I didn't dare to touch them too soon for the fear that the too-hot sugar would burn my tongue. Patience, patience.

After all that waiting, I bite into a Snickers-filled one. The cookie on the outside was crisp, as if replacing the texture lost from the now-melted chocolate coating. The caramel inside was definitely easy to chew, but it wasn't as awesome as I expected it to be. It's consistency didn't become as loose as I thought it would be. Perhaps it's because of the peanuts that held it in place. The Mars ones were like a caramel volcano though. The cookies that contained Mars bars became misshapen due to the caramel that flowed a little uncontrollably.

Instead of using fun-sized candy bars chopped into half like the recipe instructed, I bought normal-sized candy bars and chopped them into bite-sized pieces because it was simply more economical. I should have chopped them into smaller pieces though. There was barely enough dough to wrap around a candy bar piece! No wonder the Mars-filled ones went out of shape.

In the original recipe, you're supposed to dip the tops of the cookies in melted chocolate. Double dipping them again in white chocolate is also an option! And then the cookies get showered with a flourish of sprinkles! I wanted to do that but because I was giving some of the cookies away as gifts and have to pack them into boxes, I was afraid of the chocolate melting and dirtying the box so I did away with that. Sad, huh?

Oh and by the way, Merry Christmas!


Candy Bar Cookies
makes 40
adapted from Baked Elements

I modified the instructions a bit. At first you are supposed to chill the cookie dough, roll it out and cut circles out that you would then wrap around a candy bar chunk. I skipped past all that and used the dough right after mixing. You just have to try to press an even layer of dough around the candy bar all around. It's like a cheat's way of getting the pie crust into the pan.

2 cups all-purpose flour
1 tbsp unsweetened cocoa powder
1/2 cup sugar
1/8 tsp salt
1 1/2 sticks butter
1 egg yolk
40 candy bar chunks

optional:
milk or dark chocolate, melted
white chocolate, melted
sprinkles or chopped nuts

Stir the flour, cocoa powder, sugar and salt together in a bowl.

Cream the butter until smooth. Add the egg yolk and mix until incorporated. Add the flour mixture and mix until combined. The dough will be crumbly. Knead it a bit until it holds together then divide into 40 equal portions. Wrap each portion of dough around a candy bar chunk and refrigerate the dough balls for at least an hour for the dough to firm up.

Meanwhile, preheat oven to 350F. Bake the cookies for 12 to 15 minutes, until the cookies have browned slightly. Remove from the oven and let them cool for at least 5 minutes before eating. If dipping in chocolate, cool completely before proceeding.

If going by the chocolate-dipping route, you can dip the cookies in one kind of chocolate or even two (heck, why not three?) for colour contrast. After dipping, let the chocolate set for a while then top with sprinkles or chopped nuts if desired. You can use different chocolates and toppings to differentiate the candy bar hiding inside. Or perhaps don't and leave everything up to chance so that even you, the baker, can be surprised!

Monday, December 24, 2012

3D present cookies.


Hey hey, Christmas is coming! And naturally, Christmas means presents. I stopped giving store-bought gifts like stationery a long time ago when I started baking, because I felt that it was more sincere (and more fun) to give others homemade gifts. As much as I enjoy the baking and packaging, edible gifts have always been a source of nerve-wrecking decisions because I never really know what I should make. There are so many factors to consider, like how can I pack it into a box, how long can it be kept, what sort of flavours do the recipients like. Then also there's me and my stubborn reluctance to make the same thing twice so I have to think of new ideas that can suit the above criteria. Not to mention that I like to give an assortment of bakes, just to make the gift more interesting. And then if I decide to pack an assortment of sweets in the same box, I would have to consider if one would make the other harder or softer because of the loss or gain in moisture.


I've always felt that cakes are very versatile flavour carriers and make beautiful gifts but they are not that great a choice because their storage life is shorter and can't fit into a chic little box. Cookies and brownies are almost always the default choice because they travel well and can be kept for a while. Hence, I turned to cookies. But I had to make it Christmassy, which was another hurdle to overcome, and I eventually did after deriving inspiration from here.


I was absolutely smitten with the idea- 3D present cookies filled with some M&Ms and a small Merry Christmas! note that you could see once you pried off the top cookie. I have always felt that if you like the gift, there is a higher chance that others would like it too and you would feel better about yourself for giving a nice surprise.

I set off on this project with excitement and apprehension because I've never decorated sugar cookies before. Baking sugar cookies is already draining enough, what with the mixing and the chilling and the rolling and the cutting and the chilling. I did so once, and it was enough to put me off sugar cookies for a year. Although I have to admit, I did make things difficult for myself.


I used Sweetapolita's sugar cookie dough again because I made it once before and was satisfied with how the cookies didn't spread much. Her recipe doesn't contain any baking powder, hence the minimal expansion. Actually, I'm starting to think that I should try out cut out cookie recipes that contain leavening agents. That is because this time, my dough ended up on the dry side from too much flour and it cracked when I rolled it out. Most of the squares were cracked and scaly, and if they had contained leavening, they would have puffed up slightly in the oven and the cracks would have smoothed out, resulting in a smoother and prettier surface. I was lucky this time because I was going to cover the surfaces with icing so the cracks didn't show.


I basically created a border with icing of a stiff pipe-able consistency, let it dry, flooded the middle of the squares with very fluid icing, then pressed hundreds and thousands onto the surface. Because sprinkles are mandatory for every festive occasion. This way, only the centre of the cookies would get the sprinkles and not the borders. After the centre has dried, I piped a cross on top of the sprinkles to achieve a present-like image, tamping down the ends with dragees. Looking back, it's probably a better idea to pipe the cross at the same time as the borders so that they are on the same level. But that would mean more time spent on filling the gaps with sprinkles.


I had some icing leftover so I piped the initials of the recipients on top of the sprinkle surface. I also did some borders on the sides of the cookies. I thought that it was extraneous in an ugly sense at first, but after a while they started to look kinda nice. It would be good if I can find a way to completely cover the sides so that you can't see three cookies stacked on top of one another.

These were a lot of work, but equal parts of fun! The links for the recipes are as follows: cookie dough and icing. I made 1/4 the recipe of the sugar cookies and got 9 presents using a square cookie cutter 2 inches in diameter. I made 1/4 the icing recipe as well and had plenty left over.

P.S. I'm submitting this post to Aspiring Bakers #26- Creative Christmas Motif Bakes! hosted by Alan of Travellingfoodies.

Saturday, December 22, 2012

japanese souffle cheesecake with oreo whipped cream.


This is a lighter take on the American-style oreo cheesecake. Instead of the oreo crust, I use oreo whipped cream and in place of the dense and creamy cheese filling, a japanese souffle cheesecake that is lighter yet creamy in a different way. I have a favourite way to eat the cake- before you chew, use your tongue to compress it. This concentrates the cheesy flavour and its texture changes miraculously. And if you have thin strips of cake scraps (to me, the best part of making a layer cake- the eating of trimmings), roll them up from the short side like a swiss roll. You will have a thick roll of cake to take a wonderful bite out of.

I prefer having the cake at room temperature but chilling it is the price you have to pay for oodles of oreo whipped cream.

Japanese Souffle Cheesecake with Oreo Whipped Cream
makes a 8 inch round or square cake
cake adapted from here

The original recipe stated that an 8 inch round pan is to be used and lacking that, I turned to a 7 inch square pan, which should be about its equivalent. However, there was too much batter, so I recommend using a 8 inch square pan if you must use a square one. For the crushed oreos, I like them when they are larger because they have a more distinct texture when they have been folded into the whipped cream but that might be a problem if you have to do some piping work. If you're just going to frost with a spatula, try leaving some larger oreo pieces.

For the cake:
60g cake flour
20g cornstarch
1/4 tsp salt
250g cream cheese
50g butter
100ml milk
6 egg yolks
6 egg whites
1/4 tsp cream of tartar
140g sugar

Preheat the oven to 325F. Prepare a 8 inch round pan.

Stir the flour, cornstarch and salt together in a small bowl.

Melt the cream cheese, butter and milk in a heatproof bowl over a simmering pot of water. Cool the mixture slightly. Stir in the egg yolks until combined. Stir in the flour mixture until just incorporated.

Whisk the egg whites with the cream of tartar until foamy. Gradually add in the sugar and whisk until soft peaks form.

Whisk 1/4 of the egg whites into the cheese mixture to lighten. Add the rest of the egg whites and fold to incorporate evenly. Pour the batter into the prepared pan.

Bake for about 1 hour 10 minutes in a water bath until a skewer inserted comes out clean. Leave to cool slightly in the oven with the door ajar, 30 minutes to an hour. Remove from the oven and place the pan on a wire rack to cool completely.

For the oreo whipped cream:
1 3/4 cups whipping cream
1/4 cup icing sugar
1 sleeve of oreos, about 14 pieces, crushed finely or slightly larger (see note above)

Crush the oreos finely.

Whip the cream until soft peaks then gradually add in the sugar, whipping continuously, until the cream reaches medium-stiff peaks. Fold in the oreo crumbs. The whipped cream will start to thicken once the oreos have been incorporated. Use immediately.

Friday, December 21, 2012

potato chip cluster brownies.


If you were to ask me how did this happen, my honest answer to you is that one day, I was lying on my bed and two phrases popped into my head: potato chips and brownies.

Do normal people have random foods appearing in their minds?

After that, I just couldn't stop thinking about them. The most obvious way to incorporate the two was to bake them together. However, I knew just adding crushed chips to the brownie batter would result in soggy salty flakes of potato chips. I could make a potato chip crust, but it being at the bottom, smothered by all that brownie liquid, would definitely turn it limp and unappetizing. Plus, it would make holding the brownie up difficult. I knew I had to turn the potato chips into something thick and crunchy to hold up to all that moisture, so I came up with potato chip clusters.


So then, I had two options: One, to stir them into the batter as a mix-in. Two, to sprinkle them on top, holding them high and mostly dry from all the moisture.

At first, I wanted to go with option two. But at the point of adding them in, I changed my mind at the split second and... the potato chip became one with the brownie. I wonder why. Because it's only natural to stir things into brownie batter instead of sprinkling them on top? Maybe.

But good news! Most of the potato chip clusters managed to retain a fair bit of their sturdiness. In other words, they were no longer crunchy but they were not soft and mushy either. They were quite firm to the bite, if that's the way to describe it. To really really ensure that you keep at least some parts of the potato chip clusters crunchy, you have to use huge chunks. But don't go crazy- you'll still need to fit that thing in your mouth. Of course, you could also try what I did not- scatter them on the surface of the batter.


Actually, I predicted that the potato chip clusters would go soft pretty quickly so I refrigerated some brownies to see if refrigeration helps to keep the clusters crunchy. (And since the brownies were refrigerated, I might as well dip them in chocolate and sprinkles. I mean, that's common sense right?) The results were pretty good- most of the clusters' crunch held up but the smaller pieces didn't do so well. So, the best way to prevent soggy clusters is to, firstly, use fairly large pieces of potato chip clusters and secondly, refrigerate the brownies once they are baked.

Now, the potato chip cluster thing was something I conjured up from nowhere so the recipe isn't perfect. This batch I made, using 1/4 cup of sugar, is right in the middle of sweet and savory. If you happen to bite into a salted cashew, the scale tips towards savory. If you encounter a part that has a little more sugar stuck onto it, then the scale tips the other way towards the sweet side. Yes, it's tiring. My tastebuds were initially confused. After a while though, it's actually quite enjoyable. My recommendation though, is to make these with less sugar so you can experience the contrast between sweet and salty in the brownies more distinctly. For more guidance, read the notes below!


Potato Chip Cluster Brownies
makes an 8 x 5 inch pan's worth

If you want the potato chip clusters to be salty, omit the sugar. If you don't want it to be too salty yet not quite sweet, use 2 tbsp. If you want a result that is smack dab in the middle of sweet and salty, use 1/4 cup.

For the potato chip clusters:
1 1/2 cups crushed potato chips
1/4 cup roasted cashews, chopped into medium-large pieces
3 tbsp flour
optional: 2 tbsp sugar or 4 tbsp (see note above)
2 tbsp butter, melted
1/2 an egg white, whisked until frothy

Preheat oven to 300F. Prepare a baking sheet, ensuring that it is thoroughly greased.

Toss the potato chips and cashews together in a large bowl. Add the flour and toss to coat evenly. Add the sugar, if using, and toss again. Stir in the melted butter until it is evenly distributed. Stir in the whisked egg white and stir to mix evenly. The mixture will appear very damp but that's okay.

Bake for 30 minutes, stirring every 10 minutes. Let the mixture cool before breaking it up into chunks. Store in an airtight container.

For the brownie:
36g cake flour
3/16 tsp baking powder
3 tbsp butter
1 1/4 ounces milk chocolate
1/4 ounce unsweetened chocolate
1/8 tsp salt
1/2 tsp vanilla extract
1 egg
70g brown sugar
1/2 to 3/4 cup potato chip clusters

Preheat oven to 325F. Prepare a 8 x 5 inch pan.

Whisk the flour and baking powder together. Set aside.

Melt the butter, chocolates and salt. Set aside to cool slightly then stir in the vanilla extract.

Whisk the egg and brown sugar until the mixture is pale and thick. Whisk in the chocolate mixture until combined. Stir in the flour mixture just until the flour disappears. Stir in the potato chip clusters until evenly distributed.

Pour the batter into the prepared pan and bake for about 18 minutes or until a skewer inserted into the middle of the brownie comes out with a few moist crumbs attached. Cool completely before slicing. For easier and cleaner cutting, I like to refrigerate my brownies until thoroughly chilled, about 4 hours after cooling in the pan for half an hour. To speed up the process, place the brownies in the freezer for 30 minutes.

Thursday, December 20, 2012

lavender milk chocolate brownies.


I know what you're thinking. Another lavender post? Yeah. But it's not that I'm absolutely in love with it or anything- I'm just want to try out all the popular lavender combinations while I'm still in the mood to experiment. First, I combined lavender with honey, or you could see it as lavender and cream (but most things taste good with cream I guess). Secondly, also lavender and lemon, in that same dessert. Now I'm attempting lavender with chocolate. I figured that milk chocolate would work best because of its sweetness mild flavour.

P.S. I also made lavender shortbread cookies. You could turn most things into cookies and they would be an instant hit.


I was initially worried that the lavender taste would show up too prominently because they smelled really strongly of lavender when baked. I find that true, the first sensation you get after biting into one would be of lavender galore but slowly, the chocolate flavour creeps up while the lavender fades away. That is, if you don't happen to take a bite off a lavender bud. Even if you do, it's not that intense, so don't worry. Of course, if you want the brownies to taste less of lavender you could use less.


I actually added just a touch of lavender paste in with the brownies but on hindsight, I shouldn't. It screams artificial. Luckily, the minute amount I added takes a lot of concentration to be noticed. I just really shouldn't have bought it at all. What a waste. If I were to use lavender paste, I probably should use the off-white stuff. That seems less unnatural.

Have any of you used lavender paste before? What did you use it in?


Lavender Milk Chocolate Brownies
makes an 8 x 5 inch pan's worth

For the brownie:
36g cake flour
3/16 tsp baking powder
1/2 tsp dried lavender
3 tbsp butter
1 1/4 ounces milk chocolate
1/4 ounce unsweetened chocolate
1/8 tsp salt
1/2 tsp vanilla extract
1 egg
70g brown sugar

Preheat oven to 325F. Prepare a 8 x 5 inch pan.

Whisk the flour, baking powder and dried lavender together. Set aside.

Melt the butter, chocolates and salt. Set aside to cool slightly then stir in the vanilla extract.

Whisk the egg and brown sugar until the mixture is pale and thick. Whisk in the chocolate mixture until combined. Stir in the flour mixture just until the flour disappears.

Pour the batter into the prepared pan and bake for about 18 minutes or until a skewer inserted into the middle of the brownie comes out with a few moist crumbs attached. Cool completely before slicing. For easier and cleaner cutting, I like to refrigerate my brownies until thoroughly chilled, about 4 hours after cooling in the pan for half an hour. To speed up the process, place the brownies in the freezer for 30 minutes.

Wednesday, December 19, 2012

parisian apple tartlet.


Something quick and easy to do. The only thing I did differently from the original recipe was the thin slicing and layering of the apple. Four chunks of apple sitting on a bed of puff pastry didn't seem so pretty to me. I should have cut the slightly bigger circles of puff pastry out- yum yum crispy disks of butter. I think my puff pastry didn't puff up as much as it should because it's pass its expiry date. Oops. Oh and I served mine with some salted caramel sauce. You should do that too, and with a scoop of vanilla ice cream as well.


Parisian Apple Tartlet
adapted from Baking: From My Home to Yours
makes 1

1 1/8 inch thick 4 inch circle cold puff pastry
1/2 firm sweet apple, such as Golden Delicious or Fuji, peeled and cored
light brown sugar
1 tsp cold butter, cut into 3 pieces

Preheat oven to 400F. Line a baking sheet with parchment paper of a silicone mat and place the pastry circle on the sheet.

Cut the apple half into 4 chunks and center the chunks on the pastry circle. Sprinkle the apple with 1 or 2 teaspoons of brown sugar, depending on how much sweetness you want, and top with the bits of butter.

Bake for 25 about minutes until the pastry is deeply browned and puffed up around the apple and the apple can be easily pierced with the tip of a knife. Transfer the baking sheet to a rack and let the tartlet cool until a little warm or room temperature before eating.

Tuesday, December 18, 2012

honey lavender panna cotta with lemon gelee.


So. I'm embracing the purple flower again, this time in pudding form. And you know what, I'm starting to really like it! I seriously think that cream and lavender go together best.

But... I totally killed the dessert with the lemon gelee. Firstly, I added too little sugar and the whole layer was tart tart tart. Secondly, I think the strong acidity of the gelee made it hard to set, and even after 24 hours of chilling it was extremely wobbly. Some of it was not even set. And then, because it didn't set, it infiltrated the lavender panna cotta layer and made the overall dessert scarily sour. To save you such a horrific experience, I've increased the sugar and gelatin amounts in the recipe below.


However, I managed to taste some parts of the panna cotta still untainted by the gelee and I absolutely loved it! The lavender taste was not too strong- just right. I couldn't taste the subtle honey because my tastebuds practically died from the acid assault. Well I'll just have to make another batch then. With only the panna cotta of course. P.S. If you're wondering why my panna cotta is pink, it is because I added some lavender paste that was a deep purple. I've also seen lavender pastes in off-white shades- I should have gotten those instead.

To top it off, I whipped up some coconut cream. It's the first time I'm trying coconut whipped cream and the only thing I can say is that if you don't like coconut, you won't like this. But if you do, like me, then you'll probably start to get addicted to it.


Honey Lavender Panna Cotta with Lemon Gelee
panna cotta recipe slightly adapted from here, lemon gelee recipe from here

For the panna cotta:
1/4 cup heavy cream
3/4 cup milk
1 tsp sugar
2 tbsp honey
1/2 to 1 tsp dried lavender, depending on how strong a lavender taste you want (I used 1/2 tsp)
3/4 tsp powdered gelatin
1 tbsp water

In a medium saucepan, bring the heavy cream, milk and sugar to a simmer. Take it of the heat and stir in the honey and dried lavender. Let the mixture steep for about 10 minutes. Meanwhile, sprinkle the gelatin powder over the water and let it stand until softened. Strain the lavender out of the milk mixture and bring to a simmer again. Stir in the softened gelatin. Let the mixture cool before pouring into glasses or molds. Once the mixture has been poured in, let it chill for at least 4 hours before preparing the lemon gelee.

For the lemon gelee:
4g powdered gelatin
1 tbsp water
1/2 cup lemon juice
4 to 6 tbsp sugar, depending on your preference

Sprinkle the powdered gelatin over the water and let stand until the gelatin has softened. Bring the lemon juice and sugar to a simmer in a small saucepan, and stir until the sugar has dissolved. When the gelatin has softened, stir it into the lemon juice. Let the mixture cool before layering on top of the panna cotta. After pouring into the glasses or molds, chill overnight.

For the whipped coconut cream:
1/4 cup chilled coconut cream
1 tsp icing sugar

Whip the coconut cream and icing sugar until the cream reaches firm peaks. It acts the same as normal cream. Use immediately.

Sunday, December 16, 2012

lavender shortbread cookies.


Lavender. I wonder which idea came first- lavender as bath soap or lavender as food? I'm thinking its more likely the soap and if so, who decided to use something so closely associated with showering foam in something edible? I always distanced myself from this ingredient because I thought that baking with lavender was ridiculously wrong. Like, lavender dessert? You want that purple flower to trigger brain signals of shampoo that will be sent to your tastebuds that leave you choking on its bitter and acrid taste even though it may not taste that way and destroy the whole dessert?! I have no idea what I just said but the point is, lavender seems to be way behind on the dessert trend because of its unfortunate over-association with soap. I think.


Yeah you can probably tell that I was a cynic. I approached the recipe with caution. In the end though, they weren't too bad. The amount of lavender used here is just enough to provide a subtle floral fragrance to the cookies. They act like the tea in the tea shortbread I made before. Not too overpowering. In fact, I even think that more can be used to bring out the lavender more.

For the recipe, I just changed up Dorie's sablé recipe a bit. I omitted the egg this time to see what would happen and I gathered that the cookies were a little less crumbly. It doesn't make any sense to me, seeing how the lack of the egg yolk as a binder was supposed to make the cookies more fragile. But then again, it's been a while since I made the sablé so it's quite hard to tell.


Lavender Shortbread Cookies
adapted from this recipe

The cookies won't spread much but leave at least 1 inch of space in between them.

1 cup unsalted butter
1/2 cup sugar, ground with 1 tbsp dried lavender
1/4 icing sugar, sifted before measuring
1/2 tsp salt
2 cups all-purpose flour

Beat the butter until smooth and creamy. Add the lavender sugar, icing sugar and salt and continue to beat until smooth and velvety but not fluffy and airy. Stir in the flour and until just incorporated. Take 1 tsp of dough and form into a ball. Repeat until the dough is all used up. Refrigerate the formed cookie dough for at least 2 hours.

Preheat oven to 350F. Bake for 10 minutes or until lightly browned at the sides.

Thursday, December 13, 2012

vertical swiss roll cake.


You know that saying, that how something healthy can't possibly taste good? I refute that. And this cake is here to prove it.

The cake is a sponge cake with very little added fat, filled with strawberry jam (fruits!) and a chocolate mousse made with tofu. Yes, tofu! Okay, maybe this isn't totally healthy but what I'm trying to say here is that its totally delicious. P.S. If you're wondering what's up with the tofu, seeing how I had used it here before, and now using it again, I can tell you frankly that I have no idea. I saw an unused pack in the fridge and I felt like transforming it into something sweet? I'm weird.


Oh and don't forget the chocolate peanut butter rice krispie bark. It has good-for-you peanut butter, being packed with protein and all, rice krispies for the all-important carbs and chocolate for a healthy state of mental well-being.

You will definitely notice that the mousse is not as heavy as its traditional counterparts. Well good, so eat up. The only finicky thing about it is that it sets very softly- even after chilling for a good 36 hours its consistency is that of softly whipped cream. In other words, its loose. This made frosting the outsides of the cake roll scary at first- the mousse applied to the top part of the cake slowly made its descent to the bottom. However, the problem is easy to solve. A quick chill in the fridge until the applied mousse is firm enough to be manipulated again, then use your spatula to sweep the mousse that has pooled at the bottom upwards.


I deviated from the usual strawberry jam by adding brown sugar and balsamic vinegar in replacement of white sugar and lemon juice respectively. I wish I could say that this decision was premeditated, but I would be lying. Okay maybe the brown sugar addition was, but I used the balsamic vinegar simply because it was 10 pm at night and I didn't want to be slicing and juicing a lemon for less than 1 tsp of juice. Anyway, the unique taste of the resulting jam, as part of the whole cake, is unfortunately hard to discern. I did manage to pick up a deeper richer flavour that would not be achieved with just plain sugar and lemon juice though. (By the way, the colour of this jam is beautiful. Pomegranate red, dark and glistening.)


This cake is a swiss roll cake, but of a different orientation. It is the same type of cake, but a little more forgiving in the looks department. Even if the cake cracks, it is easily covered up by the second layer of cake wrapping around it. Mine did because I used too small a pan- a 7 x 11 inch one. I changed the pan size in the recipe below to a 9 inch square one in hopes that it would ensure a thin enough cake for it not to crack when rolled. But like all swiss rolls, it is vital to be judicious in the amount of filling you put in it- lest it spills out when rolled. Bluntly put- don't be too greedy! Or you'll end up loosing precious mousse and valuable time cleaning and worrying.

The bark was actually a last minute addition, because the sides looked too plain, but I don't feel that this merely served a decorative purpose. The holy trinity (in my opinion) of flavours came together harmoniously in this cake- chocolate, peanut butter and strawberry. Don't miss it.


Vertical Chocolate Strawberry Swiss Roll Cake

For the strawberry jam:
1/4 pound strawberries
2 tbsp brown sugar
1/4 to 1/2 tsp balsamic vinegar
2 tsp cornstarch dissolved in 2 tsp water

For the milk chocolate mousse:
60g milk chocolate chips, melted and cooled
180g silken tofu
50g sugar
2 tbsp unsweetened cocoa powder, sifted
40ml water

For the cake:
10g unsweetened cocoa powder, sifted, plus extra for dusting
20ml hot water
30g egg yolks (about 1 1/2 medium eggs)
22g + 30g sugar, separated
25ml oil
15ml milk
37g cake flour, sifted
60g egg whites (about 1 1/2 medium eggs)

For the chocolate peanut butter rice krispie bark:
1/4 cup peanut butter
1/2 tbsp melted butter
1/4 cup icing sugar, sifted
pinch of salt
1/2 cup rice krispies
milk chocolate chips, as needed, melted and cooled
sprinkles, as needed
sea salt, as needed

For the strawberry jam: Place the strawberries in a medium saucepan. Place the saucepan on medium heat and use a wooden spoon to crush the strawberries. Cook the strawberries until they have released their juices and reduced slightly. Add the brown sugar and balsamic vinegar and stir to incorporate. Cook for a while more until the mixture becomes a bit more concentrated then stir in the cornstarch slurry. Let it boil, stirring constantly, until it has thickened. Pour the jam into a bowl to cool before refrigerating.

For the chocolate mousse: Combine all the ingredients in a blender and blend until combined. Pour mixture into a bowl and refrigerate overnight.

For the cake: Preheat oven to 350F. Line a 9 inch square baking pan.

Dissolve the cocoa powder into the hot water. Set aside to cool.

Whisk the egg yolks and 22g sugar together until pale. Whisk in the chocolate mixture, then the oil and milk until combined. Whisk in the flour until just incorporated.

Whisk the egg whites until they reach soft peaks. Gradually add the 30g sugar, whisking constantly, until the egg whites have formed stiff peaks. Whisk 1/3 of the egg whites into the chocolate mixture to lighten, then fold in the rest of the egg whites.

Pour the batter into the prepared pan and bake for 10 to 12 minutes or until an inserted skewer comes out clean. Cool in the pan completely.

For the chocolate peanut butter rice krispie bark: Cream the peanut butter, melted butter, icing sugar and salt together until combined. Stir in the rice krispies. Spread the mixture onto a silicon baking mat or a lined sheet pan as thinly as you can. Spread the melted chocolate on top then sprinkle over the sprinkles and sea salt. Refrigerate until firm, at least 1 hour. (The amount of chocolate you need depends on your surface area- how thinly you spread the rice krispies mixture out.) Break into large pieces.

Assembly: Sift some cocoa powder over the surface of the cake. Turn the cake out onto a flat area and remove the parchment. Slice the cake into half and spread the strawberry jam thinly across. Spread a thin layer of chocolate mousse on top. You don't want to overdo it because if you apply too much, most of it will just ooze out. Roll one half of the cake up and stand it vertically on a cake board. Wrap the second half around the first roll. Slice away the ends of the second roll to make the cake as circular as possible. Refrigerate the cake for at least an hour to set the mousse. Then, frost the outsides of the cake with the remaining mousse. (You may not use all of it.) If the mousse is too soft, most of it will slide down and puddle at the bottom of the cake. If that happens, refrigerate the cake until the mousse is firm then use your spatula to spread the mousse upwards. Chill the cake again for at least 6 hours. Lastly, decorate with the rice krispie bark pieces.

Monday, December 10, 2012

peach pie bars.


So I had peaches to use up the other day. Aren't most decisions made this way?

This is the first time I'm trying a custard made with sour cream. I always thought it would be tangy but it's not! Speaking of the custard, I was supposed to fold the peach chunks into it before pouring it on top of the base but I, unwisely, decided to defy the recipe's instructions and layered the peaches onto the base before pouring the custard over instead.

No. Don't do that.


The custard is too thick to seep through the cracks so in the end, I had bars whose halves wouldn't hold together properly. Another problem I had with the bars was their base. The cookie base has too high a butter to flour ratio, in my opinion. Consequently, after it has been baked, there were a lot of air pockets  for the liquid from the peaches and custard to seep through. On day one after the bars have been baked, their bases were still fairly firm, although already having that undercooked look. Day two the bases were soft. Spongey soft. Eww.

Hence, I suggest using less butter in the dough. After all, all those extra calories doesn't guarantee you a better tasting bar right? I've adjusted the recipe below as such.

I still have so many things that I gotta use up quick. Whipping cream, a granny smith apple, tofu, cream cheese... You'll definitely be seeing desserts made with those ingredients soon!


Peach Pie Bars
adapted from here

For the crust:
1 1/2 cups all purpose flour
1/2 cup sugar
1/4 cup brown sugar
1/8 tsp salt
1/2 cup butter, cold and cubed

For the custard:
2 eggs
1/2 cup sugar
1/2 cup sour cream
6 tbsp all purpose flour
1/4 tsp ground cinnamon
1/4 tsp ground nutmeg
1 tsp vanilla extract
pinch of salt
1 1/4 lbs peaches, peeled, pitted and chopped

Preheat oven to 350F. Line a 8x8 inch square pan with aluminum foil and grease. Make sure that enough foil extends from the pan to ensure easy removal later on.

For the crust, stir the flour, sugars and salt together. Cut in the butter until the mixture is crumbly. Reserve 1 cup of the mixture for the topping later and press the remaining mixture into the bottom of the pan. Bake for 12 to 15 minutes. Cool for at least 10 minutes.

To make the filling, whisk the eggs in a large bowl and add the sugar, sour cream, flour, cinnamon, nutmeg, vanilla and salt. Gently fold in the chopped peaches and pour the mixture over the crust. Use a spatula to spread the custard evenly. Top with the reserved crumble and bake for 45 to 55 minutes or until the custard is set. Cool completely before slicing.

Saturday, December 8, 2012

japanese tofu cheesecake.

Sometimes, when our days have been filled with a pound too many of butter and sugar, yet we want to bake some more, we try to cheat ourselves a little by slashing a few calories of the recipe. Thankfully, the pastry world is merciful- there are some desserts that are destined to be made less pant-busting. Like this cheesecake. Because it uses tofu. The tofu replaces a huge percentage of the cream cheese, lowering the calorie count significantly. The resulting dessert is also incredibly smooth and pudding-like. Of course, if you are a hardcore traditional cheesecake fan, you would probably notice the noticeable lack of cheesiness. This however, is precisely why I'm pretty okay with this cheesecake- I'm not a cheese habitue. Except for buffalo mozzarella. That stuff rocks.


I first saw this recipe over at Evan's Kitchen Ramblings, who suggested altering the recipe's proportions of tofu and yogurt, using more of the former and less of the latter because the original amount of yogurt made the cheesecake too tangy. I followed her suggestion, and the cheesecake turned out hardly tangy at all, which is fine with me. A bit more tang though, would be more refreshing. Perhaps a better balance could be achieved by changing some of the omitted yogurt's worth in weight to cream cheese too instead of just tofu. Using too much tofu can dilute the taste of cream cheese.

I decided to remake the cheesecake in cups and I felt that something was missing at the top so I added a layer of apricot jam that I melted down with some lemon juice before spooning it on top of the already set cheesecake. It's an extra step, and a superfluous one. The taste of the jam is so strong that it can overwhelm the delicate cheesecake.


Japanese Tofu Cheesecake
makes 6 glasses
adapted from here

If you like your cheesecake more tangy, up the amount of yogurt but be sure to subtract the equivalent from the cream cheese and/or tofu. Similarly, feel free to increase the amount of cream cheese if you like your cheesecake cheesier, but be sure to decrease the equal weight of from the other two ingredients.

135g digestive biscuits, crushed finely
62g melted butter
150g silken tofu
100g cream cheese
50g yogurt (I used sour cream- yogurt was MIA at the moment)
50g whipping cream
50g sugar
1 tbsp lemon juice
5g powdered gelatin
50ml hot water

Mix the crushed digestives and melted butter together in a bowl. Divide the mixture equally amongst the 6 glasses.

Pour the hot water into a small bowl and sprinkle over the powdered gelatin evenly.

In a blender, combine the tofu, cream cheese, yogurt, whipping cream, sugar and lemon juice and blend until completely smooth and combined. When the gelatin has softened, pour it into the blender and blend until combined. Pour the cheesecake batter in equal amounts into the glasses. Refrigerate until set, at least 3 hours.

Friday, December 7, 2012

salted caramel filled chocolate cupcakes with vanilla cream cheese buttercream and pretzels.


Hey you all! I got myself a black plexiglass! I've been browsing through photos like this that have this dark mirrored effect that I fell hopelessly in love in and I wanted to replicate such an effect myself too. After some quick research, I found out that plexiglass is used. I got a small sheet from an arts and crafts shop and it is really quite inexpensive. For the backdrop, I used a black piece of cloth, which unfortunately, isn't as dark as I would like. Hence, the darkness of the foreground and background is uneven. Oh well, I'll deal until I find a better cloth.

I feel that an all-black shooting setup is extremely convenient when you have limited props or simply don't feel like doing elaborate arrangements to spruce up the picture. The black serves as a great contrast, showing off your food by allowing it to naturally fall into the spotlight against its singular classy shade.


Although using this setup to elevate food photos sounds really simple (just make the entire background black), there is a trick to using plexiglass to its fullest potential, a trick that I didn't realize until after I've put away my camera. When you position your food, you have to place it such that the camera can capture its full reflection too. I didn't achieve that- my cupcake's reflection is half cut off. What I should have done was to move the cupcake further back or make the frame bigger.


These cupcakes are super fun to eat. Not only is there crunch and saltiness from the pretzels, the pool of caramel in the middle provides a pleasant surprise, especially for those who don't know what went into the cupcakes. It oozes out like golden lava. The caramel moistens the surrounding cake as well. The vanilla cream cheese buttercream isn't too heavy on the cream cheese and hence not too tangy, which suits me well. It leans towards the sweeter side. However, I like this recipe for its consistency. Unlike most cream cheese frostings, this one is able to reach a rather stiff consistency. For a more classic cream cheese frosting, I suggest you try this one. It borders on sweet and tangy, and leans towards either side depending on its temperature.

While trying to create a good looking swirl on top of the cupcakes, I used quite a bit of buttercream and even I had to admit, it was a lot!


Salted Caramel Filled Chocolate Cupcakes with Vanilla Cream Cheese Buttercream and Pretzels

I know that this is a ridiculously long name but I like to call things what they are. I still can't get the hang of piping with this round tip. I have to tell ya- my piping was pretty unsightly before I covered up the mess with the pretzels. I want to be able to pipe like this! Perfectly centered circular swirls that manage to fill up the entire surface area. Must. Practice. More.

Chocolate cupcake recipe
Bake the cupcakes and allow them to cool completely. You should get about 24.

Salted caramel recipe
Make the salted caramel sauce a day ahead. Store in the fridge until ready to use.

Pretzel crumbs recipe:
8 ounces pretzels, crushed coarsely
3/4 cup unsalted butter
2 tbsp brown sugar

Preheat oven to 350F.

Melt the butter in a medium saucepan. Whisk in the brown sugar. Off the heat, stir in the pretzel pieces to coat. Turn the mixture out onto a baking sheet and bake for 10 minutes.

Vanilla cream cheese buttercream recipe:
1 cup butter, softened
1/2 cup cream cheese
1 1/2 tsp vanilla bean paste or 1/2 a vanilla bean's worth of seeds
1 1/2 tsp vanilla extract
420g icing sugar plus more if needed, sifted

Cream the butter and cream cheese until combined. Add the vanilla bean paste or seeds and extract and mix to incorporate. Stir in the icing sugar until incorporated then beat on high speed until fluffy. Use immediately or chill for half an hour until firm enough to frost or pipe.

Assembly: Use a small sharp knife to carve out a cone of cake in the center of a cupcake. Slice the topmost part of the cone off- you should get a flat circle of cake. Fill the hole with salted caramel sauce just shy of full. Cover the salted caramel with the cake. Pipe the buttercream on top of the cupcake. Chill the cupcake for 15 minutes if the buttercream is getting soft. If not, lightly press the pretzel crumbs into the sides of the cupcake. Repeat for the rest.