I've Moved!

Saturday, June 30, 2012

chocolate chip almond cookie dough brownies.


Chocolate chip cookies have been a huge hit ever since time immemorial, a little way back chocolate chip cookie dough truffles were popping up on every other blog, and now cookie dough has even been doubled up with brownies. I may be a little late, but I think chocolate chip cookie dough brownies are still in fashion.

P.S. Have you heard of The Cookie Dough Lover's Cookbook? It sounds so delicious I want to eat the whole book! Oh I want it so badly.

You know how some recipes have flavour pairings that you don't naturally think of together? I think this one is one of those recipes. The kind of recipes where you take two components that you love and put them together, because 1 + 1= 2 so you'd love the final creation doubly! In relation to that, I'm not such a cookie dough fanatic and I love a good brownie, but only once in a while. In other words, I'm just sort of neutral towards chocolate chip cookie dough and brownies, so overall, I think that this brownie creation is just pleasant. Not outstanding, but certainly worth a try if you love cookie dough and brownies.

Having said that, I think the individual components are commendable. The brownie layer is chocolaty, fudgy and dense. Typical words you would use to describe a good brownie, but here's the difference. The batter is a lot thicker than what I'm used to- it's almost of a doughy consistency, but that is precisely what makes it so sturdy and firm. And when refrigerated, it creates a difference sort of density. Some brownies have more of a batter consistency so when you underbake it slightly and then chill it, they have a texture similar to fudge. Fudgy is not bad. In fact, fudgy is good. But sometimes, the added flour somehow cuts through the richness of the chocolate a bit. Or I think.


If you ask why the almonds in the cookie dough, it's because I know that the cookie dough would probably be quite sweet (and because of that, I reduced the sugars a bit), so I wanted a different sort of flavour apart from the chocolate chips in the dough. I initially thought of walnuts, which is actually quite a classic combination with chocolate chips, but I didn't have any. But I had almonds, so that was what I used. This would be a good time to mention that if you have salted almonds, salted peanuts etc, I highly recommend that you use those. The saltiness would balance out the overall sweetness. If you're a fan of the sweet-salty combination, well, here you go!

The ratio of add-ins to dough was very high. I don't know about you but I would like more dough actually. If I were to make this again, I would increase the decrease the quantity of add-ins or increase the quantity of cookie dough. Although who am I kidding- increase the cookie dough!

My cookie dough turned out quite grainy. It's to be expected in a raw cookie dough but I find the grittiness frankly quite distracting. This could be because I did not add the milk so the sugars had less liquid to dissolve in. Perhaps the graininess might disappear after a day or so? If you've made this before could you let me know how yours turned out?

Final parting words- make this with nuts! You won't regret it!


Chocolate Chip Almond Cookie Dough Brownies
lightly adapted from Recipe Girl
makes 32

I made quite a fair bit of changes to the original recipe, the most drastic one probably being the mixing method of the brownie. I reshuffled the addition of ingredients such that you would only need 1 bowl for the entire process. Throughout the whole recipe, I also swapped the salted butter for unsalted with an addition of salt. I also reduced the amount of sugars in both the brownie and the cookie dough. And obviously, I added almonds!

Brownie Base
4 ounces unsweetened chocolate, finely chopped
1 cup unsalted butter, diced
1 1/2 cups light brown sugar
2 tsp vanilla extract
1/4 tsp salt
4 large eggs
1 cup all-purpose flour
1/2 cup mini chocolate chips

Cookie Dough
3/4 cup unsalted butter
1/2 cup light brown sugar
1/2 cup granulated sugar
3 tbsp milk
1 1/2 tsp vanilla extract
1/4 tsp salt
1 1/2 cups all-purpose flour
1 cup chocolate chips
1/2 cup toasted almonds, roughly chopped (you could also use walnuts, macadamias,etc)

For the brownies: Preheat oven to 325F. Prepare a 9 x 13 inch baking pan.

Melt the chocolate and butter in a heatproof bowl over simmering water. Add the brown sugar, vanilla and salt. Add the eggs one by one, making sure that one is thoroughly incorporated before adding the next. Stir in the flour until just combined. Stir in the chocolate chips.

Spread the batter into the prepared pan and bake for 25 to 35 minutes or until a skewer inserted into the center comes out mostly clean. Let cool completely before layering on the cookie dough.

For the cookie dough: Cream the butter and sugars together until light and fluffy. Mix in the milk, vanilla and salt. Mix in the flour until just combined. Fold in the chocolate chips and toasted and cooled almonds.

Spread the cookie dough over the cooled brownies. Refrigerate until firm before cutting.

Saturday, June 23, 2012

cook's illustrated's ultimate chocolate cupcakes.


What a difference baking soda really makes! The batter rose so much more this time. (The last time I made a really bad boo boo.) Lesson learnt: Look at the labels before plonking in anything. And probably don't bake before I'm fully awake.

These cupcakes are really really good. They are intensely chocolaty, just like my go-to recipe. But unlike my go-to recipe (let's just call it Gourmet's for convenience's sake), the coffee is a lot more prominent. These stand in the middle of Gourmet's and Ina Garten's (my first chocolate cake love) in terms of density. In other words, or format:

Density Ranking (starting from the most dense to the least)
1. Gourmet
2. Cook's Illustrated
3. Ina Garten

Gourmet's is also a lot firmer when refrigerated as compared to Cook's Illustrated's even though they both contain melted chocolate in the batter. Ina Garten's having none, has the fluffiest texture and yields the softest cupcakes amongst the three recipes.

Chocolaty-ness Ranking (starting from the most to the least)
1. Gourmet and Cook's Illustrated
2. Ina Garten

It's a tie for the intensity of chocolate flavour for now until I find time to do a side-by-side comparison. However, if you ask me to pick a recipe now, I would go for Gourmet's because it does not you to make ganache and it's less fussy in that sense. Which brings me to the ganache. I think although its a novel idea, using it to add to the moisture of the cupcake, I don't think its really necessary because the cupcakes themselves are pretty awesome without it. Most of mine merely sank to the bottom and I doubt it really served its purpose but I relished the little puddle of chocolate all the same.


I topped these cupcakes with some really simple whipped cream which paired the rich cupcakes better than a buttercream, I would say. It's great because it's quick to whip up too, but the only problem is that whipped cream waters out after a few hours, which was why I picked a recipe for stabilized whipped cream that would safely last up to 24 hours in a cool environment.

In short, yes another chocolate cake recipe to be considered when in need of one! I would do away with the ganache though.


Cook's Illustrated's Ultimate Chocolate Cupcakes
makes 12

Ganache
2 ounces bittersweet chocolate, finely chopped
1/4 cup heavy cream
1 tbsp icing sugar

Chocolate Cupcakes
3 ounces bittersweet chocolate, finely chopped
1/3 cup dutch-processed cocoa
3/4 cup hot coffee
3/4 cup bread flour
3/4 cup sugar
1/2 tsp salt
1/2 tsp baking soda
6 tbsp oil
2 large eggs
2 tsp vinegar
1 tsp vanilla extract

Stabilized Whipped Cream
2 tbsp icing sugar
1 tbsp cornstarch
1 cup heavy cream
1/2 tsp vanilla extract

For the ganache: Place chocolate, cream and icing sugar in a medium microwave-safe bowl. Heat on high power until mixture is warm to touch, 20 to 30 seconds. Whisk until smooth; transfer bowl to refrigerator and let stand until just chilled, no longer than 30 minutes because the ganache would get too firm.

For the cupcakes: Preheat oven to 350F. Line a standard size muffin pan with paper liners.

Place chocolate and cocoa in a medium bowl. Pour hot coffee over mixture and whisk until smooth. Set aside and let it cool completely.

Whisk flour, sugar, salt and baking soda together in a medium bowl.

Whisk oil, eggs, vinegar and vanilla into the cooled chocolate-cocoa mixture until smooth. Add flour mixture and whisk until smooth. Divide batter evenly amongst paper liners. Place one slightly rounded teaspoon of ganache filling in the center of each muffin cup of batter.

Bake until cupcakes are set and just firm to touch, 17 to 19 minutes. Let cool before frosting.

For the whipped cream: Refrigerate mixing bowl and beaters for at least 15 minutes.

In a small saucepan, place the icing sugar and cornstarch and gradually whisk in 1/4 cup of cream. Bring to a boil, stirring constantly, and simmer until the cream is thickened. Scrape into a small bowl and cool to room temperature. Add the vanilla.

Beat the remaining 3/4 cup of cream just until traces of beater marks begin to show distinctly. Add the cornstarch mixture in a steady stream, beating constantly.  Beat just until stiff peaks form when the beater is raised.

Thursday, June 21, 2012

quick cinnamon rolls.


The reason why I've never be suckered in by promises of quick versions of time-consuming recipes is because firstly, if I want to bake something, I will plan ahead. And I will make time for it instead of having to squeeze my baking slot in a busy schedule. In other words, I've got the time, so why rush? The second reason is because I'm skeptical of how the new adaptation would fare as compared to the original. I mean, sure, it is faster but would it be less tasty?


That's why even though there's a panoply of quick cinnamon roll recipes out there, garnering many fans to boot, I've never really bothered to try one. I decided to give it a shot this time because I had extra buttermilk in the fridge and I've already made blueberry muffins and I didn't feel like pancakes. Not to mention I was missing my favourite spice cinnamon.

So I threw the dough together, patted, buttered, rolled, sliced and baked. Like normal yeasted cinnamon rolls, they perfumed the house with the wonderful aroma of heavenly heavenly cinnamon, but sans the yeastiness and bread dough.

The cinnamon-mixture was erupting out of the tiny volcanoes of cinnamon rolls. I lamented the waste of goo and thanked god that I remembered to spray the pan.


And then came the hard part. How to choose which cinnamon roll has the most goo? I am by no means an expert, but I have a general guideline garnered from past experiences. My own, experiences, so please excuse me if it does not apply across the world of cinnamon rolls: Look for the cinnamon roll which shows the most goo. I mean, I know its kinda obvious but I used to think that cinnamon rolls with the least visible goo would actually have the most because that means very little leaked out and most of the cinnamon-sugar mixture would still be inside. But I soon realized that the reason why exploding (with goo) cinnamon rolls would have more goo because there's too much goo to be contained inside!


Now past the choosing, let's get down to the munching. Surprisingly, it wasn't the goo or the fluffiness of the dough that convinced me that quick cinnamon rolls are worthy substitutes of their traditional yeasted counterparts, it was the crunch of the tops of the dough that sealed the deal. This sort of crunch is something that you will never ever get from a yeasted dough. Of course, the insides of the dough were total yums as well- fluffy, moist, buttery, a little bit salty. In fact, even though yeasted buns are quite easy to make, these quick cinnamon rolls are more of a fool-proof version because the slightest overbaking of yeasted dough can result in unpleasant dryness while a few minutes extra wouldn't do as much damage to the moisture of the dough. Plus, you get some really good crunch!


I always think that cinnamon-sugar mixtures of cinnamon buns are missing a little something. They are just sugar and cinnamon-y (duh) and they need some kick to break the monotony. I'm thinking that instant espresso powder would add some spice, going down the non-chocolate route, or even bacon for some saltiness! If you like to play safe, toasted walnuts are always good too.

These are really good if you're short on time, but I wouldn't say that they are suitable substitutes if you're looking for the deep complex flavour yeasted breads can give. Plus, bread dough is more porous than biscuit dough and can absorb a hell lotta butter which is precisely what makes the centre of the spiral so pleasantly soggy and bursting with that golden fat. Having said that, I would definitely make these again and again and again.


Quick Cinnamon Buns
makes 8
recipe adapted from America's Test Kitchen

Cinnamon-Sugar Filling
3/4 cup dark brown sugar, packed
2 tsp ground cinnamon
1/8 tsp ground cloves
1/8 tsp table salt

Biscuit Dough
2 1/2 cups all-purpose flour, plus more for flouring work surface
2 tbsp sugar
1 1/4 tsp baking powder
1/2 tsp baking soda
1/2 tsp table salt
1 1/4 cups buttermilk
6 tbsp unsalted butter, melted, divided

Icing
2 tbsp cream cheese, softened
2 tbsp buttermilk
1 cup icing sugar

Preheat oven to 425F. Prepare a 8 inch square pan.

To make cinnamon-sugar filling: Whisk all ingredients together. Set aside.

To make biscuit dough: Whisk flour, sugar, baking powder, baking soda and salt together in a large bowl. Whisk buttermilk and 2 tbsp melted butter together. Add liquid to dry ingredients and stir until liquid is absorbed, about 30 seconds. Transfer dough to a lightly floured work surface and knead until just smooth and no longer shaggy, about 1 minute.

Pat dough into a 12 x 9 inch rectangle. Brush 2 tbsp of melted butter onto the dough, spread cinnamon-sugar mixture on top and roll it up from the longer side. Slice into eights and arrange rolls in the prepared pan.

Bake until edges are golden brown, 20 to 25 minutes. (Mine took 15 minutes individually baked in a muffin pan.) Remove rolls from pan onto a rack and cool for 5 minutes before icing.

For the icing: Whisk cream cheese and buttermilk in a large bowl until thick and smooth. Sift the icing sugar over and whisk until a smooth glaze forms.

Wednesday, June 20, 2012

twice baked shortbread.


Baking cookies isn't really my top priority. Cakes always steal the limelight, especially sky high layer cakes with a thick slathering of frosting. Yum. But there's only so often you can make such cakes, and when I'm itching to bake something, I have to think of stuff that is a little less indulgent and suitable for everyday nibbling. And that's what cookies are for no?


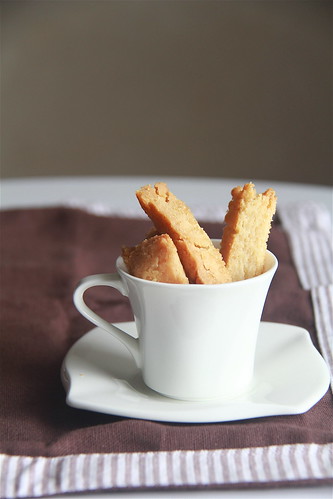
This shortbread recipe caught my eye because it adopts an unconventional baking method for its kind. It uses the way we bake biscotti, which is to bake it at low temperatures, twice. The first to cook the dough through, the second to dry it out and make it crisp-crunchy. This is perfect because I always lament the lack of crunchy as shortbreads are often to tender to do more than crumble away in your mouth.


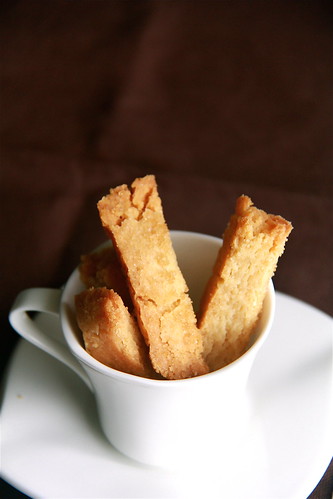
These shortbreads are indeed crunchy, buttery and delicious and fabulously easy to make. In fact, I didn't bother transferring the butter to another bowl to mix it with the other ingredients. I did everything in a saucepan!


Twice Baked Shortbread
recipe by Alice Medrich

11 tbsp unsalted butter, melted and still warm
5 tbsp sugar
1 tsp vanilla extract
1/4 tsp salt
1 1/2 cups all-purpose flour
extra coarse sugar for sprinkling

In a medium bowl, combine the melted butter, sugar vanilla and salt. Add the flour and mix until just incorporated. Pat the dough evenly into an foil-lined 8 inch square pan. Let it rest for at least 2 hours or overnight (no need to refrigerate).

Position a rack in the lower third of the oven and preheat the oven to 300F. Bake the shortbread for 45 minutes.

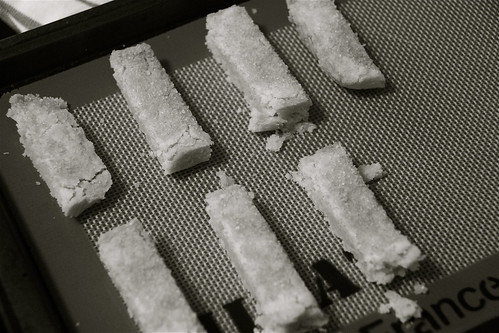
Remove pan from oven, leaving the oven on. Lightly sprinkle the surface of the shortbread with the coarse sugar. Let the shortbread cool for 10 minutes.

Remove shortbread from pan and cut it into oblong "fingers" or squares. Place the pieces slightly apart on a parchment-lined baking sheet and bake for another 15 minutes. Cool on a rack before storing.

Sunday, June 17, 2012

cook's illustrated blueberry muffins.


Ah. Blueberry muffins. One of those recipes that people are constantly searching for the one. I myself have made a few muffin recipes before in search of my ideal muffin- spongy texture, moist and the very important huge domed top.

Along the course of my search, I found the trick to getting that spongey fluffy texture I so love, which is basically to whip the eggs and sugar together until pale and voluminous, not unlike a sponge cake method. The moistness of the muffin is something that can be controlled by careful monitoring of baking times. So that just leaves the domed top, the hardest component.


Flour bakery's recipe yielded muffin tops that were the closest to my idea of perfection. Pity about the dense texture and the sticky surface that soon developed a few hours later. If I could combine the sponge cake method with this recipe's proportions, I bet that would make a pretty awesome muffin. I must try it soon.

Allrecipe's version came pretty close to muffin heaven too. The tops were super crunchy and I would invest in a muffin top pan just for this recipe. Pity that I switched from the conventional squatter muffin liners for a taller slimmer one, resulting in more batter going into the "stump" and less for the top. If I had used the regular ones, I would be able to see just how big the tops can really get. However, I noticed that this batch of muffins had tops that tend to be more like humps whereas I prefer tops that expand more sideways than upwards, like Flour bakery's.


So coming back to Cook's Illustrated's recipe. It checked off most of my requirements- the spongey-ness and the moistness (even if I did swap the oil for applesauce) and it wasn't too sweet too, but the top wasn't magnificent. I filled the muffin cups all the way to the brim, save for the last one because I was overly generous with the others, but they didn't give quite the mushroom top I expected. I omitted the lemon-sugar topping and the top wasn't crunchy like I would like. I feel no remorse for docking points here because my perfect muffin recipe would yield muffins with crunchy tops without extra toppings like streusel and sugar.

However, I must commend this recipe on its blueberry component. Cooking down the blueberries into a jam really amped them up. None of the grey-ish bland-tasting splotches in your muffins! In fact, I would definitely borrow this idea and make all my future blueberry muffins with blueberry jam.


Best Blueberry Muffins
adapted from Cook's Illustrated
makes 12

Lemon Sugar Topping
1/3 cup sugar
1 1/2 tsp finely grated lemon zest

Muffins
2 cups fresh blueberries, divided
1 1/8 cups + 1 tsp sugar
2 1/2 cups all purpose flour
2 1/2 tsp baking powder
1 tsp salt
2 large eggs
4 tbsp unsalted butter, melted and cooled slightly
1/4 cup vegetable oil
1 cup buttermilk
1 1/2 tsp vanilla extract

For the topping: Stir together sugar and lemon zest in a small bowl until combined. Set aside

For the muffins: Preheat oven to 425F. Prepare a standard muffin tin.

Bring 1 cup blueberries and 1 tsp sugar to a simmer in a small saucepan over medium heat. Cook, mashing berries with spoon several times and stirring frequently, until the berries have broken down and mixture is thickened and reduced to 1/4 cup, about 6 minutes. Transfer to a small bowl and cool to room temperature, 10 to 15 minutes.

Whisk flour, baking powder and salt together in a large bowl. Whisk the eggs and remaining sugar together in a medium bowl until thick and homogenous, about 45 seconds. Whisk in butter and oil until just combined. Whisk in buttermilk and vanilla until just combined. Fold egg mixture and remaining cup of blueberries into the flour mixture until just moistened. The batter will be very lumpy. Do not overmix.

Divide batter equally amongst prepare muffin cups. Swirl a teaspoon of cooked blueberry mixture into the center of each mound of batter. Sprinkle lemon sugar evenly over muffins.

Bake until muffin tops are golden and just firm, 17-19 minutes.