I've Moved!

Thursday, June 13, 2013

easy candy bar tart bars.


Sometimes I just feel like writing. There's nothing in particular I would like to write about- I just want to get words out on a piece of paper, letters typed out onto a computer screen. It seems like this feeling always arises when I'm holed up at home with nobody to talk to (my parents don't count as people I would want to hold an extended conversation with; I hate to say it but it's true), went through something really stressful, am struck by a bout of inspiration, just read a good book... Today, it's a mix of reasons 1, 2 and 4- well, 1 doesn't need any explanation; I just did too much math in sweltering heat and I think the Jodi Picoult book I'm in the midst of might have a part to play.


But ultimately, I'm here to tell you about these little confections. No, there isn't a typo in the title. True, the original title is just supposed to be "Easy Candy Bar Tart", but I added "Bars" behind it for a good reason. Here's the story:

I didn't have enough oreo cookies to make even half the recipe so figured that I should just do mini tarts. I didn't want to use the molds with the fluted edges however, so I got out some of my metal rings usually reserved for making entremets. I managed to get enough crust to fill 3 square metal rings. I then chilled the crusts while I got on with the caramel. Oh wait I gotta tell you about my little caramel hoo ha. Let's pause this story so that I can start another.

I have this tendency to let my caramel cook too far, meaning that it usually gets darker than I want it to be, but it's still safe from being burnt. This time, I was determined to make a lighter caramel because I wanted it to be sweet. So there I was, watching the sugar caramelize and gradually turn into darker shades of amber when I found the perfect point to stop. I yanked the pan off the heat, but I couldn't find another place on the stovetop to put the pan down because the other two burners were occupied by various objects I can't remember. I was panicking. The caramel was turning darker by the second. In the end, I had to put the pan back down on the original burner, heat turned off of course, and scrambled to pour in the cream. I slowed down the cooking, but it wasn't enough. Finally, I ended up with a caramel that was perhaps just the perfect shade usually but darker than what I wanted it to be. Can you imagine what would have happened if I was aiming for the regular colour you should stop the caramel from cooking at?

Okay, resume original story. Caramel fiasco over, nuts stirred in and mixture poured into the metal rings, I chilled the half-finished tarts again. While I was waiting for the caramel to cool completely in the fridge, I was wondering if the tarts were too big. After all, these are pretty rich. The squares measured at about 2 x 2 inches. And then I wondered if I should cut them into half. I decided that I probably should, given the amount of calories. So when the tarts were cold and the chocolate glaze was ready, I got out the tray of tarts and proceeded to halve them, and when I did, they looked just like mini candy bars! Which is pretty funny really, because the recipe was designed to transform a regular candy bar into tart form with an added bonus of being easy to assemble while I was gradually reversing the meticulous planning that went into the recipe at every stage (with the exception of the caramel bit but I did fiddle with it too). The bars were cut; there was no turning back. So I laughed to myself and decided to dip each and every bar entirely in the glaze to imitate real candy bars, effectively rendering the recipe title a misnomer.
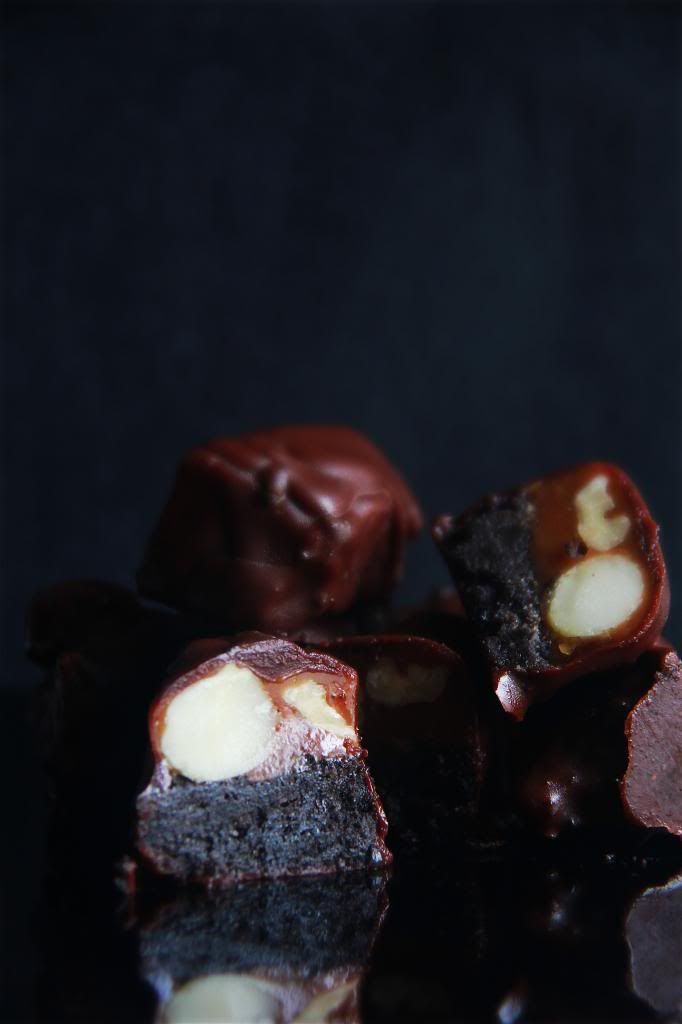

And now you see why I call these "Easy Candy Bar Tart Bars". I would have just done away with the word "tart" and probably "easy" but I acknowledge that the chocolate cookie crust does provide a tart element to these bars, and the crust was a breeze to make. The chocolate dipping part was a little messy though, the way I did it.


Oh these tart/bars... where do I start? They are Phenomenal with a capital P. I think the crust definitely plays the starring role in these bars. I ate them using my fingers and because the crust was not actually meant to be so sturdy, it crumbled away on the plate and in my mouth. The flavour of the chocolate cookie crumbs and chocolate glaze was so o.m.g. The crust makes these so much better than real candy bars because I never really liked the nougat  layer in them. (I had a lot of trouble typing out this paragraph because the crust + chocolate was so good it is hard to put in words how delicious it is.)

For the caramel portion, I used a 50-50 mix of macadamias and walnuts because I just love caramel and macadamia nuts together. Needless to say, I adored the caramel, even though I have issues with its chewiness. And I shouldn't have used this chocolate glaze recipe if I knew that I was going to use it as a candy bar coating. It melted really fast at room temperature.

The conclusion? This recipe is awesome. Make it!

And then give some to me.


Easy Candy Bar Tart
recipe adapted from Baked Elements
makes a 9 inch tart

For the crust:
30 chocolate wafer cookies (about 6 ounces), crushed
1 tbsp sugar
6 tbsp butter, melted

For the caramel:
1 cup sugar
1/3 cup heavy cream
5 tbsp butter
1/2 tsp salt
1/2 tsp vanilla extract
2 cups walnuts, toasted

For the chocolate glaze:
4 ounces dark chocolate
3 ounces butter
1 tsp light corn syrup

Prepare a 9 inch springform pan.

For the crust: Whisk the wafer crumbs and sugar together. Stir in the melted butter until evenly combined. Press the crust into the bottom and up the sides of the prepared pan. Refrigerate while you make the caramel.

For the caramel: Combine the sugar and 1/4 cup water in a medium saucepan with high sides. Cook over medium-high heat, stirring until the mixture dissolves. Increase the heat to high and cook until it begins to turn a rich amber color, without stirring. Remove from heat and slowly stream in the cream. After the mixture stops bubbling, return pan to very low heat and whisk in the butter. Continue whisking gently until the caramel is uniform and slightly thickened. Stir in the vanilla and salt. Remove pan from heat and stir in the toasted walnuts. Pour filling into the prepared crust and chill tart for at least 1 hour.

For the chocolate glaze: Place the chocolate, butter and corn syrup in a bowl over a pot of simmering water. Stir mixture until smooth. Remove from heat and cool slightly before pouring over the tart. Refrigerate for another 1 hour to set the glaze before slicing and serving.

Sunday, June 9, 2013

classic diner-style chocolate pies.


I'm getting tired of cake so let's talk pie- chocolate pie. Chocolate pie with a chocolate pudding laced with malt powder and a bit of booze, that is. And topped with the fantabulous fat called whipped cream that we all, well, most of us anyway, know and love.


So you might have noticed that I mentioned that the pudding contains malt powder and alcohol, specifically, whiskey. I'm sad to say that the malt was undistinguishable but the booze was. You can tell that it's not your normal chocolate pudding. But then again, I added more than the recipe called for by accident because trying to pour liquid from a bottle that is more than 3/4 full and altogether weighs more than a pound with one hand into a tiny shallow half teaspoon is just a bit difficult.


I tried to liven up the dull chocolate cookie crumb crust with some confetti (inspiration from here) but I couldn't show off the effect because I couldn't unmold the crust! I foolishly thought that I could at first, but then again, it is a no-bake crust. Or perhaps its not the right reason- I'm sure some no-bake crusts can be unmolded just fine. Or can't they? Oh I don't know what to think anymore. I'm just incredibly disappointed that the confetti went to waste. Plus, they kind of ruined the crust because I stored them with my dried lavender buds and they kinda smell lavendery now, i.e. my chocolate crust was perfumed with lavender. In a bad way.


This is going to be hilarious but my favourite part of the pie was the whipped cream, which wasn't made from the recipe provided in the book, a vanilla-bean one. I just threw in a bit of icing sugar into the cream, whipped it and ta-da. Didn't even add in vanilla extract. I guess why I liked it so much is because I used cream from a freshly-opened pack. I don't always get the chance to eat whipped fresh cream. Usually it gets folded into some kind of custard or used in a ganache (in its un-whipped state of course) etc. I'm definitely going to take advantage of newly-opened packs of cream to make pure whipped cream to stuff my face with from now on.


Classic Diner-Style Chocolate Pie
adapted from Baked
makes a 9 inch pie

For the crust:
30 chocolate wafer cookies (about 6 ounces), crushed finely
1 tbsp sugar
6 tbsp butter, melted

For the chocolate pudding:
1/2 cup sugar
3 tbsp chocolate malt Ovaltine
1 tsp salt
1/4 cup cornstarch
5 large egg yolks
2 cups whole milk
1/2 cup heavy cream
5 ounces dark chocolate, chopped
2 ounces milk chocolate, chopped
2 tsp whiskey
1 tsp vanilla extract

whipped cream, to top the pie with

For the crust: Mix the crushed cookies and sugar together. Add the melted butter and mix until combined. Press mixture evenly into the bottom and up the sides of a 9 inch round pie plate. Freeze the crust while you make the filling.

For the chocolate pudding: Whisk the sugar, Ovaltine, salt and cornstarch in a saucepan. Whisk in the egg yolks until combined. Stream in the milk and heavy cream while whisking constantly until combined. Bring mixture to a boil over medium heat, whisking constantly. Let the mixture boil for 30 seconds and remove from heat.

Add the chocolates, whiskey and vanilla extract and whisk to incorporate. Let the mixture cool for at least 15 minutes before filling the crust. Refrigerate for at least 4 hours.

Mound whipped cream on top of the pie and serve.

Thursday, June 6, 2013

vanilla malted cookies.


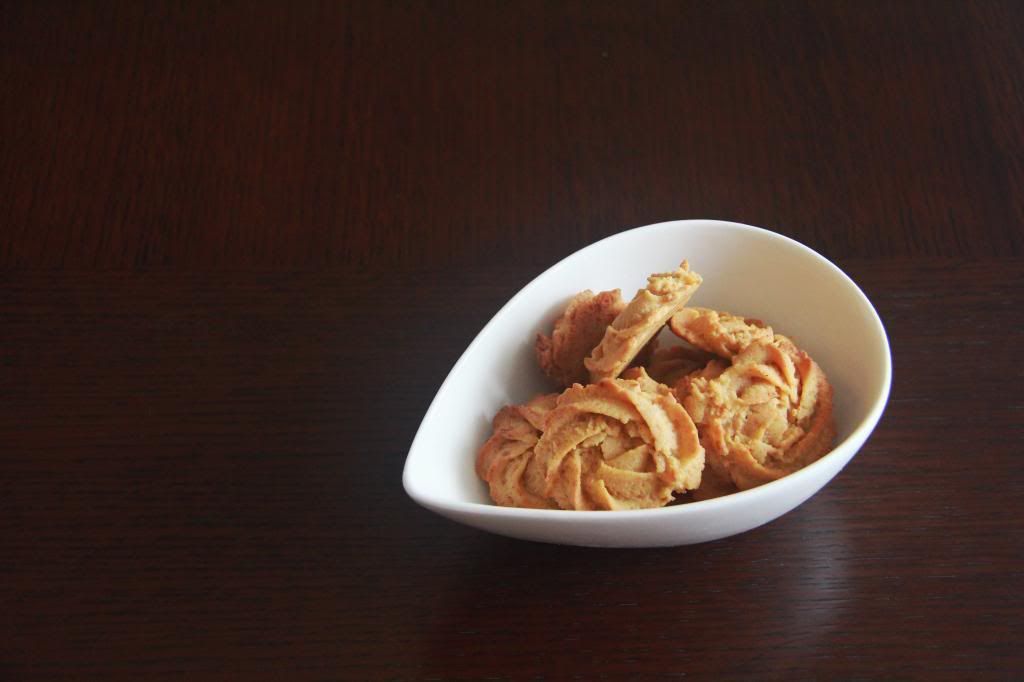
These cookies, I tell you, were a big pain in the behind to make. I had to use, oh, three piping bags, two nozzles and close to an hour just piping the dough. Yeah. They were just a leetle bit nerve-wracking.

The problem was the dough itself- it was way too stiff. Even after I dribbled in a tablespoon of milk, it was decidedly stubborn. Perhaps I should recount my experience from the beginning.

Try #1: With the first piping bag and a small star tip (because I wanted my cookies to be dainty and elegant). The dough was too stiff (I have not added in any milk yet) and the tip was too small. The bag burst. Okay, no biggie, it happens sometimes. I grabbed a new piping bag and a bigger star tip, which brings us to...

Try #2: I added a bit of milk and the dough was a tad more pipeable, but apparently not enough. The inertia of the dough when I tried to squeeze it out was so great that the tip dislocated itself from the piping bag, i.e., it just flew out.

Try #3: With a great deal more milk and frustration (and a new piping bag), I managed to churn out loops of dough more easily. But as I was piping, I noticed that the dough was starting to get kind of squishy. Not only that, pools of butter were oozing out due to the heat from my hands and all the abuse it has been through ever since I started trying to pipe it. I unceremoniously dumped all the unpiped dough back into a bowl, covered it with clingwrap and pushed it into the deepest darkest depths of my overcrowded fridge, and gave up.


But. At least the cookies that survived the arduous piping process were worth it. These are, without a doubt, one of the most addictive and delicious cookies that has ever passed my lips. They are the kind of cookie that would make you go back for just one more but end up with a handful; the kind of cookie that you wish to never have to share and hoard shamelessly for yourself and yourself only; the kind of cookie my hard-to-please mother would begrudgingly give a nod to when I ask if they were good. There really is something magical about malted milk powder, isn't there?

Now, if you excuse me, I must find that remaining bowl of cookie dough.


Vanilla Malted Cookies
adapted from Martha Stewart
makes about 6 dozen

2 1/4 cups all-purpose flour, or more if dough is too soft (it was originally 2 3/4 cups but I found the dough to stiff to pipe)
3/4 cup plain malted milk powder
1 tsp baking powder
3/4 tsp salt
1 cup butter
3 ounces cream cheese
1 cup sugar
1 vanilla bean, split, seeds scraped and reserved
1 large egg
1/2 tsp vanilla extract

Whisk flour, malted milk powder, baking powder and salt together.

Cream the butter and cream cheese until smooth. Add the sugar and vanilla seeds and beat until combined. Add the egg and vanilla extract and beat until combined. Stir in the flour mixture until just incorporated.

Transfer dough to a pastry bag fitted with a large start tip. Pipe dough onto baking sheets, spacing them about 1 inch apart. At this point, you can choose to refrigerate the dough for a few hours so that they retain their shape better when baked.

Bake at 350F for 11 to 15 minutes or until the bottom and edges are golden brown.

Wednesday, June 5, 2013

malted waffles.


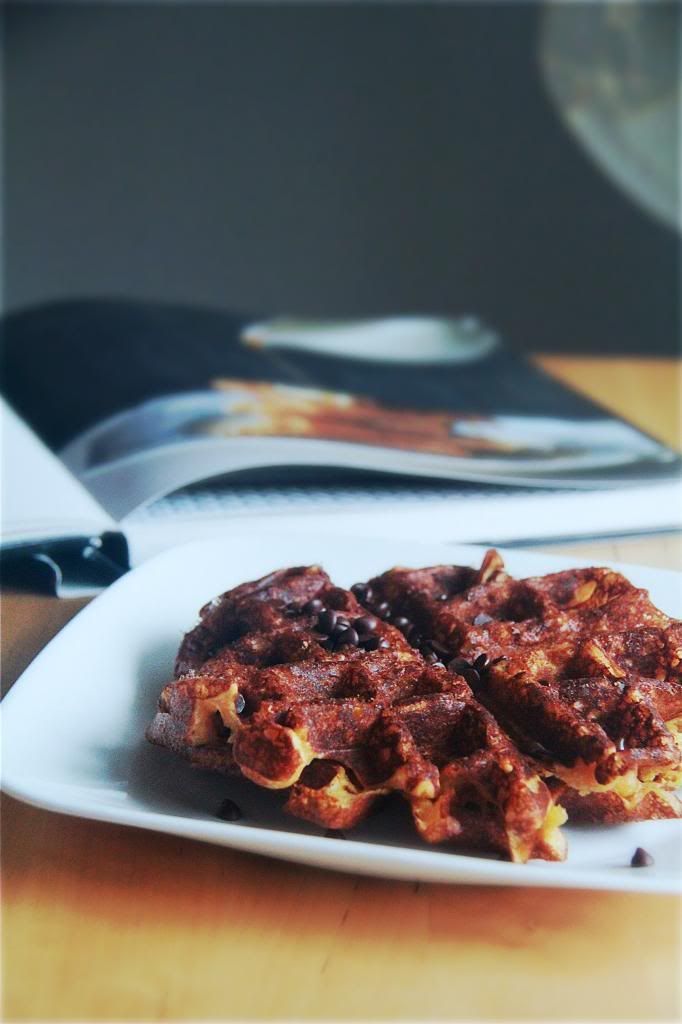
Today, I pulled out my neglected Baked Explorations cookbook and my even longer-neglected waffle machine, and made waffles. Waffles with malted milk powder to be exact.

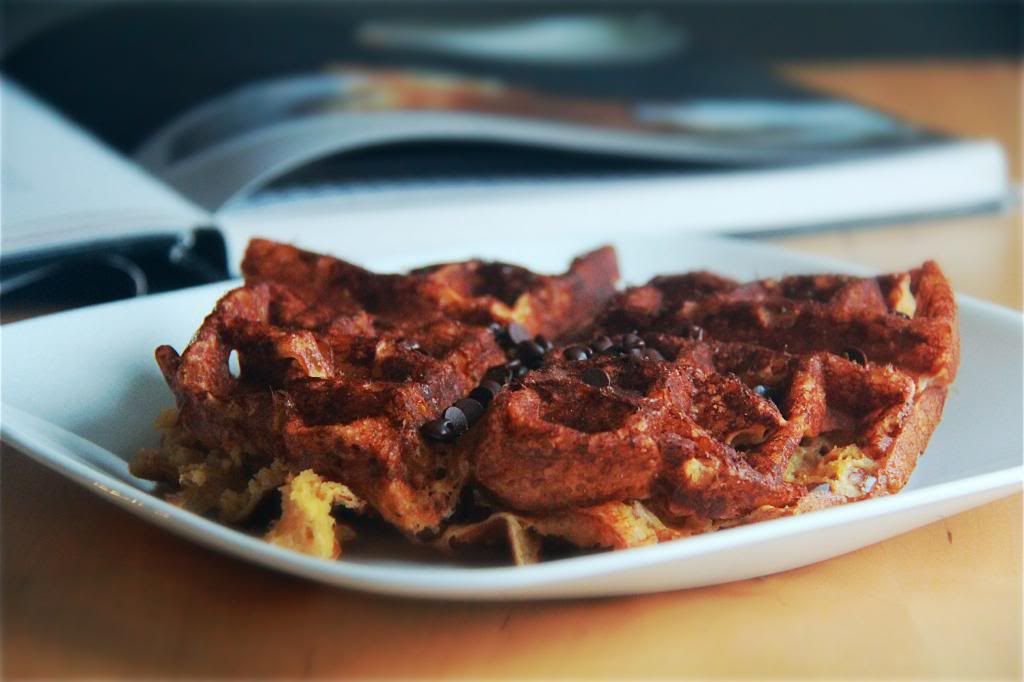
Everything was going along rather uneventfully. I mixed up the batter, poured it onto the preheated iron, closed the lid, and waited for the machine to beep a second time. I even managed to practice enough self-restraint to not overfill the damn thing like I always do out of greediness. And then, the waffle iron beeped. I lifted up the handle and found that the waffle stuck. It split cleanly into two lengthwise when I opened up the iron fully. Never mind, I thought. The first one is always a flop. (It was a tasty flop though).

I tried again. And again. After the third try, I came to the conclusion that the batter simply does not yield a waffle with enough structural integrity to be baked using a Belgian waffle maker of the deep-pocket kind. I solemnly swear that I greased the waffle iron properly too. So the moral of the story here is to use the waffle maker that makes the thin shallow kind of waffles. If you don't have one, like me, and you would rather not go through the trouble and heartache of making failed waffles with the other kind of waffle maker, turn the batter into pancakes.

There is nothing much else to critique about these waffles except maybe that they could use a bit, okay, a lot, more sugar. I'm sure that most waffle recipes are designed to contain modest amounts of sugar so that you can go crazy and top them with maple syrup and chocolate and all kinds of crazy sweet accompaniments after they're baked but it's nice to have a waffle that is flavorful enough to eat by itself. That isn't to say that these were bland- you can detect a nice hint of malt in them- but more sugar would make these taste so much better. Just saying.


Malted Waffles
adapted from Baked Explorations
makes 10

2 cups all-purpose flour
1 cup malt powder
2 tbsp brown sugar
1 tsp baking soda
1 1/2 tsp baking powder
1/2 tsp salt
2 large eggs
2 1/2 cups buttermilk
6 tbsp butter, melted and cooled

Grease and preheat waffle iron.

Whisk the flour, sugar, malt powder, salt, baking powder and baking soda in a bowl. Whisk the eggs, buttermilk and melted butter together in another bowl. Stir the wet mixture into the dry mixture until just combined.

Bake waffles according to your waffle machine's manufacturer's instructions. Serve immediately with chocolate chips- time and tide waits for no waffles!

Saturday, June 1, 2013

lemon layer cake.


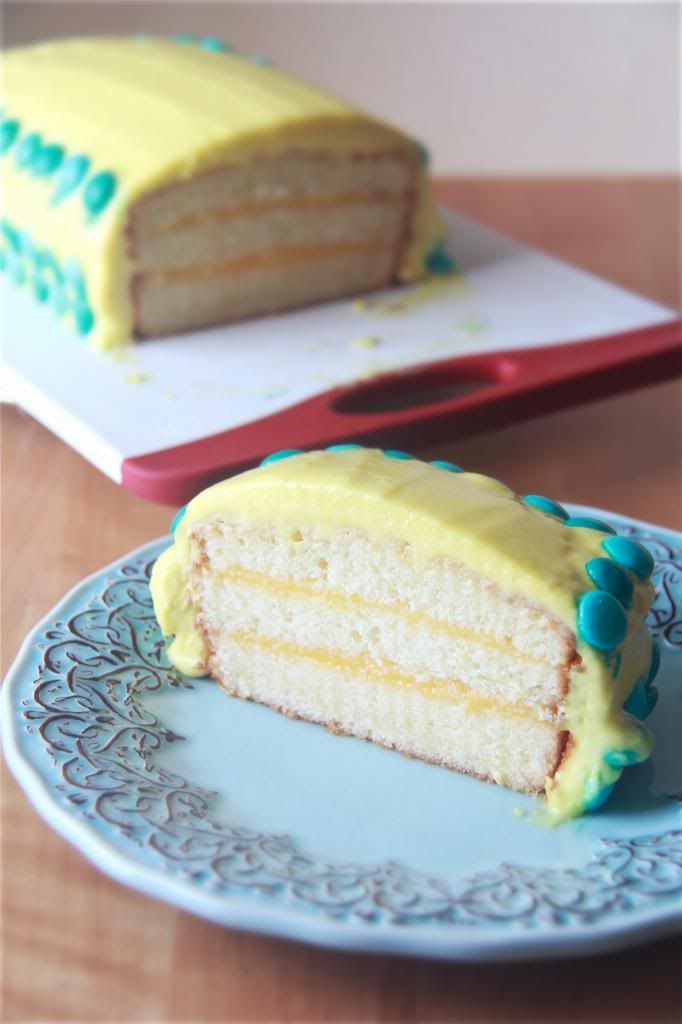
Woohoo I've finally done it! Made a layer cake using a loaf pan, that is. I've been getting tired of round cakes. Rectangular layer cakes are a really refreshing and much needed change.


The only layer cake on my current to-do list was this lemon layer cake by Baking by Flavour, so a rectangular lemon layer cake it was. I also had a bunch of blue M&Ms in two different shades that I wanted to use for decorating cakes somehow so it was also the perfect chance to use them. Chocolate and lemon. Definitely a good match. Plus, the blue plays nicely against the sunny shade of yellow. The frosting wasn't supposed to be this yellow by the way, I added some food colouring to it so that the contrast was sharper.


If you adore lemon, like worship it kind of adore, then you will like this cake. The lemon custard, which is something like a lemon curd, is puckery and tart. No big deal right- we all expect that of lemon curd. The surprise here is the lemon frosting. It is made with lemon zest, lemon extract and fresh lemon juice. I don't think I've ever seen lemon juice in frosting before. And the frosting calls for quite a significant amount too. My first bite of frosting tasted really tangy, followed by an onset of sweetness from the icing sugar. The best part about this frosting is that it doesn't taste artificial at all.

P.S. Remember that I said that I was looking for a crusting buttercream? Well, this buttercream unexpectedly crusted. I was pleasantly surprised, but I shouldn't have been. I should have predicted that the crazy amount of icing sugar that when into the frosting would cause it to crust. In a good way.


Now I've come to the most important and most important part of the cake- the cake itself. It is a white cake made using a technique that requires you to whip the egg whites and fold them into the batter. (I've made a cake using this method before.) The baked cake has a light feathery crumb that you rarely see in cakes and I liked it so much that I wished that I had done away with the triple layers and frosting so that I could have more pure cake in one bite! If you don't like lemon, you have to at least try the white cake itself.

I swear that the humidity I live in frustrates me to no end. Bleeding M&Ms are quite repulsive.


Lemon Layer Cake
makes a 8 inch 3 layer cake
adapted from Baking by Flavour

To make a rectangular cake like I did, make 2/5 of the recipe in a 8 x 5 inch loaf pan and bake at 150C for 40 to 45 minutes or until done. Make half of the lemon custard filling and half of the lemon frosting. You may not need to use all of the frosting.

For the cake:
3 cups sifted cake flour
2 1/2 tsp baking powder
1/2 tsp salt
1 cup butter
2 cups sugar, divided
2 tsp lemon extract
2 tbsp lemon zest
1 cup milk, cold
3 tbsp water, cold
5 large egg whites
1/8 tsp cream of tartar

Preheat oven to 350F. Prepare 3 8 inch round cake pans.

Sift the flour, baking powder and salt together.

Cream the butter until smooth. Add the 1 3/4 cups of the sugar and beat until light and fluffy. Beat in the lemon extract and lemon zest.

Add the flour mixture in 3 additions, alternating with the cold milk in two additions, starting and ending with the flour mixture. Blend in the cold water.

Beat the egg whites in a clean, dry bowl until foamy. Add the cream of tartar and continue beating until soft peaks are formed. Gradually add the remaining 1/4 cup sugar and continue beating until form peaks form.

Fold 3 large spoonfuls of the beaten egg whites into the batter to lighten, then gently fold in the remaining whites until evenly incorporated.

Scrape the batter into the prepared pans and bake for about 30 minutes or until an inserted skewer comes out mostly clean, with a few moist crumbs attached.

Cool cake layers in their pans for about 10 minutes, then invert out onto a wire rack to cool completely before frosting and filling.

For the lemon custard filling:
1 cup sugar
2 tbsp cornstarch
pinch of salt
1/2 cup water
1/2 cup + 3 tbsp lemon juice, divided
4 large egg yolks
2 tsp lemon zest
2 tbsp butter

Whisk the sugar, cornstarch and salt together in a saucepan. Stir in the water and all but 1 tbsp of the lemon juice.

Place the saucepan on medium high heat and bring to a boil, stirring slowly with a wooden spoon. Let the mixture boil for one minute then stir 3 tbsp of the hot lemon mixture into the egg yolks. Remove saucepan from heat and slowly and carefully stir in the tempered egg yolks. Return to heat and let the mixture cook on low heat for a minute longer, or until thickened.

Sieve the mixture into a bowl. Stir in the lemon zest, butter and remaining 1 tbsp lemon juice. Cool and refrigerate for at least 6 hours before using.

For the lemon frosting:
6 cups icing sugar
large pinch of salt
5 tbsp lemon juice
3 tbsp heavy cream
1 1/4 tsp lemon extract
1 stick butter, cubed
2 tbsp + 1 tsp lemon zest

Place the icing sugar, salt, lemon juice, heavy cream and lemon extract in a bowl. Scatter over the chunks of butter. Beat mixture until combined. Add in the lemon zest and beat until frosting is light and fluffy.