I've Moved!

Saturday, September 8, 2012

individual chocolate chip cookie pie.


Okay folks, sit up and listen. Because you're about to know about the most amazing thing I've eaten this whole week. (And I eat a lot of sweets.)

This is a huge chocolate chip cookie made with browned butter, baked in the oven in a pan until the outside is set and crunchy while the inside is still warm and gooey. I don't usually go gaga about cookies, let alone non-crispy ones, so the fact that I'm practically raving mad about this is testimony enough to its sheer deliciousness. Best of all, this cookie pie is yours and yours alone. No sharing. Nuh-uh.


If you've been sniffing around for chocolate chip cookie recipes, many of them advocate using browned butter for the best-tasting cookies. Just the number of fans of this ingredient could have been enough to persuade you to think likewise but have you ever considered just how is a cookie made with browned butter different from one without?


Perhaps the obvious answer would be duh, the cookies have a nutty fragrance to them. Maybe, but I think its more than that. When you brown butter, there is a distinctive toasty smell right? And when you incorporate the browned butter into a cookie, it should smell like something remotely similar right?

Wrong.

Browned butter does not give the cookies the toasty nutty flavour straight up browned butter has. Rather, it adds a complex, rich and deep flavour to the cookies. It's like all your life you've been using white sugar and now you've discovered brown sugar. Or something like that. I am an absolute convert now. I think browned butter adds that secret flavour I've always been trying to achieve- just like Famous Amos' chocolate chip cookies.


The second step in this recipe that renders this cookie pie irresistible is the chilling step. I made the dough the day before, allowing the sugars and whatnot to meld together during their few hours' rest. I'm sure the article on this chilling the chocolate chip cookie dough thing is pretty much viral. You can check up on it if you need some convincing. For some, the chilling step is crucial for the best flavour but for me, I like to make my cookie dough in advance also because its less of a hassle when you want to get down to the eating.


Chocolate chip cookie pie seems incomplete without a scoop of vanilla ice cream, whether for aesthetic reasons or taste. Personally, I prefer to eat my pie without a scoop of fast-melting ice cream on top. I'd rather not challenge myself to a speed eating contest. I scooped my vanilla ice cream into a bowl on the side to go with the pie but I had to include a tiny spoonful on it to snap a quick picture just because.

Another reason I don't like ice cream on my pie, besides having to race against time, is when you put something that cold on the cookie, the cookie starts to cool down real quickly and loose its gooeyness too.

The last thing I have to say, and maybe emphasize, is that please wait for your pie to cool for at least 5 minutes! Your tongue will thank you and besides, letting it cool allows the crust to firm up and have a nice crunch.


Chocolate Chip Cookie Pie
makes enough for you and you alone
recipe loosely adapted from Tasty Kitchen

This seems like a small amount of dough but trust me, it is rich! Patience will pay off when you let your cookie dough rest for at least 12 hours before but without the chilling time, it will still be good anyway.

18g butter, melted and browned
2 tsp sugar
2 tbsp brown sugar
1/4 tsp vanilla extract
1/6 egg
1/4 cup flour
1/12 tsp baking soda
pinch salt
2 tbsp chocolate chips or chunks

Preheat oven to 350F. Prepare a small baking dish.

Mix the flour, baking soda and salt together.

Combine the browned butter, sugars and vanilla in a bowl. Add the egg and mix to incorporate. Add the flour mixture and stir just until incorporated. Add the chocolate chips or chunks. The dough will be stiff.

Pat the dough into the prepared baking dish. At this point, you can choose to refrigerate it for a few hours before continuing or bake straightaway for about 10 to 15 minutes or until the top starts to turn golden while still remaining soft in the middle.

Remove from the oven and let it cool for 5 minutes before digging in.

Thursday, September 6, 2012

spiced chocolate chiffon cake.


There was a time way before I became obsessed with butter and frosting-laden cakes, I was pretty enthusiastic about chiffon cakes. I allude it to their simplicity and challenges they pose.

Chiffon cakes are hardly meant to be heavy and rich cakes. In fact, they are mostly eaten sans frosting. The tube pans they are originally baked in adds a touch of uniqueness such that frosting is not always necessary to beautify the cake.


Of course, chiffon cakes are definitely not the easiest cakes to make. The greatest obstacle comes in the form of whisking and folding in the egg whites. Under-whisk and risk fallen cakes; over-whisk and the egg whites will curdle and break down, and using them in the cake will no doubt lead to disastrous results. Once the whisking hurdle has been passed, you have another issue. The folding. Over zealous attempts in trying to incorporate those whites will cause the egg whites to deflate, and you'll end up with a denser cake. Under-folding means that you will have streaks of meringue interspersed throughout the cake, which is not that bad a thing, but some parts of the cake will be denser and heavier because the batter has not been evenly mixed.


So here you see the major cons of baking chiffons. No doubt I'd failed many times before because of the finicky egg whites, but every failure only motivated me further to get that damn cake right. After countless attempts and thousands of calories, I finally succeeded. But by that time, I wished to never have another chiffon cake in sight. Hence the lack of chiffon cake recipes on this blog.

Which is why I think it is time for one.

I chanced upon a Chinese Five Spice Chocolate Chiffon Cake recipe by Elinor Klivans some time ago. I love five spice and especially when combined with chocolate, so it went onto my to-bake list and now I can finally check it off.


I didn't follow the recipe quite that closely. For one, I didn't have five spice powder and I wasn't about to buy a bottle to use just a few spoonfuls of it. Instead, I fashioned my own blend of spices with allspice and ground white pepper to mimic chinese five spice. It is definitely not close to what real five spice is, but I was trying to go for the chocolate and spice combination in general, not specifically five spice.

The cake turned out fluffy but not as soft as I like my chiffon cakes to be, probably due to the use of more flour. I also believe that chiffon cakes are not supposed to contain baking powder. They are supposed to rely on the beaten egg whites for leavening. Hence you could say that this is not a true chiffon cake. Baking powder is commonly used as a "safety net" of sorts- in case the egg whites deflate, the cake would still rise at least a little. But this is a minor quibble.


I was a little disappointed with the flavour because the spices were not apparent enough. Sure they showed up enough to let you know that there's more to this chocolate cake then it seemed, but it was hard to detect exactly what spices there were in the cake. It would be better if the spices could unleash their full potential by first stirring them into some hot water before adding them into the batter.

The chopped milk chocolate that went into the batter puzzled me a little. I'm not sure if it was meant to dissolve completely into the batter, which means that it would be the same as mixing in melted chocolate, or meant to be super tiny chocolate chips. I say that because my chocolate did not meld homogeneously into the the batter. Most of them sank to the bottom, which you can probably tell from the picture here. Nah, actually I scraped those off the bottom of the tin and pasted them on top of the cake. Not very intentional but they sure do look good there.


Spiced Chocolate Chiffon Cake
slightly adapted from Elinor Klivan's recipe
makes a 9 1/2 or 10 inch cake

To make the original Chinese Five Spice Chocolate Chiffon Cake, replace the ground all spice and ground white pepper with 2 1/2 teaspoons of chinese five spice powder.

1 3/4 cups cake flour
1/2 cup unsweetened Dutch-process cocoa powder
1 1/2 cups sugar
2 1/4 tsp ground allspice
1/4 tsp ground white pepper
1/2 tsp cinnamon
2 tsp baking powder
1/2 cup oil
7 large eggs, separated
1/2 cup room temperature water + 1/4 cup boiling water
1 1/2 tsp vanilla extract
1 tsp cream or tartar
6 ounces milk chocolate, finely chopped

Preheat oven to 325F. Have a 9 1/2 inch or 10 inch tube pan ready. There's no need to grease it.

Combine the 1/4 cup boiling water and spices together in a small bowl. Set aside to cool.

Sift the flour, cocoa powder, 1 cup of sugar, baking powder and salt into a bowl.

Combine the oil, egg yolks, 1/2 cup water, water with spices and vanilla in a bowl. Pour this mixture into the dry ingredients and mix both of them to combine. Do not overmix. Fold in the chopped milk chocolate.

Whisk the egg whites and cream of tartar on low speed until the whites are foamy and cream of tartar dissolves. Increase the speed to medium and whisk until the whites look shiny and smooth and the beaters leave lines in them. Increase the speed to high and slowly beat in the remaining 1/2 cup sugar, 1 tablespoon at a time. Beat until the whites reach stiff peaks.

Take 1/3 of the egg whites and whisk it into the chocolate mixture to lighten. Gently fold in the remaining egg whites until no white streaks remain. Scrape the batter into the pan and smooth the top.

Bake for about 1 hour and 10 minutes or until the top of the cake feels firm when lightly touched. Invert the pan onto a cooling rack and let cool completely before unmolding.

Monday, September 3, 2012

condensed milk pound cakes.


It's hard not to wonder how condensed milk would taste like in a pound cake. Pound cake is already dense, rich and buttery. Condensed milk would add a milky and sweet dimension to the cake. So, you'll get dense, rich, buttery, milky and sweet all packed into a cake. How awesome does that sound?


The condensed milk did not actually make the cake that sweet. Although it is sweeter than your average pound cake, it will hardly send you spiraling into sugar highs after a few bites. The milky fragrance you get is worth the trade off in a little extra sweetness. The condensed milk also makes the tops of the cake crustier and more browned than usual because of its high sugar content. This is why you should probably eat it a few hours after baking. The tops will soften and become chewy any longer than that.


If you study the mixing method closely, you'd realize that the order of addition of ingredients is not quite your usual sequence. In this recipe, eggs are added after mixing in the flour. I thought it was a typo error at first but after surfing a few blogs, I realized that it wasn't. I can't quite imagine the rationale for this. Blending eggs after the flour would result in extra toughening of the gluten of the flour and run the risk of tough cakes. My cakes turned out fine, if a bit sturdier than usual, but there's always a possibility that some might get carried away with incorporating the eggs and end up with brick-like cakes.

I think in terms of flavour, this recipe is worth trying out but the texture could be improved. And in case you're wondering, I added some Japanese sweet black beans (kuromame) into the larger cakes. They pair really well with milky or chocolaty flavours.


Condensed Milk Pound Cake
makes a 8.5" x 4.5" loaf
adapted from Pichet Ong from The Sweet Spot

1 1/3 cup all-purpose flour
3/4 tsp baking powder
1/2 tsp salt
1 cup butter
1/2 cup sugar
2 tsp vanilla extract
3/4 cup condensed milk
3 large eggs

Preheat oven to 325F. Prepare a 8.5" x 4/5" loaf pan.

Sift the flour, baking powder and salt into a bowl.

Cream the butter and sugar until light and fluffy. Add the vanilla and condensed milk and mix until well combined.

Add the sifted flour mixture and mix until just incorporated. Beat in the eggs until well combined.

Scrape the batter into the pan and bake for about 1 hour or until an inserted skewer comes out mostly clean, with moist crumbs attached.

Saturday, September 1, 2012

rum and milk chocolate waffles with creamy brown sugar and rum sauce.


It's been so long since I've seen the shiny handle of my waffle maker. Thank goodness I didn't decide to get an ice cream maker too or it might end up as a mere display item as well.


Anyway, these waffles have inspired me to utilize my waffle iron more (erm.. for a short while only, most likely). Come on- rum and milk chocolate? In a waffle? How can you not fall for it? To be honest, the waffles were good, but they weren't the main star of the plate. For that honor, I would have to award to the brown sugar and rum sauce.


This sauce is the king of caramel sauces. Butterscotch 9.0. The stuff you can put on your shoes and make you eat your shoes (but please don't do that). The rum in it makes all the difference. It's not some flavour hiding in the background, waiting for your tastebuds to detect it. No. The sauce contains rum with capital RUM. You can throw in some raisins and call it rum and raisin sauce.


So please, if the waffles don't entice you, make the sauce! You won't regret it!


Rum and Milk Chocolate Waffles
makes 6 round belgian style ones
adapted from Baking by Flavour by Lisa Yockelson

2 cups all-purpose flour
2 1/2 tsp baking powder
1/4 tsp salt
1/4 tsp ground allspice
1/3 cup + 1 tbsp sugar
3 large eggs
6 tbsp butter, melted and cooled
2 tsp vanilla extract
1/2 tsp almond extract
1/4 cup dark rum
1 cup milk
1/2 cup light cream
1 cup milk chocolate chips

Sift the all-purpose flour, baking powder, salt, ground allspice and sugar into a bowl. Whisk the eggs, melted butter, extracts, rum, milk and cream. Pour the wet ingredients over the dry, add the milk chocolate chips and stir to form a batter. Let the batter stand for 5 minutes to thicken.

Meanwhile, preheat your waffle iron. Cook the waffles according to your waffle iron's instructions.

Creamy Brown Sugar and Rum Sauce
makes 1 1/3 cups

I substituted evaporated milk for the heavy cream. This sauce is not optional.

1/2 cup brown sugar
3 tbsp sugar
1/2 cup + 2 tbsp heavy cream
6 tbsp butter, diced
pinch of salt
2 1/2 tbsp dark rum, divided
1 tsp vanilla

Combine the brown sugar, sugar, heavy cream, butter, salt and 1 1/2 tbsp of rum in a saucepan over moderate heat until sugar dissolves completely. Increase the heat and bring the mixture to a boil then reduce the heat to cook at a simmer for about 3 to 4 minutes or until the sauce has thickened slightly.

Remove from heat and stir in the remaining 1 tbsp rum and vanilla extract. Use the sauce while its still warm and fluid.

Friday, August 31, 2012

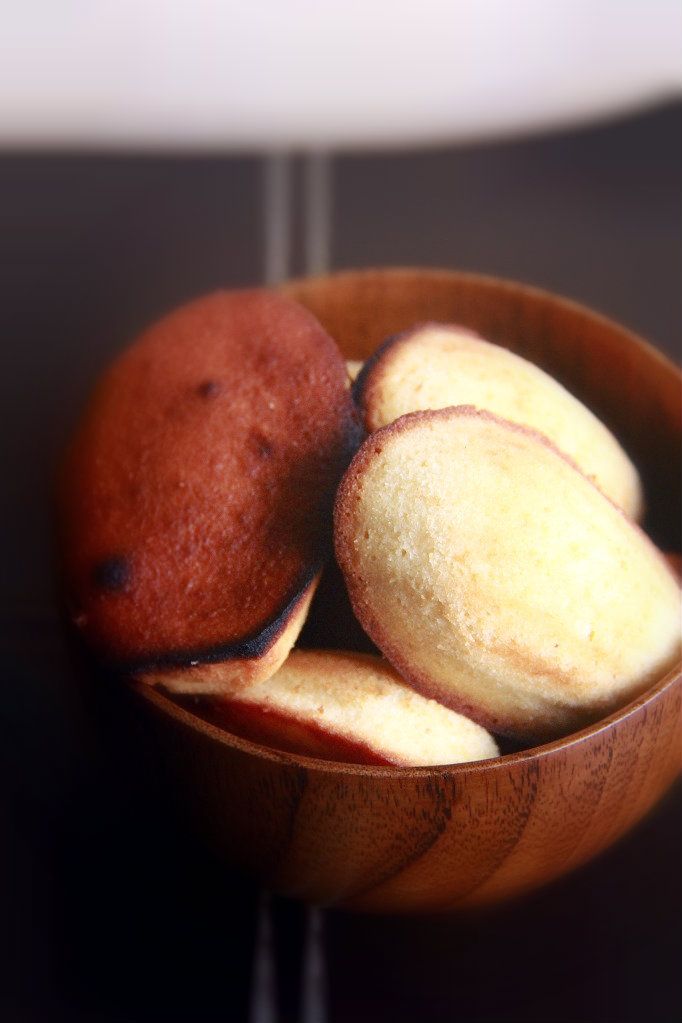
vanilla madeleines.


I made chocolate nutella madeleines the last time, so now I'm going to the other end of the flavour spectrum to make vanilla madeleines, recipe also from Baking by Flavour.

I had high hopes for these madeleines because of the immense success I've had with the other two recipes from this book. A few more of such wonderful recipes and I'd trust Lisa Yockelson fully. Sadly, I wasn't that wowed this time, because the cakes were not vanilla-y enough and tasted eggy and weird on day one (I couldn't pinpoint exactly what made them taste "off"). The second day, they tasted fine though. However, I must mention that I did alter the recipe slightly. I left out the vanilla bean and used vanilla bean paste instead, and did not use vanilla-scented sugar because I didn't have any. So, sure they were decent madeleines, but definitely not memorable.


Oh and my oven is functioning wackily. One moment it's on "bake" and the next moment it's on the "grill" function, which explains the burnt tops and flat surfaces. I baked the madeleines for only 8 minutes but look at the damage! I don't think its safe to use my oven for a while until the problem is resolved. How will I survive?!


Vanilla Madeleines
recipe from Baking by Flavour
makes 19

1/2 cup + 2 tbsp all-purpose flour
1/4 cup cake flour
1/4 tsp baking powder
1/8 tsp salt
1/8 tsp freshly grated nutmeg
6 tbsp butter
1/3 cup + 3 tbsp vanilla-scented sugar
seeds from 1/4 vanilla bean
2 large eggs
1 tsp intensified vanilla extract
2 tsp heavy cream

Preheat oven to 375F. Grease and flour madeleine molds.

Sift the all-purpose flour, cake flour, baking powder, salt and nutmeg into a bowl twice.

Cream the butter until smooth and creamy. Add the sugar and vanilla bean seeds and beat until the mixture appears light and fluffy. Beat in the eggs one by one, mixing to incorporate the first before adding the second. Blend in the vanilla extract. Add the sifted ingredients and stir until just combined. Stir in the heavy cream.

Divide the batter amongst the crevices and bake for about 10 to 12 minutes or until a skewer inserted in the middle of a madeleine comes out clean. Cool the madeleines in the pans on racks for 1 minute before unmolding.