I've Moved!

Sunday, May 25, 2014

caramel macadamia carousel.


Ever since I started baking six years ago, I've gone through many crazes - bread, cookie, cake - and have consequently amassed a considerable number of cookbooks. Thank goodness libraries exist or my house would become one itself.


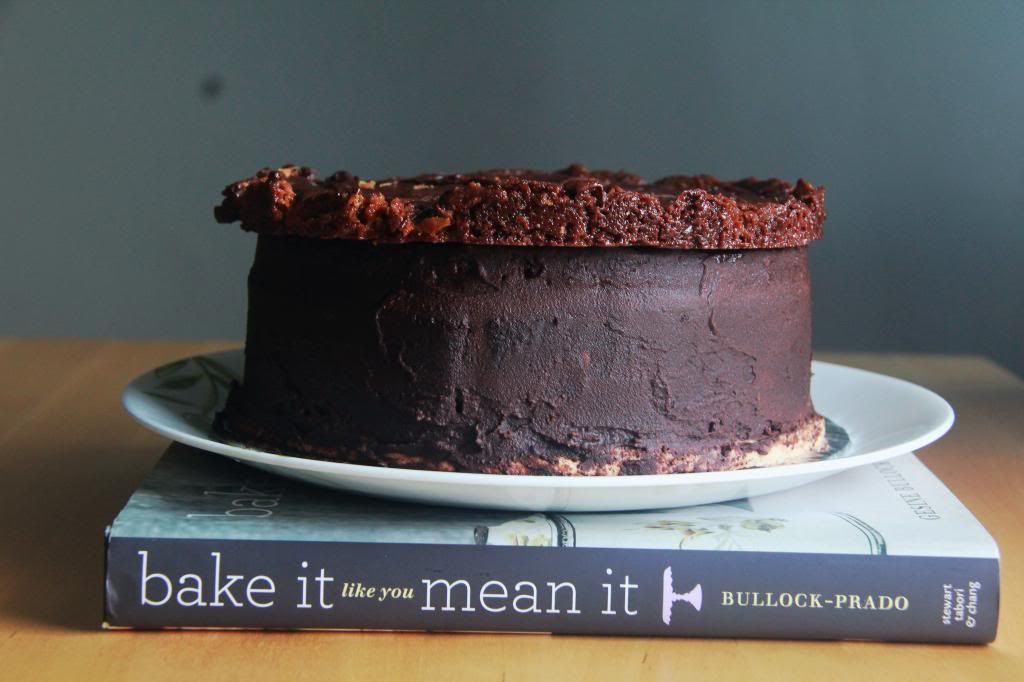
I have a cookbook to turn to for almost every mood I'm in; when I feel like making something relatively simple I can always rely on one of my Baked books to give me a suitable recipe, when I feel making something challenging I turn to this book called Bake It Like You Mean It, and I think the title explains why. Unfortunately this book has been sorely underutilised ever since it was bought because of my busy schedule these days and I am rarely able to gather more than enough energy to make pancakes, which, I must emphasise, doesn't even engage the use of the oven and therefore cannot count as baking. However, I flipped open the book once again this week - the time spent away from intensive baking must have been long enough for me to naturally feel like taking on a project again.


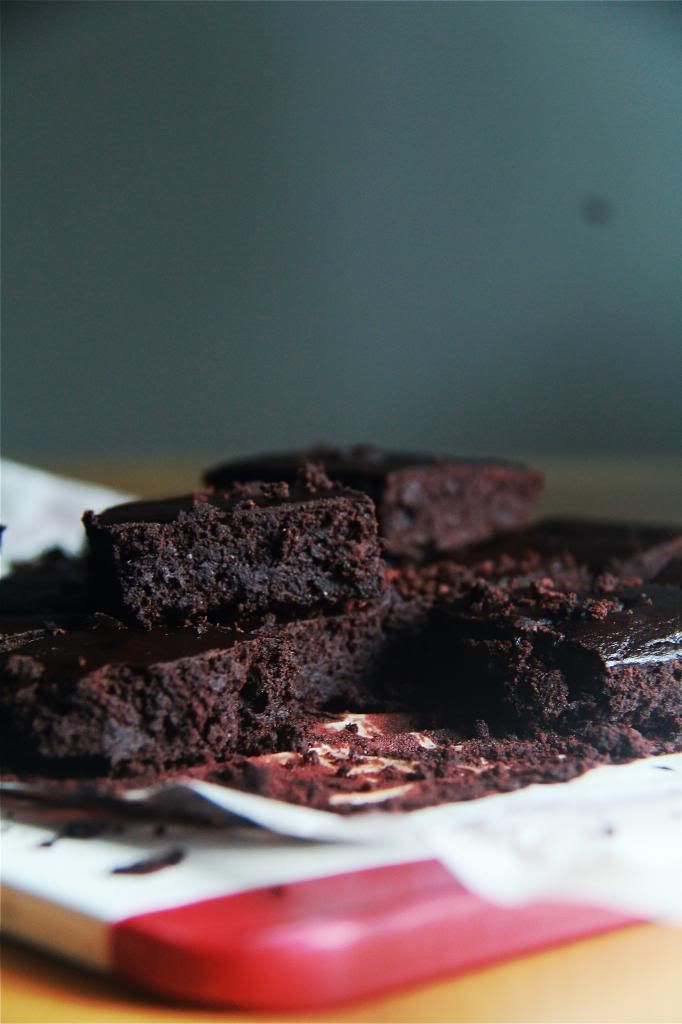
The last time I used this book was to make its Mocha Ricotta Tower recipe, some 8 months ago or so. Today, I picked this caramel macadamia carousel cake to bake. The recipe was laborious to type out but the baking process was ten times more so. It consists of a disk of meringue to serve as the base of the cake, chocolate sponge cake that functions as the walls enclosing the buttery caramel cream, ganache to cover up all the imperfections and act as glue to adhere all the components together and finally a crown of nutty, buttery, caramelly macadamia florentine to top it all off. I had to divide the work across three days. School days, of course. I bet it could actually be finished in two days if you're on a roll.


I made a fraction of the recipe for a 7 inch cake and created only two circles of chocolate sponge, hence the cake you see here looks slightly different from the picture in the book if you have seen it. I'm not sure if my adjustment of the quantities has resulted in a sponge thicker than it was supposed to be but I found it slightly dry. Perhaps brushing the sponge with some syrup, which the recipe didn't call for, would be good. Apart from this issue I think this recipe is worth a try especially for its visual appeal. It also satisfies those who like crunch in their cake - the meringue and the florentine provide plenty of that.


Thankfully after making this cake I don't feel like I would abandon all thought of using recipes from this book in the near future. In fact I think another cake is in my plans for the coming week. I hope that you would make this cake a part of your plans too.


Caramel Macadamia Carousel
makes a 10 inch cake
adapted from Bake It Like You Mean It

For the meringue bottom:
2 ounces blanched slivered almonds
1/2 cup sugar
2 tbsp cornstarch
1/4 cup egg whites
1/4 tsp salt

Preheat oven to 300F. Line a half sheet pan with parchment paper. Draw a 10 inch circle on the parchment and flip it over onto the pan so that the circle is visible but will not transfer onto the meringue.

Combine the almonds, a third of the sugar and cornstarch into a food processor and pulse until the mixture is fine.

Whisk the egg whites and salt until foamy. Slowly add in the remaining sugar while whisking constantly until stiff peaks form. Fold the almond mixture into the egg whites until combined.

Transfer batter into a large pastry bag with a large open round tip. Pipe mixture onto the parchment in a spiral starting from the centre of the circle.

Bake for 30 to 35 minutes until golden brown. Set aside to cool completely.

For the sponge cake:
7 eggs
1 cup sugar
1 tsp salt
1 cup cake flour
1/4 cup cornstarch
1/2 cup dutch-process cocoa powder

Preheat oven to 400F. Line the bottom of a 10 inch cake pan and a half sheet pan with parchment paper. Do not grease them.

In a heatproof bowl of a stand mixer, combine the eggs, sugar and salt. Place the bowl over a pot of simmering water and whisk constantly until the sugar has completely dissolved.

Transfer bowl to the stand mixer and whisk on high speed until the eggs have quadrupled in volume and bowl is cool to touch.

Sift the flour, cornstarch and cocoa powder over the egg mixture. Fold the flour mixture into the eggs.

Spread one-third of the batter into the cake pan and the remaining into the half sheet pan. Bake the cakes for 15 to 20 minutes or until an inserted skewer comes out clean. Cool completely.

For the caramel cream:
1/2 cup sugar
1/2 tsp lemon juice (I omitted)
1/2 tsp salt
2 1/2 cups heavy cream

Combine the sugar, 1/4 cup of water, lemon juice and salt in a large saucepan. Stir over low heat until the sugar has completely melted. Stop stirring, raise the heat to medium high and cook the syrup until it turns a light amber. Remove the pan from heat and add 1/2 cup of the cream and stir until smooth. Refrigerate until cool.

Whip the remaining cream to stiff peaks. Fold one-third of the cream into the caramel to lighten it. Transfer the caramel mixture into the bowl with the remaining cream and gently fold until evenly incorporated. Refrigerate until needed.

For the ganache:
4 ounces bittersweet chocolate, finely chopped
1/4 cup heavy cream
1 tbsp butter

Place the chocolate in a heatproof bowl.

Combine the cream and butter in a saucepan and bring to a simmer. Pour the cream mixture over the chocolate and allow the mixture to stand for a few minutes before whisking till smooth.

For the macadamia florentine:
1/2 cup butter, browned and set aside to cool
1 cup finely chopped macadamia nuts
1 cup light brown sugar
1 egg
1 tbsp vanilla bean paste
1/2 tsp salt

Preheat oven to 350F. Spray a 10 inch cake ring with nonstick baking spray and place it on a parchment-lined half sheet pan.

Combine the macadamia nuts, brown sugar, egg, vanilla bean paste and salt and pulse until a slightly chunky paste forms. Still pulsing, pour in the butter until combined.

Spread the batter evenly inside the cake ring and bake until just golden brown, about 15 minutes. Remove the cake ring and score the florentine into 12 even wedges while still warm.

Assemble the cake:
Spread one-third of the ganache evenly over the meringue layer. Chill the remaining ganache.

Place a 10 inch cake ring atop the meringue layer. Cut the cake in the sheet pan lengthwise into strips 2 inches wide. Line the inside of the cake ring by pressing a cake strip around the outer edge. You may need to use more than once strip to go all the way around, trimming the strips as necessary to fit.

Make four more concentric rings of cake strips, starting slightly in from the outside ring and working your way towards the centre. Leave enough space between rings for the filling to be piped.

Transfer the caramel cream to a large pastry bag fitted with a large open tip. Pipe the cream in between the standing cake rings. Spread any extra cream on the top in an even layer.

Place the round sponge layer atop the cream and press gently to adhere. Refrigerate until set, at least 2 hours.

Warm the reserved ganache until spreadable consistency.

Remove the cake ring by gently heating it with a blow dryer or letting it remain at room temperature for about half an hour. Trim the excess meringue layer such that it is flush with the cake layers.

Frost the entire cake with ganache (but leave some for the florentine). Allow to set for about 20 minutes.

Spread a thin layer of the remaining ganache over the scored florentine. Place it on top of the cake.

To slice, use the lines on the florentine as a guide. You should be able to cut through both the florentine and cake in one stroke with a serrated knife if you'd scored the florentine deeply enough. If you're worried that the florentine might be too hard, slice it into wedges and arrange them on top of the cake in a circle instead.

Serve.

Sunday, May 18, 2014

matcha adzuki chiffon cake sandwiches.


Wow... has it been a month since I last made cake? Well maybe it's a month minus about eight days but still. It's been longer still since I last made something green tea and I can't even remember when was the last time I made a chiffon cake. I think today's a special day.

It has been said and proven that chiffon cake is very prone to failure. Many things can go wrong with this relatively uncomplicated cake because of the finicky meringue. However when I set my mind on baking this cake I completely forgot about the possibility that my cake might be a flop so thank goodness it turned out fine.


The reason why I felt so compelled to bake a chiffon all of a sudden is because of some pictures of chiffon cake sandwiches I saw on Instagram lately. It's such an ingenious idea I just couldn't wait to execute my own version. I mean, there are regular sandwiches made with bread, I'm sure we've all seen the occasional waffle sandwich, the Japanese have this thing called dorayaki which is basically two pancakes sandwiching red bean paste (traditionally), but up until recently I've never ever seen a sandwich made with cake. I'm pretty sure my eyes must have sparkled with inspiration at that moment.


I decided on going with a Japanese flair for my cake sandwich simply because I'd uncovered a bottle of green tea powder and red bean paste in my kitchen - a pleasant surprise. Green tea and red bean is pretty much a classic combination so I don't think I have to elaborate further on how fabulous these sandwiches taste. Instead I shall gush about how soft and fluffy the cake is - you can use it as a pillow and drift off to sleep dreaming the sweetest dreams, literally.


These sandwiches are probably one of the most photogenic things I've made in a while. I think most of us agree that as long something tastes good its appearance, however messy and unprofessional, can be forgiven. Sometimes when my cakes turn out short of aesthetically pleasing I'm inclined to think that way, but with these, I'm reminded again that I should continuously strive to make both pretty and delicious cakes. After all, our eyes do take part in the feasting too.

Enjoy! P.S. More pictures of these on my Instagram!


Matcha Adzuki Chiffon Cake Sandwiches
cake adapted from Keiko Ishida's Okashi

For the cake:
70g cake flour
10g matcha powder
5 egg yolks
20g sugar
70g water
60g oil
180g egg whites
90g sugar
10g corn flour

For the cream:
1 cup heavy cream
1/2 cup sweetened red bean paste + extra for filling the cake

Make the cake: Preheat oven to 160C. Have a 20cm in diameter chiffon cake pan ready.

Sift the flour and matcha powder together twice.

Whisk the egg yolks and sugar until combined. Add the oil and water to the yolk mixture and whisk until well incorporated. Stir in the flour mixture.

Stir the sugar and corn flour together in a bowl.

Beat the egg whites until frothy then add half the sugar mixture while still beating. Slowly add in the rest of the sugar mixture and beat until the egg whites reach stiff glossy peaks.

Fold one third of the meringue into the yolk mixture to lighten. Fold in the rest of the meringue until evenly mixed and well combined.

Pour the batter into the pan and bake for 40 to 50 minutes. Invert the cake pan onto a cooling rack to cool completely, about 2 hours.

Make the cream: Whip the cream to stiff peaks. Whisk 1/4 of the cream into the red bean paste to lighten then fold in the rest until the mixture is homogenous. Transfer the cream into a piping bag with a tip of your choice. (I used a star tip.)

Assemble the cake: When the cake has completely cooled, slice it into 12 portions or more if you wish to stretch it. Take a slice and make a cut down the inner side (it's quite hard to explain, I'm sorry - I hope that the pictures are of some help) but not all the way down or you'll have two slices of cake.

Take a bit of red bean paste and press it into the bottom. Be careful not to use too much strength though! You may rip the cake into half. Pipe the cream into the remaining space.

Eat now or refrigerate if you're not.

Thursday, May 15, 2014

honey sweet potato pancakes.


It is extremely rare that I'm willing to work with an ingredient that requires such, well, work. I mean, you have to peel the dirt-covered skin of the sweet potato, chop it into manageable cubes, steam or bake them, mash them and then you're finally done with one component of your recipe. For someone who bakes on a whim, it's also unlikely that I would ever attempt recipes with ingredients like sweet potatoes. Yet, one Sunday afternoon, I decided to go through the laborious process of preparing some sweet potatoes for future use, the near future of course - you can't keep fresh ingredients like this for long.

Apart from making these pancakes with the sweet potato mash/puree, I also made a sweet potato mousse that I conjured up without a recipe. It's fun once in a while to throw aside instructions and follow your tastes and senses. But because I wasn't consciously taking note of measurements, I'm unable to provide the recipe here. Perhaps if I ever feel like making it again one day I'll make sure to pay attention to what I was adding and how much. (I have to first psyche myself into going through a mound of sweet potatoes though.)

But anyway, back to these pancakes. Evidently the recipe is very minimalist which means that the quality of your sweet potatoes matters a lot. Frankly speaking my sweet potatoes weren't all that sweet so I added a tablespoon of honey to make up for it. Even if you feel that your sweet potatoes are sweet enough I would still advise you to add the honey because they're such a natural combination! The pancakes are quite dense despite the baking powder but it still definitely makes a difference, and you can't really taste the egg. These pancakes are just sweet potato through and through. Sweet potato lovers may now rejoice.


Honey Sweet Potato Pancakes
makes 1 serving

1/3 cup mashed sweet potato
1 egg
1 tbsp honey
1/2 tsp baking powder
pinch of salt

Mix all the ingredients together well.

Pour a scant 1/4 cup at a time onto a heated skillet. Cook over medium heat for about 1 1/2 minutes on each side. Be careful when you flip the pancakes because they are quite fragile.

Serve hot and I highly recommend that you do so with peanut butter!

Wednesday, May 14, 2014

white chocolate cranberry mocha macarons.


A recent aimless hunt around the fridge led to the discovery of a pack of unopened ground almonds in the bottommost compartment right-hand corner, hidden beneath bags of macadamia, almonds and pistachios. It also came to mind at that point, that there was a bar of white chocolate waiting to be used, a half-finished pack of ruby red cranberries and an opened box of cream. Lightbulb moment. White chocolate cranberry mocha macarons.

I'll admit here that the first batch didn't turn out successful; I didn't dry the surfaces of the piped rounds of batter out well enough so the tops cracked down the middle in an eruption of wrinkles when baked. Not to be defeated, I tried again and achieved acceptable macaron shells.

I was disappointed that the shells turned out rather flat, after all I did consciously monitor the consistency of the batter, but I guess I was unfairly expecting them to look like the italian meringue macarons when these are made using the french method. Ah well, that's what I get for being lazy and turning to the less fussy way of making macarons.


Whenever I halt my macaron making adventures for a prolonged period of time, I'm quick to lament that my shells look horrid and unpresentable, but this time I realised that it's actually possible to forget the skill in filling the macaron shells as well. As you can see, the filling isn't well sandwiched between the macaron shells - the cranberries and mocha bean jut out very unceremoniously from the ganache, propping the top shell up and creating this unwanted space in between.

After all this trouble I'm glad that these tasted good at the very least. The coffee taste in the ganache isn't so strong that it becomes a coffee-white-chocolate ganache than the white-chocolate-coffee ganache that it should be if you know what I mean. It's subtle but present. The cranberries pair harmoniously with the ganache in my opinion. Both are sweet components but each offering different kinds of sweetness; the former a refreshing fruity kind and the latter a rich milky one.

And in case you're wondering, these are indeed, inspired by the Starbucks drink.


White Chocolate Cranberry Mocha Macarons

For the macaron shells:
macaron recipe here, scaled down by half
red food coloring

For the coffee ganache:
100g white chocolate, chopped
90g heavy cream
2 tsp coffee extract

For assembly:
dried cranberries
chocolate-coated coffee bean (it's okay to omit if you don't have)

Make the macaron shells: Bake the macarons according to the recipe linked, except when before transferring the macaron batter to a piping bag use a toothpick dipped in red food coloring to draw streaks of red down the insides of the piping bag.

Make the coffee ganache: Bring the cream and to a simmer in a saucepan and pour over the chopped white chocolate. Let the mixture stand for 3 minutes then add the coffee extract before stirring to combine. Refrigerate until thickened to a pipe-able consistency.

Assemble the macarons: Pipe the coffee ganache onto the base of a macaron. Stud about three cranberries and a coffee bean into the ganache then sandwich with a matching macaron in size. Repeat for all the macarons. (Optional: dip a cranberry into a little bit of ganache and press it gently into the top of the macaron as an embellishment.)

Refrigerate macarons for at least a day before consuming.

Saturday, May 10, 2014

french toast pancakes.


I get crazy ideas all the time but I realised that my best ones stem from the need to use up leftover ingredients. Say, if you give me a bar of chocolate I take a great deal longer to come up with something good than if you just ask me to finish up a bowl of ganache, and even so it may not be entirely spectacular. Maybe it's because leftovers narrow down my available options , them already being in a certain state and all, so I can just concentrate on expanding on the few ideas I conjure up.

My inspiration for this week is leftover pancakes. I made a pancake stack a few days ago and I was debating between letting my brother eat the extras or making something else with them and in the end, unsurprisingly, I chose the latter. Dorayaki came to mind but I'd made the pancakes a little too big so after a few seconds of consideration I thought of french toasting them. The decision was made quicker than I thought - I guess my sweet tooth subconsciousness has never forgotten about a certain japanese french toast recipe that I'd bookmarked way back.


The pancakes aren't as porous as the bread I'm supposed to use but they still managed to soak up a considerable amount of the sweet eggy custard. The great thing about this recipe is that the pancakes/bread cook up light and fluffy while the innards remain soft, custardy and moist due to the unique cooking method. After frying the pieces of pancakes/bread lightly on one side, you flip them over, adjust the heat to low and clamp a lid over the pan so that you're actually somewhat steaming them. If I had used slices of bread and had the custard fully permeating ever nook and cranny of them they would have expanded in size the resemble puffy golden cushions. I suggest that you take a look at the link below to see what I mean.) The only downside to this recipe is that you need the foresight to soak the bread at least 24 hours before.

This recipe makes french toasts on the sweet side so you don't have to drown them in syrup but please, by all means, dollop a generous scoop of freshly whipped cream on top because it makes your morning that much more beautiful.


French Toast Pancakes
egg custard recipe adapted from here

4 thick and fluffy pancakes, torn into large chunks
3 eggs
185ml milk
31g sugar
1/2 tsp vanilla extract

Start preparing at least 24 hours before you plan to cook. Whisk the eggs, milk, sugar and vanilla extract until combined. Pour into a large shallow dish and submerge the pancake pieces in the custard. After 12 hours flip the pancakes around to immerse the other side in custard as well.

When you're ready to cook, heat a pan on low heat and add a bit of butter or oil. Fry a few pancake pieces on one side for about 2 to 3 minutes until lightly browned then flip them over. Cover the pan with a lid and cook until the pancakes have expanded, at least 5 minutes. Transfer them to a plate and continue cooking the rest.

Saturday, May 3, 2014

black bean brownies.


Trying out a black bean brownie recipe has been on my to-do list for the longest time, along with many other things. I didn't keep putting it off because I was skeptical about it or anything, but because having to get a can of black beans specially for this occasion was a bit of a pain and I had a million other things I wanted to make too that didn't require me to go to the supermarket.

I finally got down to baking these brownies because I felt like baking but only had limited time. As you can see, this is an extremely simple and fuss-free recipe. Just dump all the ingredients into the blender and the batter is finished, like magic! The clean up is easy as well because none of the ingredients are oily.


I didn't do much research about this before I baked them so I had absolutely no expectations of how they would turn out. I was pleasantly surprised at how fudgy they are but I could still taste a faint black bean taste, which honestly was quite off-putting. I think it's because there wasn't enough sugar to back up the chocolate and mask the taste of the beans. I've increased the amount sugar accordingly in the recipe below.

Having said that, I refrigerated the brownies for a few hours and had one of them a few hours later when they were completely chilled. Surprisingly, they don't taste that bad anymore! Maybe they weren't that bad in the first place - after all I did eat a piece of real chocolate before tasting the brownies for the first time so the difference was bound to show quite starkly.

So my conclusion is that this recipe is worth a try, but if you are used to eating the real deal then your tastebuds might need some time to adjust to this "healthy" version.


Black Bean Brownies

1 15-ounce can black beans, rinsed and drained
2 large eggs
3 tbsp milk
3/4 cup cocoa powder
pinch of salt
1 tsp vanilla extract
2/3 cup sugar
1 1/2 tsp baking powder

Preheat oven to 350F. Prepare a 9 x 13 inch baking pan.

Put all the ingredients in a blender and blend until the consistency of brownie batter.

Scrape the batter into the pan and bake for about 30 minutes or until an inserted toothpick comes out clean.

Cool completely before slicing.