I've Moved!

Thursday, December 25, 2014

christmas tree cake.

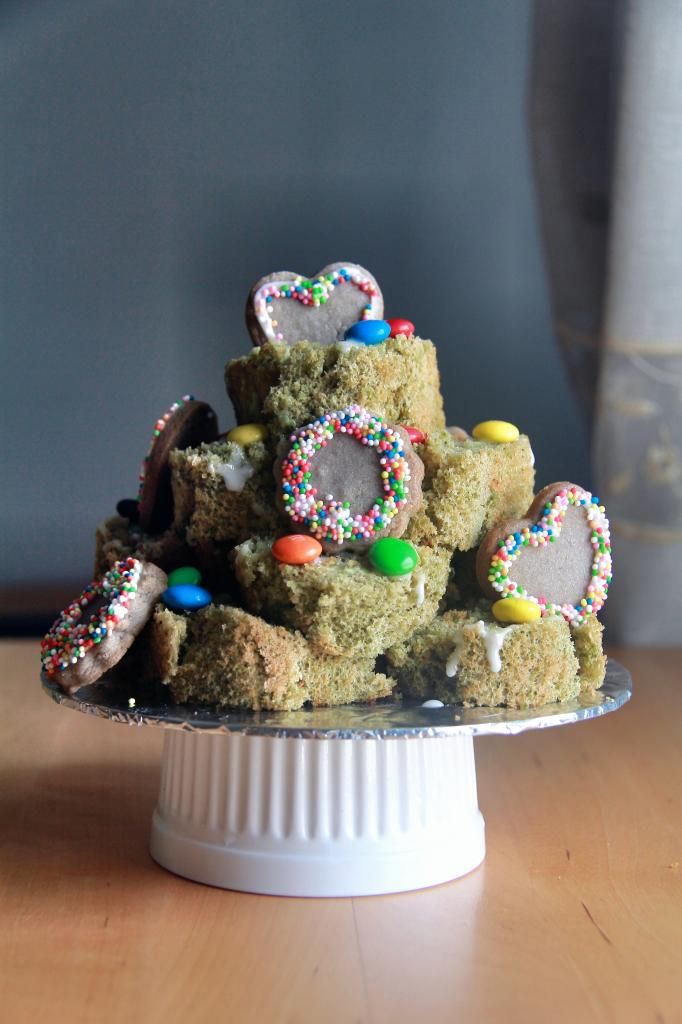
dessert - christmas tree cake (swiss roll tower)

Merry Christmas everyone! I don't know about you guys, but Christmas is definitely my favorite time of the year. The joyful jingles, the trees adorned with baubles and tinsel and pretty lights, the presents... it's such a magical season! Brings tears to my eyes and all (really) (well sometimes).


So in honour of my favorite day, I baked a Christmas-themed cake. Usually log cakes would come to mind but you know, I'm not a very conventional person so I decided to do a christmas tree version of the swiss roll tower. I didn't use the recipe in that post though; frankly I had to bake in the morning and I knew that if I attempted something too complicated in my half-awoken state I might mess it up. Thus I chose a simpler swiss roll recipe that utilizes only four ingredients, which is pretty much idiot proof. Unfortunately it wasn't the best recipe for my christmas tree cake because the bottom of the cake, which would be the side facing outwards, developed a brown skin that was undesirable because I needed the green to be prominent. I tried to brush off as much of the skin as I could but there were patches of it that I could not get rid off without ripping off a considerable chunk of cake as well. I should have stuck to the recipe I used for the swiss roll tower because the bottom doesn't turn brown at all. Oh well.


The swiss roll is filled with a matcha cream cheese filling as I added a bit of matcha powder into the batter to give the cake it's green colour. I attempted to recreate christmas lights by piping royal icing around the cake and sticking M&Ms onto random parts of the icing. The icing isn't really obvious because I made it a tad too thin. For the ornaments I baked sugar cookies decorated with royal icing and sprinkles.


I'm a little bummed that the cake didn't turn out as well as I envisioned it although it was kinda fun trying to piece it all together. I hope that you guys are enjoying your Christmas baking as well!  

Sunday, December 21, 2014

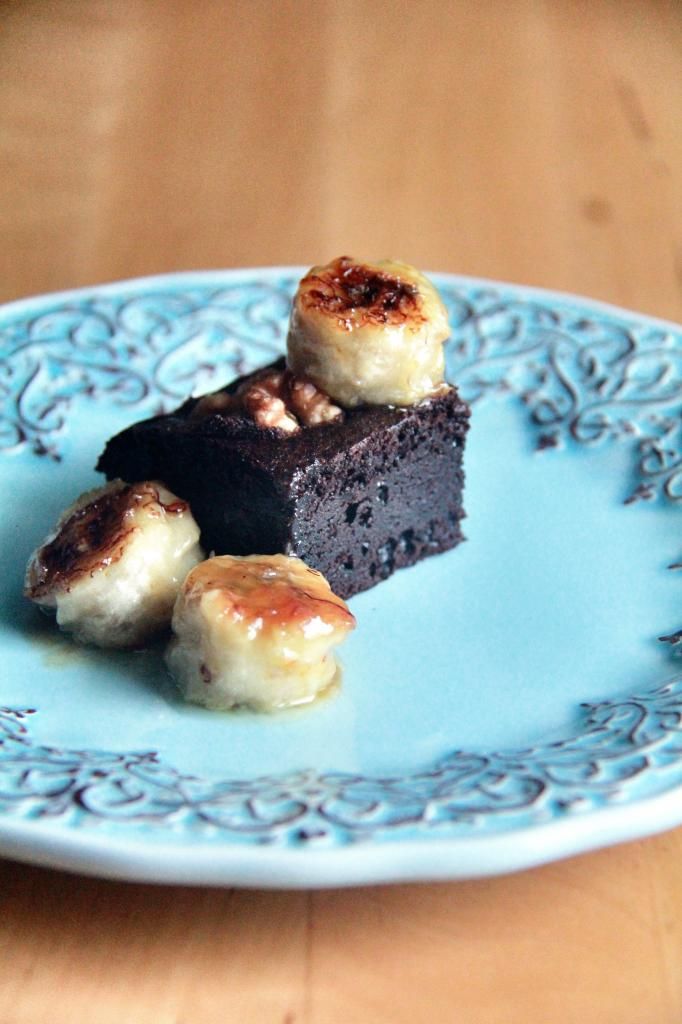
best cocoa brownies (with sautéed bananas).


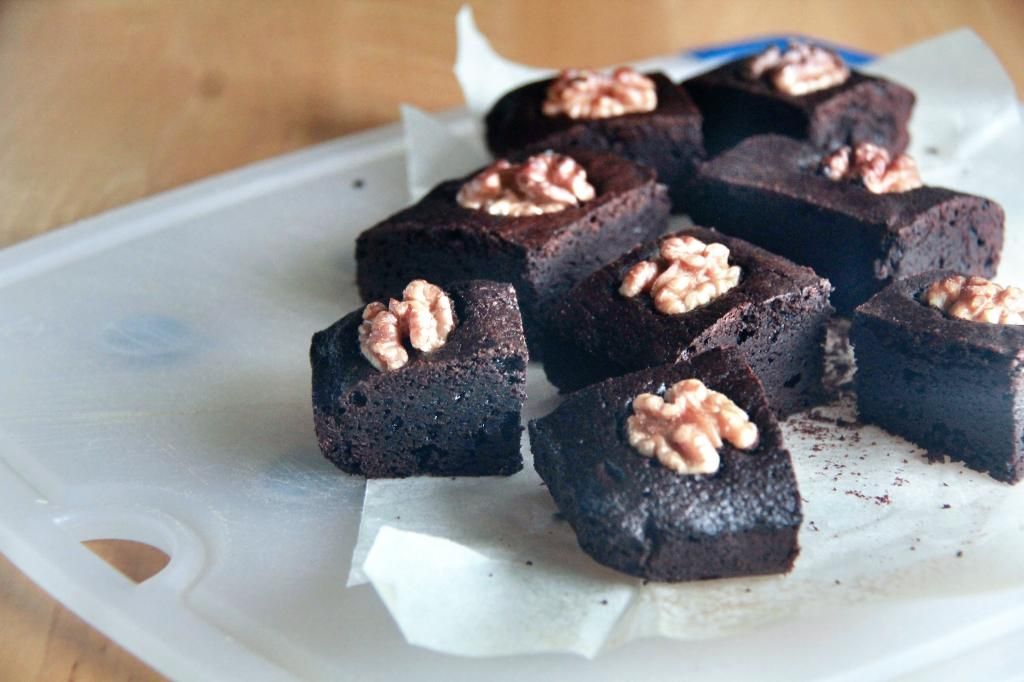
Hey all! Just casually popping by to breathe some life back into this dusty space before it turns into a tangle of cobwebs. My creative juices have not really been churning lately so I've been revisiting a couple of old favorites, like these cocoa brownies like Alice Medrich. I blogged about them a few times before but did not quite give them the full attention they deserve so today I shall finally do them justice.


These brownies are probably still one of the best brownies I've ever tasted - intensely chocolaty (although I would cut down on the sugar a bit) and fudgy (try them when they're cold through!). Plus they are a breeze to whip up; this recipe requires really the most basic of brownie ingredients. If the crackly top is a major deal breaker in your book, this recipe does yield brownies of that nature if you whisk the batter a bit longer (I forgot to this time). I imagine it must be air bubbles in the batter that contributes to the crinkly magic.

Aaaand I had to saute some bananas to have with the brownies. Lip-smacking.

dessert - best cocoa brownies with sauteed bananas

Best Cocoa Brownies
recipe by Alice Medrich
makes an 8 x 8 inch pan's worth

10 tbsp unsalted butter
1 1/4 cup sugar
3/4 cup + 2 tbsp unsweetened cocoa powder
1/4 tsp salt
1/2 tsp vanilla extract
2 large eggs, cold
1/2 cup all purpose flour

Preheat oven to 325F. Prepare an 8 x 8 inch baking pan.

Combine the butter, sugar, unsweetened cocoa powder and salt in a medium heatproof bowl and set the bowl over a pot of simmering water. Stir from time to time until the butter has melted and mixture is smooth.

Remove from heat and stir in vanilla. Beat in eggs one at a time, incorporating the first fully before adding the second, until the batter looks thick, shiny and well blended. Add the flour and stir until all traces of it disappear.

Pour batter into prepared pan and bake for 20 to 25 minutes, or until an inserted skewer comes out with moist crumbs attached. Cool completely before slicing. Placing them in the fridge until they're completely cold would make slicing easier.

Thursday, December 11, 2014

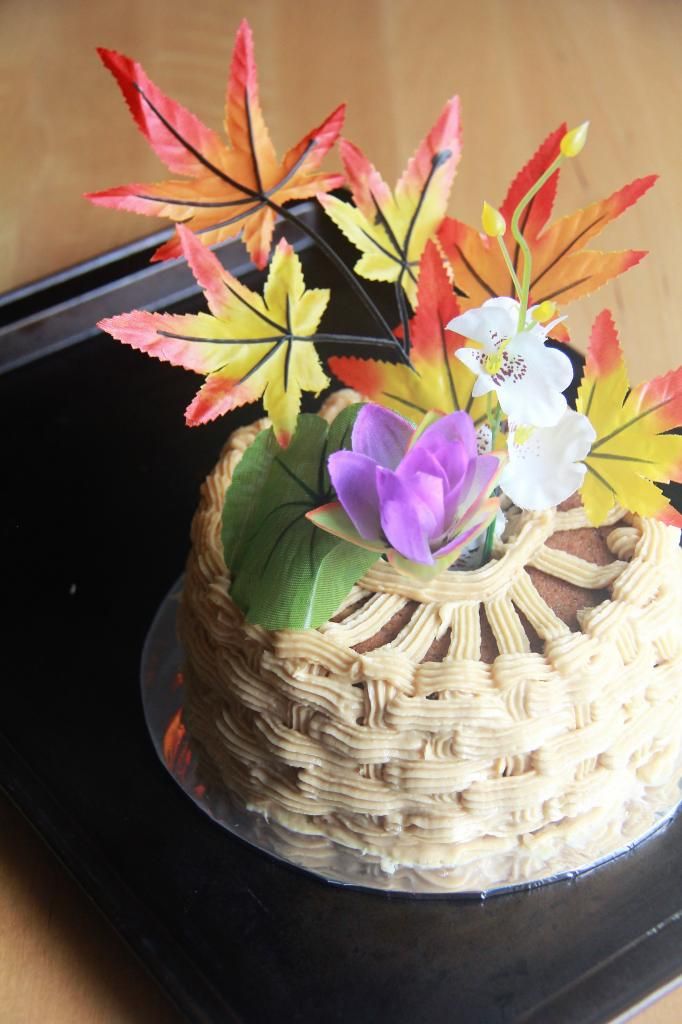
banana cake with peanut butter frosting.


Why hello there! It's been a while. Somehow I feel that's the tone I've been adopting for all recent blog entries. It pains me to admit it but my interest in baking has been waning somewhat. But I'm sure I'll get my motivation back when I get to sample some of the finest pastries ever created during my upcoming holiday trip (Japan I'm coming for you!).


The inspiration for this cake stems from pictures of flower-adorned cakes I found on Instagram. I'm actually not really a fan of using non-edible decorations because I feel that there are many other options that can both make a cake look good and complement the flavours of the cake. Flowers and figurines are eye-catching of course but using them feels like cheating (although I make an exception for the miniature reindeers and santa clauses on log cakes). Out of curiosity though, I felt like trying to embellish a cake with flowers just for once.

dessert - banana cake with peanut butter frosting

I decided to get fake flowers so that I could reuse them if I thought them to be acceptable decorations for cake after all. My original plan was to bake a regular round cake (i.e. not using a tube pan) and have the flowers, with their stems removed and all, arranged on the surface and sides in some artsy fartsy manner but I had a change of heart in the midst of brutally twist-snapping the stems off and decided to make use of the cavity of a cake baked in a tube pan. I would position the flowers in the cavity like I would flowers in a vase. To finish I would pipe a basket weave pattern on the sides of the cake because y'know, flowers, basket. Yeah. (I swear that sometimes even I can't keep up with myself.) I'm pleased with the way the cake turned out to be honest. I quite like the combination of colours of the flowers. But when you slice the cake you have to remove the flowers in the centre and poof just like that the magic noticeably disappears.


Well, I wasn't planning to bake a cake solely for experimenting with flower decoration; I wanted an excuse to bake my favorite banana bread again as well. This is my go-to recipe for banana bread - it practically screams banana and is extremely extremely moist. Even if you eat it straight from the fridge when it's supposed to be so cold flavours can't come through very prominently you can definitely tell that it's banana bread with your eyes closed. And I love how the top of the cake gets a little gummy when I wrap it while it's still warm and leave it like that to cool.

Even if you have no interest in adorning your next cake with flowers I sincerely urge you to try this recipe. Peanut butter frosting mandatory.


Banana Cake with Peanut Butter Frosting
cake recipe adapted from Flour Bakery

I scaled down the recipe by half and baked it in a 6 inch tube pan but the quantities reflected below are the original recipe's. You will need a loaf pan about the size of a 9 x 5 inch.

For the cake:
1 2/3 cups all-purpose flour
1 tsp baking soda
1/4 tsp ground cinnamon
1/2 tsp salt
1 cup + 2 tbsp sugar
2 eggs
1/2 cup oil
3 1/2 bananas, very ripe, mashed
2 tbsp creme fraiche or sour cream
1 tsp vanilla extract
2/3 cup walnuts, toasted and chopped

For the frosting:
refer to this post

Preheat oven to 350F. Line the bottom of a loaf pan with parchment paper.

Sift together the flour, baking soda, cinnamon and salt. Beat the sugar and eggs with a whisk until light and fluffy, about 10 minutes. Drizzle in the oil. Add the mashed bananas, creme fraiche and vanilla. Fold in the dry ingredients and nuts.

Pour into the lined loaf pan and bake for about 45 minutes to an hour.

Cool cake completely before frosting.

Sunday, November 30, 2014

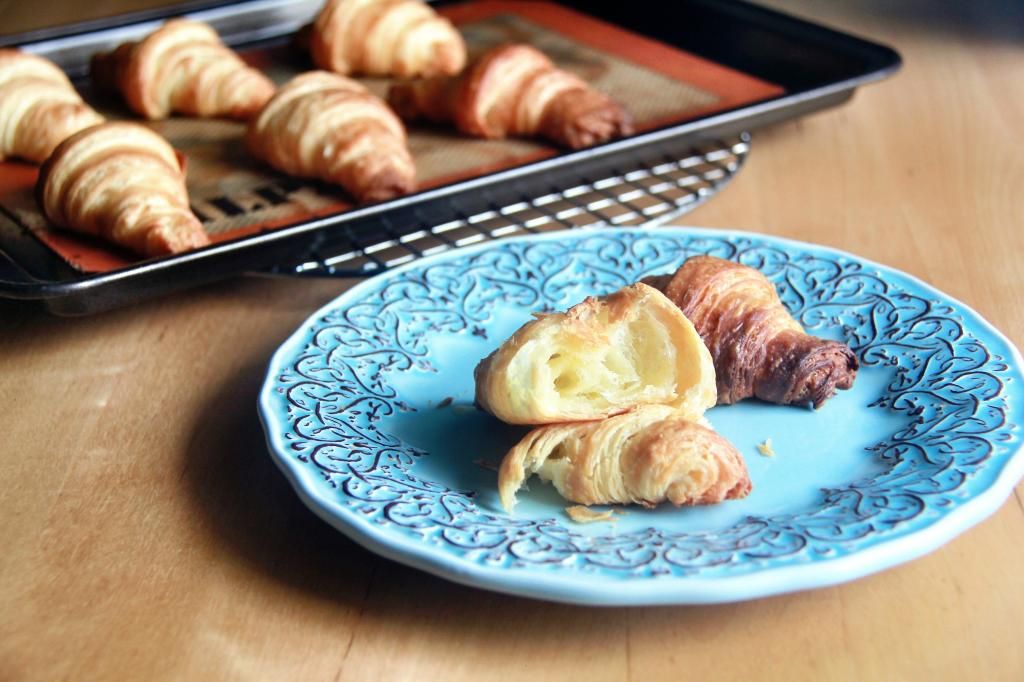
classic french croissants.


It's strange that I would attempt making croissants when I can't even roll out cookie dough decently. The power of boredom is amazing. But you know what? I think I've always made croissants out to be more difficult to make than they actually are. Sure they're a little more difficult to master (I think), but they're not exactly something that home bakers cannot and must not attempt for they'll flop for sure. In fact I think I'll give this recipe another go because I accidentally made these smaller than I wanted them to be. And forgot the egg wash.


The step of wrapping the butter in the dough and rolling it out was pretty nerve wracking because the butter was stone-hard as it was stone-cold and certain parts of the dough were thinner than the rest so bits of butter would occasionally poke through the dough. I had to constantly patch those holes up with dough from the thicker portions. The rolling and folding gradually got easier as the dough spent more time in the fridge so discounting the start, I actually thought that the process was pretty fun. I was tempted to create more layers because it was so easy to do so but more layers actually hamper the rise of your croissants so don't get carried away!

pastries / breakfast - classic french croissants

Before I embarked on making the croissants I did some research. Tips, basically, on how to avoid a croissant calamity. One particularly useful one I found on a thread was to trim the ends of the folded dough such that dough containing no butter is removed. I think this helps to prevent your croissants from baking up misshapen by keeping the layers of butter and dough even. I ended up with a lot of unwanted dough and I didn't want to waste them so I gathered them all up, braided the pieces and baked them separately.


To be honest, I don't eat a lot of croissants so while I can more or less judge that one is better than the other, I'm not sure what really makes one superior. I felt that these were passable texture wise - quite flaky, not too dense - but there is just something that these are lacking. I'm still trying to figure it out. I have a feeling that the problem may lie in my rolling technique more than the recipe itself. So I don't know if this recipe is the best out there but for record's sake I shall just post it here. If you have any tips on making croissants please share. Similarly if you have a great recipe to recommend I'll be eternally grateful!  


Classic French Croissants
makes 15 regular sized croissants

500g plain flour
140g water
140g milk (can be taken straight from the fridge)
55g sugar
40g soft unsalted butter
11g instant yeast
12g salt

280g cold unsalted butter for laminating
1 egg + 1 tsp water for the egg wash

Refer to this link for instructions with a pictorial guide.

Wednesday, November 26, 2014

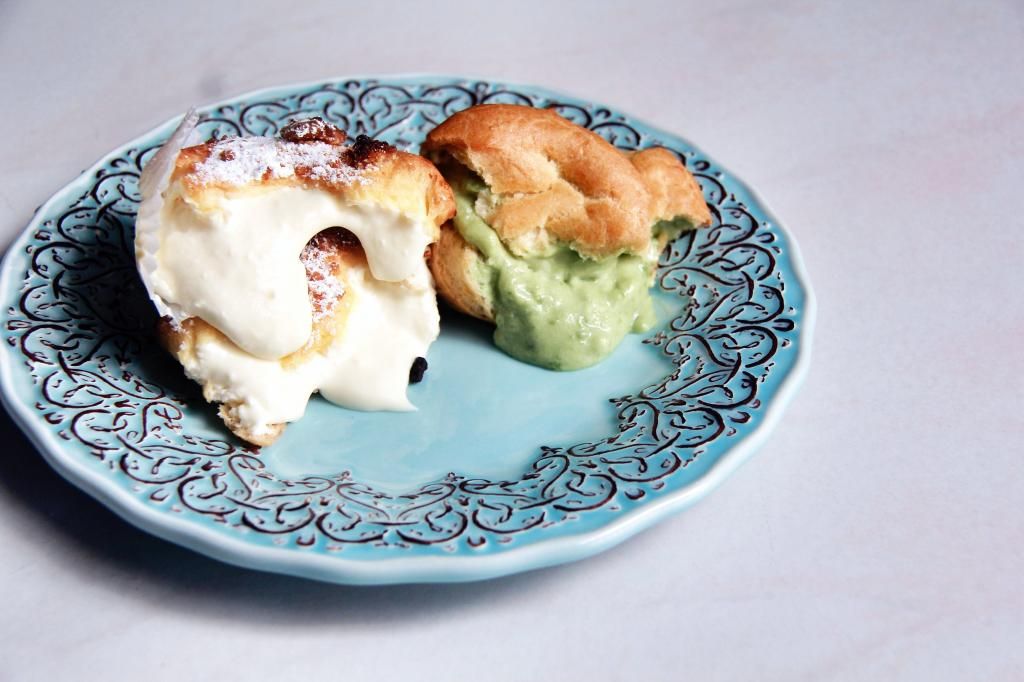
cheesecake choux puffs.


So I've been in a choux puff craze lately, although strictly speaking I've always loved this pastry. I've actually made another batch using this choux recipe before but didn't post it on the blog as the filling wasn't really up to expectations. The choux pastry was so good though that I found myself churning out flavour ideas just so that I could make the puffs again.


This recipe makes 12 largish puffs so I decided to split the batch into two flavours - matcha and cream cheese. For the latter I would top the dough with streusel before baking to give the puff a crunch that alludes to the texture of the base of a cheesecake. Although if I were to make this again, I would bake the streusel separately and fold it into the mousse instead of using it to top the puffs because it burns rather easily. If you're curious about the matcha ones, the mousse is made from instant matcha pudding with whipped cream folded into it, which is why I'm afraid I can't provide a recipe for them. It tasted good though because the pudding mix is from a renowned Japanese brand!


As for the cream cheese mousse, it's more on the tart than the sweet side which I felt complemented the streusel nicely and quite liked even though I'm not a huge fan of non-sweet cream cheese anything. If you like yours sweeter just increase the amount of sugar. Also note that the mousse has a rather loose consistency so you should try to make it in advance and refrigerate it so that it has time to firm up and is easier to pipe.


The choux pastry is probably the best I've ever tried in terms of its sturdiness when baked. Before encountering this recipe I used Pierre Herme's which calls for an equal amount of milk and water for the liquid component. The milk makes the choux more flavourful but also less crisp. The pastry tastes great but I've always wanted the puffs to be taller just because they look more appealing that way and also because you can pipe more filling into them. This recipe here uses only water so the pastry bakes up more firm and they still taste pretty darn good (read: deliciously buttery) despite the lack of milk. I can't say for sure if this batch tastes better than those made using Pierre Herme's recipe but I think it's sufficiently tasty and any flavour compromised for height is well worth it. I think I might give Pierre Herme's choux recipe another go soon before I make any conclusions.

Oh and this recipe is capable of yielding choux puffs taller than these you see here. I reduced the baking time because I was worried that the streusel would be reduced to charcoal if I were to give them a few extra minutes. The streusel may also have weighed the puffs down a bit. I promise that their maximum possible height is actually very impressive.


I can't even imagine how good these would taste in churro form *lightbulb moment*.

dessert - cheesecake (and matcha) choux puffs

Cheesecake Choux Puffs
choux pastry recipe adapted from here
makes 12 large ones

For the pate a choux:
125g water
2.5g salt
2.5g sugar
62g butter
75g flour, sifted
110g egg (about 2 eggs)

For the cheesecake mousse:
6 ounces cream cheese
1/2 cup + 1/2 cup cream
2 tbsp sugar
1 1/2 tsp vanilla extract

For the streusel (you won't use all of it):
22g sugar
23g brown sugar
pinch of salt
37g butter, melted
60g cake flour

Make the mousse: Beat the cream cheese and 1/2 cup cream together until combined. Stir in the sugar and vanilla extract. Whip the 1/3 cup cream to soft peaks and fold into the cream cheese mixture. Set aside in the fridge.

Make the streusel: Whisk the sugars, salt and butter together. Add the flour and stir until mixture becomes a thick cohesive dough. Set aside.

Make the pate a choux: Preheat oven to 210C. Line baking sheets with parchment or silicon mats.

Combine the water, butter, sugar and salt in a saucepan and bring to a boil. Turn off the heat and stir in the sifted flour. Mix vigorously until the mixture becomes a smooth dough. Stir it around for another minute before transferring to a bowl of a stand mixer.

Using a paddle attachment, beat the ball of dough until it has cooled down slightly then beat in the eggs one by one, mixing well between each addition. The resulting dough should be smooth and supple. You may not need to use all the eggs.

Transfer the dough to a pastry bag fitted with a round plain tip. Pipe large mounds of dough (2 tbsp worth) onto the prepared baking sheets. Take the streusel dough, pinch off small lumps of it and scatter the pieces on top of the piped mounds of dough.

Bake until the puffs have risen to their maximum size (around 12 minutes) then lower the temperature down to 160C and bake until the puffs are brown, hollow and crisp (around another 12 minutes). Set aside to cool.

Fill puffs and refrigerate until cold.