I've Moved!
Saturday, November 16, 2013
peanut butter caramel sauce.
Okay I'm just going to give a very functional commentary today because I have no idea what I could possibly write as a nice lead up to the peanut butter caramel sauce itself.
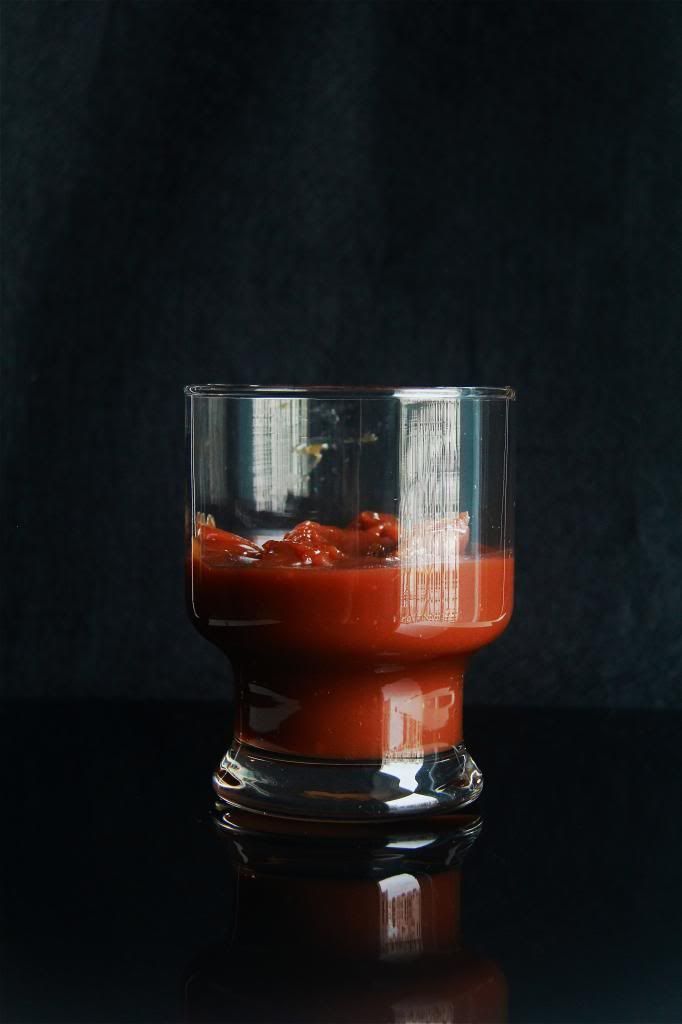
So. If I were to rename this sauce I would call it "Snickers Sauce", because that was the first thing that popped into my mind when I tasted it - a snickers bar. As enticing as this sounds, I advise you not to take even a half teaspoonful of it by itself because it is so rich it will knock you out for a second I swear. I would think that a reordering of the name of this sauce from peanut butter caramel sauce to caramel peanut butter sauce is more apt. The former suggests that the caramel sauce has peanut butter nuances while the latter represents a peanut butter sauce with a bit of caramel flavour in it, which is exactly what I think this sauce is. There is a ton of peanut butter packed in this sauce. I wasn't surprised that the sauce managed to thicken up so much just at room temperature it was almost at a spreadable consistency.
Then again, it could be because I made a little mistake when incorporating the peanut butter. After stirring in the last few ingredients, I found that there was a bit of hardened caramel stuck at the bottom of the pan and I had to reheat the caramel. I guess I must have applied too much heat and the sauce turned grainy and started to separate because the oils from the peanut butter started to seep out. I managed to save it and smoothen it out with a blender and a splash of cold milk but I guess it's just not the same as doing it right the first time.
I bet this sauce would go well with lots of things - brownies, with a refreshing sorbet, heck, spread it on toast if you dare. But I'm going to put this sauce to good use in something else, which I will show you in the next post so stay tuned!
P.S Feel free to check out my instagram!
Peanut Butter Caramel Sauce
adapted from here
1/2 cup heavy cream
1/4 cup sugar
1/4 cup water
1/2 cup creamy peanut butter
1 tbsp light corn syrup
pinch of salt
1/8 tsp vanilla extract
Heat the heavy cream until lukewarm.
Add the sugar and water to a saucepan and swirl the pan to combine. Set over medium to medium-high heat and bring mixture to a boil without stirring. Cook until the caramel turns amber in color and gradually whisk in the warm cream, mixing until the mixture is smooth. I highly advise you to check for any hardened bits of caramel at this point so you don't have to reheat the entire mixture again after the peanut butter is added. If some of the caramel seizes when you add the cream, just place the pan on low heat until it melts.
Remove pan from heat and stir in the peanut butter, corn syrup, salt and vanilla extract until combined and smooth. Transfer to a heatproof jar.
Once cool, store the sauce in the refrigerator for up to 1 week.
Monday, November 11, 2013
cherry chocolate chip cake.
I would like to start this post with a more elegant and sophisticated sentence but what I really just want to say is simply, I miss making layer cakes! The last one I made was back in September and the one before that was another two months ago. Now that all of my exams are finally done for the year, I figured that a layer cake was due.
I stopped surfing baking blogs and Foodgawker and Tastespotting as regularly as I did before my final year exams which left me with very little inspiration for what kind of cake to make. Luckily, I'd bookmarked a few in advance so I decided to go with a cherry chocolate chip cake I found on this website. I wanted to decorate my cake in a different way from what she did, but again, I was stuck for ideas. In the end, I decided to throw chocolate sprinkles in the frosting to give the cake a chocolate-chip-flecked appearance. I just love the contrast of the chocolate brown on pastel pink!
I was so excited to be finally able to make a layer cake again, which was why when I realised that I had made a calculation error when scaling down the recipe, I wanted to flop down on my bed face down and stay in that position for eternity. I had put in 1/4 of the amount of baking powder required, which explained why the cakes hardly rose and emerged from the oven with cracks of strange formations. As you can imagine, the cakes turned out dense and pound-cakey, but the damage wasn't as bad as I thought. The cakes were still really moist and the vanilla-almond flavours came through nicely. I especially love the little chocolate chips interspersed throughout the cake! You would think that after refrigeration, the chocolate chips would harden up again but no - they were unexpectedly slightly molten. And I think that the neon cherry pieces here are just a wonderful addition, both aesthetically and taste-wise.
The only change I made to the recipe was to swap the white sugar with brown, because the combination of brown sugar with almond, vanilla, chocolate and cherry sounded better. You're free to stick to the original recipe though. Another thing to note about this recipe is its rather unorthodox method of not adding the eggs to the creamed butter-sugar mixture first before adding the rest of the ingredients. Instead, they are whisked together with the other liquids and then the liquids are added first when alternating with the flour mixture. Usually the flour mixture goes in first, yes? I followed the instructions and I think the cake turned out fine but if you feel safer sticking to the conventional method then please do.
My piping skills definitely need some work. I wanted to do a shell border and I started off rather hesitant and unsure, and it showed in my piping. I was trying to recall all the tutorials I've read and watched before but I couldn't really remember how it was done for sure so I just winged it and hey, at least half of the piping turned out decent!
I gotta make more cakes to practice my piping. Yes.
Oh and for a 360 degree view of this cake in all its girly glory, check out my instagram!
Cherry Chocolate Chip Cake
adapted from here
makes an 8 inch cake
For the cake:
4 cups cake flour
4 tsp baking powder
1 tsp salt
3 sticks butter
2 cups sugar (I used brown)
4 large eggs + 1 large egg white
1 cup milk
1 tsp vanilla extract
1 tsp almond extract
1 1/2 cups mini chocolate chips
1 cup maraschino cherries, stemmed, drained and chopped
For the frosting:
Follow the recipe and instructions here but make half of the quantity stated and tint the frosting a pastel pink a throw in a handful of chocolate sprinkles
Make the cake: Preheat oven to 350F. Prepare 3 8-inch round cake pans.
Sift the flour, baking powder and salt together.
Whisk the eggs, milk and extracts together.
Cream the butter and sugar together until light and fluffy. Pour in 1/3 of the wet ingredients and mix until incorporated. Stir in 1/3 of the dry ingredients and mix to combine. Repeat procedure, alternating between the wet and dry mixture and ending with the dry. Fold in chocolate chips and cherries until evenly distributed.
Divide batter evenly amongst the prepared pans and bake for about 30 to 35 minutes or until an inserted skewer comes out mostly clean. Cool completely before frosting.
Thursday, November 7, 2013
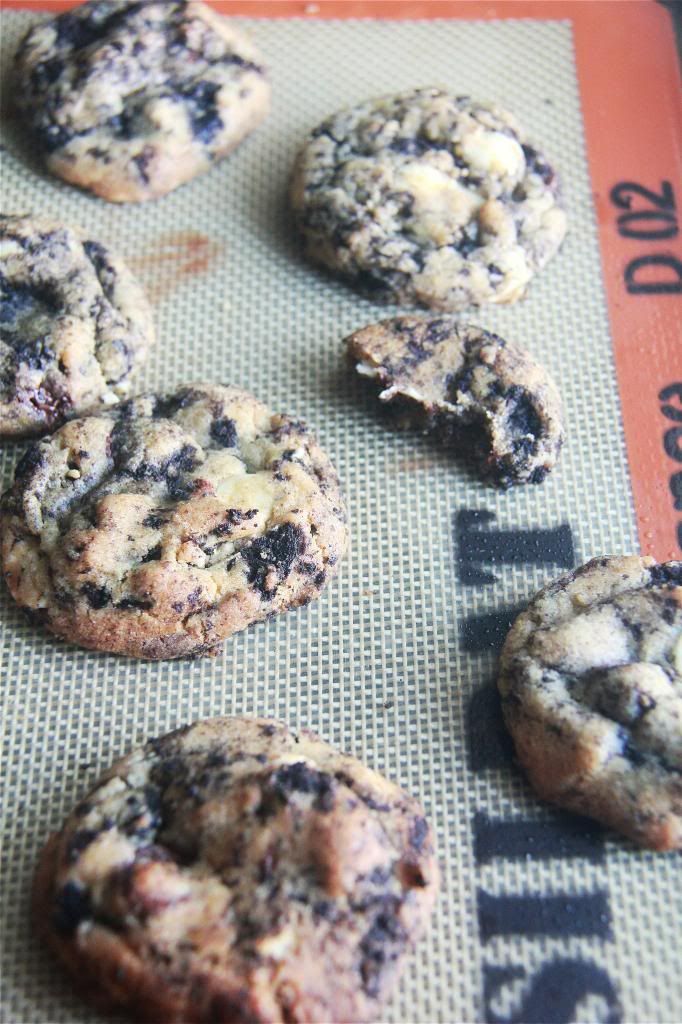
cookies n' cream cookies.
I feels like forever since I last baked cookies. I think I mentioned this before but cookies aren't the first things to come to mind when I want to bake. I guess it's because they are too simple and I like challenging myself when it comes to baking.
I wouldn't have thought to make cookies if not for the half opened packet of oreo cookies sitting on my dining table that looked really sad and in need of rescue. But as usual, I'm glad I chose the cookie path because you know, cookies are just so satisfying in their understated and unassuming way.
So I present to you these cookies n' cream cookies, which can be pretty much summed up as chocolate galore more than anything else. They contain white and milk chocolate chips, and of course oreo cookies that are already super chocolaty, so we're looking at three kinds of chocolate here already! There is minimal cookie dough binding the chunks of chocolate, but however much dough you can taste, it's brown-sugarishly fabulous.
Have those napkins on hand. You wouldn't want to be walking around with black lipstick when you finally surface from a pile of these.
P.S. I'm on instagram too!
Cookies N' Cream Cookies
adapted from here
Note: I chilled the dough before baking.
1/2 cup salted butter
3/4 cup brown sugar
1 tbsp vanilla (I just used 1 tsp)
1 egg
1 1/4 cup flour
1/2 tsp baking soda
1/2 tsp salt
6 oreo cookies, roughly crushed
1/2 cup white chocolate chips
1/2 cup chocolate chips
Preheat oven to 350F. Prepare baking sheets.
Cream the butter and brown sugar together until light and fluffy. Add the vanilla and egg and mix to combine.
Whisk the flour, baking soda and salt together.
Stir the flour mixture into the creamed mixture until just incorporated. Stir in the cookies and both types of chocolate chips until evenly distributed.
Form walnut-sized balls and space them out evenly on the baking sheets. Bake for about 8 minutes or until the edges look done.
Wednesday, November 6, 2013
egg toast cups.
I don't usually cook. Or maybe more accurately, I can't cook. I always tell people that I'm so inept at cooking that whenever I try I either burn the food, burn the pan or burn myself. I'm not exaggerating.
I think it's also not cooking per se - I'm just not enamoured with the idea of making savory food. Sugar all the way please! The only times I would deign to make something outside of desserts is when the recipe in question is quite interesting and fun to create. Like these toast cups.
The fact that they're so simple to make is another huge draw. Just butter the bread, snip it up into four triangles, arrange or more realistically, smush, the bread into buttered ramekins, put a bit of cheese on top, crack an egg, put more cheese, sprinkle with salt and pepper, and bake. It's so easily done that I feel almost foolish for typing out a recipe for these but here you go!
P.S. I have instagram so go check it out!
Egg Toast Cups
makes 2 servings
2 slices of bread, buttered
2 eggs
cheese, as much as needed
salt and pepper
Preheat oven to 350F. Butter two 6-ounce ramekins.
Cut the buttered slices of bread into 4 triangles each. Smush 4 triangles into each ramekin such that there are no gaps at the bottom. Place some cheese on top of the breads slices. Crack an egg into each ramekin. Top with more cheese. Sprinkle with salt and pepper.
Bake for about 15 minutes or until eggs are just set.
Saturday, November 2, 2013
blueberry honey tea macarons.
Yes! Passable macarons even after not practicing for eons! These were made using the french meringue method while I usually use the italian meringue one. I think the french meringue method is more forgiving but they don't have the crisp shell you get using the italian meringue method. These were also chewier than your italian meringue macarons.
I originally intended these to be lavender blueberry honey tea macarons but my dried lavender buds were unusable. Well, even without the lavender these were still fabulous! For a jam which ingredients that I sorta threw together on a whim I have to say that it was quite a success. There was just the right amount of tea flavour and floral sweetness from the honey that gelled very nicely with the blueberries. I was considering if I should make the jam smooth like a puree but I think the slight chunkiness was pretty nice too.
There's really something about the pairing of berries with almond. I often get swayed by the promises of salted caramel macarons, ispahan macarons, dark chocolate macarons and the like but I have to say that the refreshing fruitiness of berries and the rich nuttiness of almonds work best together.
I should have sifted my ground almonds better. The surfaces of the macarons were noticeably rough and bumpy. Oh well. I still think these were a job well done!
I miss baking so so much. I'm going to go on a baking spree once my final exam of the year is over. Can't wait!
Blueberry Honey Tea Macarons
For the shell recipe, refer to here
For the blueberry honey tea jam (enough to fill 15 macarons):
1/2 cup dried blueberries
1 heaped tsp tea leaves
1/4 cup water
1 tbsp honey
Combine the blueberries, tea leaves and water in a small saucepan. Bring mixture to a simmer and cook until the blueberries have softened and plumped up. Remove from heat and cool.
Pour mixture into a blender and blend until almost smooth. Add in the 1 tbsp honey and blend to combine. Refrigerate jam until it has thickened up.
Fill macarons with jam. Refrigerate macarons for at least 1 day before consuming.
Subscribe to:
Posts
(
Atom
)