I've Moved!

Tuesday, December 28, 2010

black bottom cupcakes.

I don't know if I can call them cupcakes... they look more like craters to me. Ah well, my bad. Because these aren't cream cheese topped, these are coconut cream cheese topped. Meaning I didn't follow that part of the recipe. When will I ever learn? But that wasn't the downfall of this cupcake. In fact, it was the part I enjoyed more.

You see, there are good cupcakes and then, there are great cupcakes. These are in the range of good cupcakes. A surprising disappointment from America's Test Kitchen.
The chocolate batter baked up light and ethereally moist, and the resulting texture was somewhat like a souffle. You know, like how you spoon a huge chunk into your mouth and it disappeared like a cloud? Actually, I think its more like melting marshmallows.

That's not to say that its a bad thing. It's just not my thing. I was hoping for something dense, dark and deeply chocolaty but this isn't the recipe to go to apparently. The other downside to this recipe- they told you to mix room temperature water into the batter. I think everyone should know that boiling water unlocks the flavour of the cocoa powder, not tepid water. If you don't know that, now you do. So I used boiling water instead, but it still wasn't chocolaty enough.
Okay, now let's switch to the cream cheese. I fashioned my own little topping from just light cream cheese, a quarter that of sugar and sweetened shredded coconut. I think there was no harm in using a reduced fat product. I didn't use an egg so the filling wasn't all flowy like I think the recipe intended. Nevertheless, it bested the chocolate batter, in my opinion.
The cream cheese was only lightly sweetened so there was still a subtle tang. The sweetened coconut lent, duh, sweetness, so you have a careful balance between sweet and tangy.

Black Bottom Cupcakes
recipe from AMERICA'S TEST KITCHEN
Test Kitchen Tip:  Butter is Better

“Black bottom cupcakes are basically miniature cheesecakes (chocolate cake cradling a cheesecake filling) and are usually made with oil, which is great for creating a cake with a rich, fudgy texture but can also cause greasiness.  We used melted butter (and sour cream) instead—our cupcakes turned out rich and moist, but not greasy.  Best of all, they were sturdy enough to support the cheesecake filling.”

Filling
8 ounces cream cheese, softened
1/4 cup (1.75 ounces) sugar
1/8 teaspoon salt
1 large egg white
1 tablespoon sour cream
1/4 cup (1.5 ounces) semisweet mini chocolate chips (Do not substitute regular chocolate chips for the miniature chips here; regular chips are much heavier and will sink to the bottom of the cupcakes.)

Cupcakes
3/4 cup (3.75 ounces) all-purpose flour
2/3 cup (4.66 ounces) sugar
1/4 cup (0.75 ounce) Dutch-processed cocoa powder
1/2 teaspoon baking soda
1/4 teaspoon salt
3/4 cup water, room temperature
6 tablespoons sour cream, room temperature
4 tablespoons (1/2 stick) unsalted butter, melted and cooled
1/2 teaspoon vanilla extract

1.  Adjust an oven rack to the lower-middle position and heat the oven to 400 degrees.  Line a 12-cup muffin tin with cupcake liners.

2.  For the filling: Beat the cream cheese, sugar, and salt together in a medium bowl with an electric mixer on medium speed until smooth, about 30 seconds.  Beat in the egg white and sour cream until combined, about 30 seconds.  Stir in the chocolate chips.

3.  For the cupcakes: Whisk the flour, sugar, cocoa, baking soda, and salt together by hand in a large bowl.  Whisk in the water, sour cream, melted butter, and vanilla until just incorporated.

4.  Using a greased 1/4 cup measure, portion the batter into each muffin cup.  Spoon a rounded tablespoon of the cream cheese mixture onto the center of each cupcake.

5.  Bake the cupcakes until the tops just begin to crack, 18 to 22 minutes, rotating the tin halfway through baking.  Let the cupcakes cool in the tin for 10 minutes, then transfer them to a wire rack to cool completely before serving.


Monday, December 27, 2010

macaron take #4 - coffee caramel macarons.

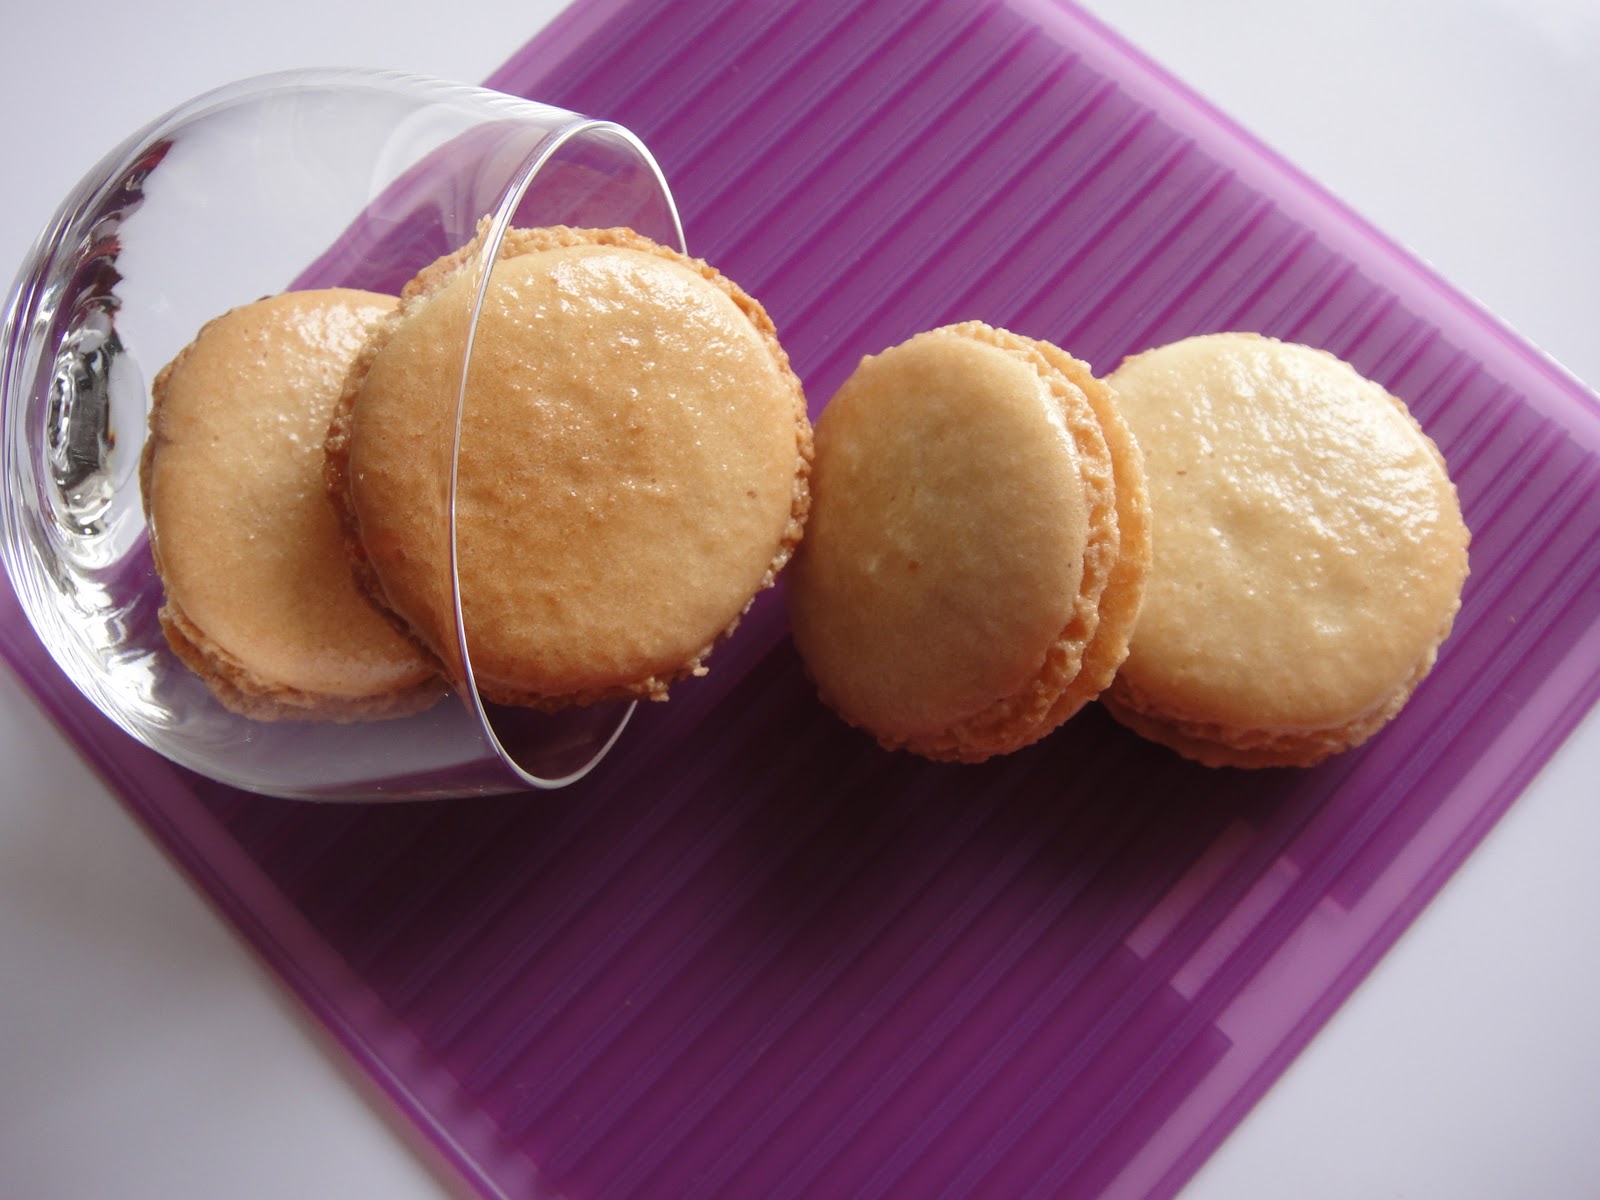
To be honest, this isn't take #4, it's take #5. The actual #4 batch was such a flop, probably as bad as my first batch, that I wanted to bury it within the deep recesses of my mind so I decided not to take any pictures. After trying so many tries, I find that my second batch produced the most desirable results so far. The batter was super sticky and more difficult to squeeze and I need to keep that consistency of the batter in mind the next time I try making macarons. Again.

I was so desperate for my macarons to work this time, I googled almost every page on troubleshooting macarons and I came across this page. She used a different macaron recipe and even suggested not beating the heck out of the macaron batter. I followed her instructions obediently and while my macarons didn't show any frilly feet this time, it was definitely under-mixed.
The shells were too full of air and fragile. Just a tiny poke and I created a dent! Uh-oh. Not good. I knew something would go wrong when the batter was too easy to pipe. And instead of parchment paper, I used a silicon baking mat despite knowing that it would produce shorter feet. But I think the silicon baking mat prevented my feet from exploding at the sides. Or is it just the batter consistency? Hmm...

On the bright side, no cracks in this batch again! At least not when baking. And I think I've gone overboard with the caramel filling. It's highly fluid so even a half teaspoon can result in a gooey mess spilling out of the macaron. Anyway, since this caramel is quite sweet, you may want to avoid spooning too much of it into the macaron.
I want, no, I need to get this right soon. My mum is already complaining at how much almond meal I've already consumed. Not good for the wallet, as we all know. I'm really near my wit's end. I've read Tartelette's, Syrup and Tang's, Not So Humble Pie's and many other sites on macaron making, not to mention the You Tube videos but I still can't perfect it. WHY?! Argh!

Anyway, if you would like to know the recipe for the coffee caramel filling, click here:)

Sunday, December 26, 2010

coffee caramel sauce.

If I say caramel, what do you think of? Did the word chocolate come to mind? Come on, admit it. I know you did.

And that's what I don't get. Chocolate-caramel. Why not coffee-caramel? I think coffee caramel is a much better combination, albeit a lesser used one. My threshold for sweetness is extremely extremely high but chocolate and caramel is testing my limits. Not to mention that they are both quite heaty on their own already. The chocolate often overpowers the caramel, and all you're left with is a too-rich chocolate mixture. Now, let's talk coffee caramel. Who loves caramel macchiato? I do! Instead of battling each other, coffee accentuates caramel and vice versa. That's why I made this sauce.

I like to substitute heavy cream for evaporated milk in sauces whenever I can. And since I succeeded with the swap in my awesome salted caramel sauce, I used it in this sauce too. The setback in using evaporated milk is that it doesn't thicken as much as with heavy cream. Desperate, I tried to use egg whites. (Think creme anglaise!) I wasn't quick enough to thoroughly mix in the egg whites, and I ended up with egg-white-drop caramel soup. Bleh. But the sauce did thicken slightly with the help of some of the egg whites that managed to be incorporated.

In the end, I strained out the scrambled whites and poured in about 2 tablespoons of heavy cream. And like magic, it started to thicken beautifully! Ah well, at least I succeeded halfway.

Note: I didn't follow the recipe's instructions to cook the caramel until it's a deep golden because I wanted the sauce to remain more fluid. I stopped at 238F, that's why my caramel couldn't thicken enough without heavy cream. I believe that if you do cook it as instructed, you wouldn't need the heavy cream.

Coffee Caramel Sauce
recipe from GroupRecipes

Ingredients

    1/2 cup granulated sugar
      3 tablespoons water
        Freshly squeezed lemon juice, two or three drops
          1/2 cup fresh whipping cream *I subbed in evaporated milk
            1/4 cup coffee, brewed double strength
            1/4 teaspoon freshly ground coffee
              2 teaspoons pure vanilla extract
                1 teaspoon sweet butter unsalted
                  Pinch of salt
                  • Directions
                  • Place the sugar, water, and lemon juice in a small saucepan and stir over medium heat until the sugar dissolves.
                  • Increase the heat to medium high until mixture comes to a boil.
                  • If sugar crystals remain, use a wet pastry brush to help them dissolve.
                  • Continue to boil the liquid until it turns a deep caramel color, but do not stir and do not allow to burn.
                  • This should take about five or six minutes.
                  • Remove from heat and stir in the coffee, cream, and coffee granules until all are dissolved.
                  • Because the caramelized sugar is very hot, stir carefully to avoid bubbles.
                  • Return the pan to medium heat and continue to stir the mixture until thoroughly mixed.
                  • Turn up the heat and boil until the mixture thickens, about five more minutes.
                  • Add the vanilla, butter and salt.
                  • Stir once more and pour into a warmed pitcher or gravy bowl, and serve.

                  • Hey, here's an idea: why not put it in your morning coffee? 

                  Saturday, December 25, 2010

                  just a trifle.

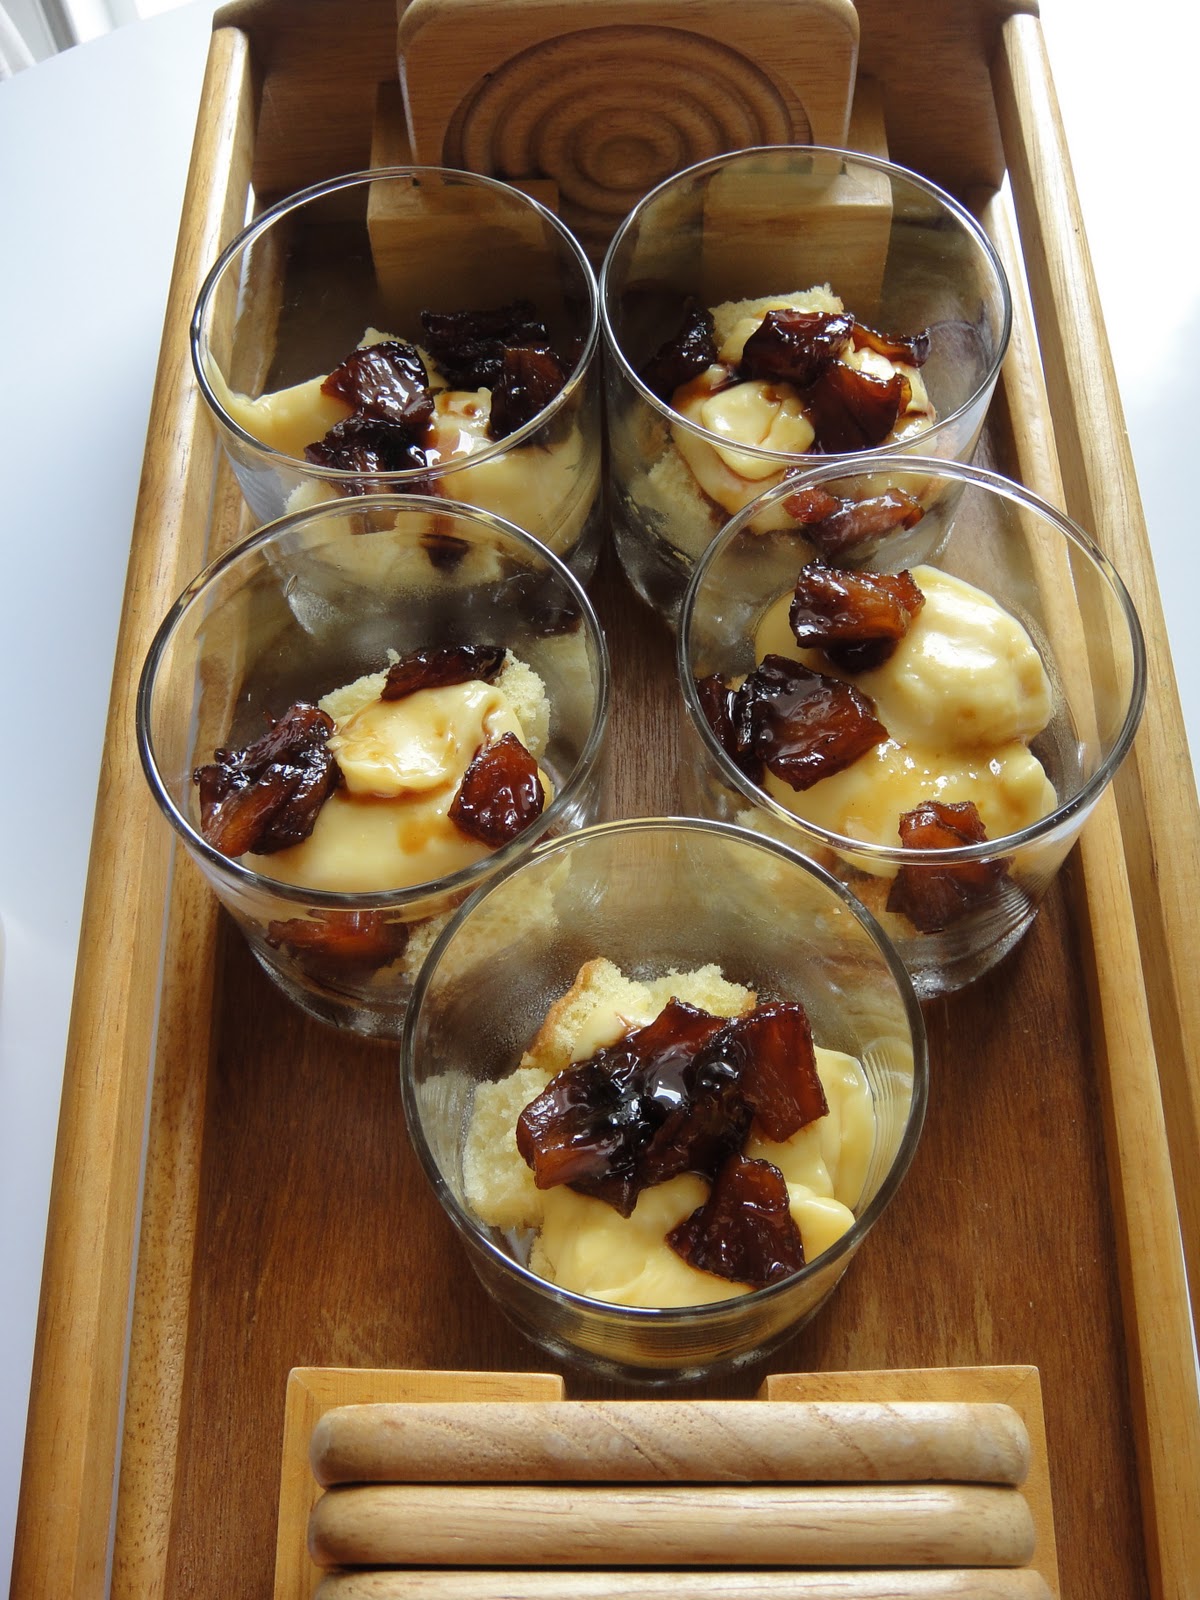
                  Merry Christmas! And Christmas means finger-lickin' dinners with food as far as your eye can see and most importantly, dessert! At my house, we have rather limited space, so desserts that can be eaten without having to sit at the dinner table would be more convenient when guests come around. A trifle in individual glasses sounded perfect to me, and that's how this trifle was born.

                  Let me take you through the makings. First, we have a genoise brushed with syrup and then cubed.
                  Pastry cream.
                  Palm sugar roasted pineapple. I took this recipe from one of the library books I borrowed. It's really simple, actually. Cube the pineapple, throw palm sugar in the saucepan and cook it together on high heat with the pineapple until it's liquified. Then lower down the heat and simmer until all the mixture is dry. Drops of vanilla go in and you're pretty much done.
                  Repeat with more cake and pastry cream.
                  Chantilly cream and salt and pepper cashew nuts dragees!
                  The dragees are caramelized cashews along with, you guessed it, salt and pepper as well as sesame oil. See how this trifle is taking on an asian twist?

                  I have to say I'm getting this caramel thing down. Not too long ago, I would have skipped a recipe just because it requires a caramel something. But seriously, how difficult is throwing sugar and water in a pan and staring at a candy thermometer until it reaches the required temperature?
                  The pastry cream was kind of a solid lump because it was refrigerated so it set. I think a creme anglaise would be better since it isn't so thick. That way, it can remain beautifully flowy. And the cashew nuts were oh my god, so good! They were, of course, crunchy. But not just that. After the crunch, it somehow dissolved in a cloud of lightness, carrying with it a bittersweet caramelized flavour. Unfortunately, the salt, pepper and sesame oil didn't come through enough to make for an interesting flavour profile but the nuts were already so droolicious I couldn't be disappointed.

                  I've never assembled a trifle before and I loved it! It's so much fun! Layering all the different components and letting them come together with just a scoop of a spoon, and you can't go wrong with presentation. Besides, anything in a bowl, or in this case, glass, and a spoon spells comfort. And it's a good way to use up leftover cake!

                  Friday, December 24, 2010

                  macarons take #3.

                   Say hi to macarons again!
                  It's frustrating. It really is. Because I actually managed to produce macarons that are 3D the last time, and now, they're back to being 2D- pancake flat. But the upside to this batch is that...
                  No cracks! Yes! *doing the happy dance* I experimented with different baking temperatures this time, which explains why each row looks different from the next. Okay, starting from the right, I preheated the oven to 200C and lowered down the temperature to 180C once the macs were in the oven. The oven door was left opened. The second row I used the fairly common 150C with the door closed. The third, oven was preheated to 180C and then lowered to 160C. Door closed. All batches were baked on the lower rack.

                  I was so excited about this experiment I completely forgot to put another tray above them to protect them from browning. Oopsie...
                  Preheated to 200C then lowered to 180C. Oven door opened.

                  These were the worst. Not only were they the darkest, their "feet" stuck out like a flying frisbee. The bottoms were getting browned before the top was done, so I moved them up to the middle rack halfway.
                  150C
                  I think this is the best temperature for my macarons. They still remained fairly pale, and they were slightly taller than the other two rows. Although it could be because I piped these out first so the batter wasn't as runny yet.
                  Preheated to 180C then baked at 160C
                  These are second best. Yes, they also got quite a bit of a suntan but a macaron from this batch had just that one perfectly formed feet. This one.
                  No sticky-outy business.

                  I had a problem with all of them, however. Even after spending close to 18 minutes in the oven regardless of any baking temperatures, their bottoms still stuck! The middle part, in particular. This problem occurred less in the first batch because of the higher heat though. Most bakers bake theirs for 12 to 15 minutes and this worries me. A lot. I think the consistency of the piped macaron batter should have a role in this. Ah well, more research to do!
                  Second and third batch
                  This recipe is based on Tartelette's. Same as before.
                  I filled them with a quick Rosewater Vanilla Raspberry jam I made out of raspberries, sugar, rosewater and vanilla.
                  Fourth try coming up and Merry Christmas!